Designing the HF-01 "Pioneer" Overland Trailer
The build saga of the Pioneer began in late 2008 as our plans for our first extended backcountry adventure in Utah's San Rafael Swell took shape. The impetus for the trailer was the fact that since we drove Jeep Wranglers (me a YJ and Tom a TJ), cargo space for trips longer than an overnight was pretty much non-existant. Our plan for the San Rafael adventure was 10 days total with 6 days in the backcountry desert. We didn't anticipate more than 3 days without a resupply in a nearby town. We had split some of the necessary gear between us, but space was still at a premium for our trip. Another vehicle wasn't an option, so building an experimental off road capable trailer became the focus. I wasn't looking forward to sleeping in the dirt and eating MREs for a week. I did that enough in the Army. I wanted a little comfort, at least. There was a lot of research the went into the design, and I had to get creative, because I didn't have thousands of dollars in cash to buy a proper off road trailer outright. Especially since I wasn't even certain the concept was a good fit for me and my style of travel. I did, however, have the capability to do a lot of fabrication, some time, and a lot of spare Jeep parts lying around. A month of evenings on the internet researching and many conversations with my friend, Derek from Midwest Off Road and Trailers, I had a plan.
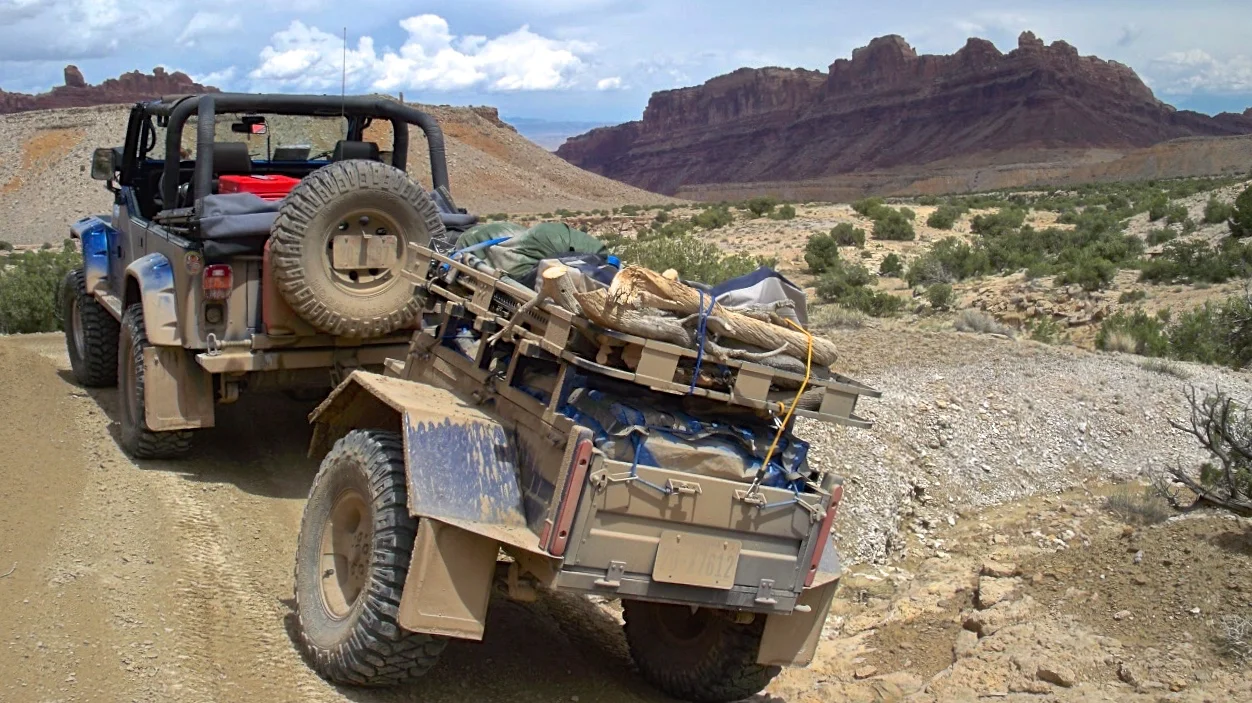
On Fix-it Pass, San Rafael Swell, Utah 2009
The trailer was going to be small and open topped. The intent was to keep it simple, compact, and light weight as possible. It was to be a proof of concept experiment in using a trailer in technical terrain. The trailer needed to be able to traverse the same terrain as my Jeep with lockers, 33's, and a 4.5" lift. This meant keeping it following in the same turning radius, similar track width, similar ground clearance, and with a similar roll center as the YJ. I fit it into my budget by building it over the course of a couple months and accumulating some pricier components long before the build started. Well, the experiment was a complete success, and I often commented after the trip how my experiment went "horribly right". I couldn't have pulled it off so well without the research and advice from friends. Here's what you need to know from my experience (and the advice better men than me!) if you are going to build an overland trailer that you actually expect to perform on highway, off road, and long term:
- Match the pivot wheelbase, track width, ground clearance, roll center, and suspension type to the tow vehicle as close as possible. (if you don't know what any of these things are, you probably shouldn't be building your own trailer without some education first) Some of these things are common sense, but adhering to these basic design principles will ensure operational success in whatever off road trailer you are designing. If you don't match the pivot wheelbase to your tow rig wheelbase, the trailer won't follow the vehicle tracks on the trail. This will result in either the trailer cutting corners, being impossible to back up, and prone to getting damaged. I needed and wanted to use identical tire/wheel combo on the trailer as the Jeep had to facilitate spares and minimize the chance for tire damage and maintain ground clearance. Calculate your trailer roll center to be at least as low as your tow vehicle- preferably lower. A master trailer builder told me once to "Never put a suspension on your trailer that you wouldn't put on the tow rig". What he meant was suspension type. Many utility trailers (particularly cheap ones) use cheap suspensions or even no suspension. Another thing to consider is jack-knife. On the trail, it will occasionally be necessary to "jack knife" the trailer during obstacle maneuvers. Making sure the trailer body is clear of the tow rig body during a jack knife situation by measuring the tongue to body length and keeping it clear of the truck and within wheelbase dimensions. This will prevent unnecessary damage to either the trailer or tow rig when maneuvering or during a rollover situation. All this will ensure the trailer will handle similarly to the tow rig both on the trail and on the interstate.
- Use quality materials, assemble it properly, and finish it with good coatings. I had to be a little creative here since I wanted to stay under $2000 for this particular build, but also wanted it match the Jeep and "look nice". I hate the whole "hack-fab, rattle-can" look with a passion. I wanted it to last a while for testing, and it would be finished properly if I got asked "where did you buy that"? Some things I could safely do on the cheap, like reusing factory Jeep wheels and some partially used tires that came off the Jeep, and repurposing some minor parts and a roof rack. I did not skimp on the axle, suspension, and structure. If you are going to take your trailer off road, you need to assume it will tip or roll at some point. This was a major reason for the structural improvements on the trailer chassis and body.
- Don't snub DOT regulations and include all the proper safety and control equipment to be prepared for emergencies; because.....well, it's the right thing to do. If you neglect licensing and registration, brakes, safety chains, proper cargo tie-downs, reflectors, lights, and decent tires, you are basically telling everyone on the road with you that you could care less about them and their families' lives. If your thought process is: "can I get away with not doing that?" or "Do I really HAVE to do that?"; you probably shouldn't be pulling a trailer on public roadways. Sorry if that offends you, but I also pull trailers commercially, so I am extra sensitive about people trying to get away with substandard builds and foolhardy operation.
- Invest in a multi-axis hitch for the trailer. This proved to be a huge positive for the whole design. I was originally going to use a pintle due to my experience in the military with them, but once a friend alerted me to the "Lock 'N' Roll" hitch, I was excited to try it, and have never gone back to anything but a multi-axis hitch on my overland trailers. A good suspension can't be ignored, but a hitch such as this one can save your bacon off road. It will allow either the trailer or the vehicle to tip or roll over without effecting the other. There really isn't another option that is as good off and on road. Using a standard ball hitch is a really bad idea for an off road trailer since it won't articulate enough for trail use and will ultimately fail catastrophically and leave the trailer stranded if not damage your vehicle in the process. A trailer rollover has happened to me, and I can't say enough how happy I was to listen to others advice when designing and building this trailer.
Building the Pioneer
The discontinued Harbor Frieght #2948 trailer kit
By this point, which was about February 2009, I had a pretty good idea about how I was going to go about building the trailer project. Since I didn't want to reinvent the wheel, and this was after all, an experiment- I found a base trailer that was easy to procure and met the criteria. I decided to use the Harbor Freight 1000 lbs. capacity kit trailer #2948. It was cheap to begin with, but my local store had it on sale for almost half off, so it was too good to pass up. This little guy is no longer sold by Harbor Freight. This wasn't my ideal, but the price was right. I wouldn't be using the suspension or wheels, and most of the other small bits. This tiny little box trailer is far too light duty for overland use as is, so I had a little more work ahead on the frame, setting the tongue length, and the suspension than originally planned.
Chassis and Body
The bare chassis finished
Body on frame and ready for paint
After taking the kit home and inspecting the components more closely, I realized that the little sheet metal body and Chinese sheet metal frame were far from sufficient to hold up to the use I was planning. My budget was going to have to include some more steel. Also, the kit contained a "plywood" floor that was just slightly thicker than veneer. Not only would it fail with cargo on rough trails, I was convinced the first rain to hit it would delaminate the whole trailer. So, I got to work. First off, I purchased some 3/4" marine grade plywood which was then soaked in spar urethane after the appropriate mounting holes were drilled. Next, I reinforced the frame everywhere I thought necessary to include new suspension mounts and the main tongue bar going into the frame. Even this later proved to not be enough (more on that later). The tongue was terminated into a 2" Class III receiver for using a Lock'N'Roll articulating hitch. The next task was framing up the sheet metal body. The body on the 2948 trailer kit was at least galvanized, and boxed on the ends. However, I planned to mount a roof rack on the top that would hinge to one side on a frame. These hinges were some weld-on grease-able bullet hinges. (I also used these hinges for the drop-down tailgate since all my reinforcements precluded the use of the kit hinges). There could be a couple hundred pounds of cargo on that rack, so it needed to be strong enough to take all the weight to frame without stressing the box panels. This was accomplished with about $200 of 1 1/4" square tube along with some stout angle iron I had around the shop. When building your own trailer, and if you plan to have a rack or tent, etc. mounted on the top, don't just build for the static weight of the cargo- consider the dynamic loads put on the trailer when you are driving down rough roads and bouncing down 4x4 trails. The end result was a heavy duty frame that stood off of the top of the body with mounting points for the repurposed roof rack. This frame encased the sheet metal body panels and distributed the roof rack load directly and evenly to the chassis below.
The Suspension
As mentioned above, I was counseled that you should only put a suspension on your overland trailer that you would run on the tow rig. In this case, my YJ Wrangler is leaf sprung, so it would be easy. I didn't think the time and money of designing a better coil or independent trailing arm suspension was worth it in this case, so I utilized a pair of new OME (Old Man Emu #OMECS039R) Samurai rear springs and bushings I had on hand. The chassis wasn't long enough to effective use some old stock YJ springs, so the Samurai units were a perfect fit. These are definitely high quality leaf packs and had just about the correct spring rate for the GVW of the trailer when in use. Of course, new suspension mounts needed to be measured, fabricated, and welded to the chassis. As with all things, measure multiple times, then cut (and weld!). I have a lot of used YJ parts lying around, so I repurposed two sets of YJ spring shackles to hang the Samurai springs with. With the springs in place, it was time for mounting the axle. I opted for a new axle from Redneck Trailers. This was special ordered in the width I needed and 5x4.5 bolt pattern hubs and pre-installed spring perches per my measurements from Midwest Off Road and Trailer (now Grotrian Enterprises). After finishing the suspension, I mounted up some partially used 33" Mickey Thompson MTZs onto a pair of Jeep TJ "Canyon" wheels I had in storage. NOTE: the "Canyon" factory alloys had to be machined out in the center cap area to clear the bearing housing on the trailer brake hub. At this time, I now had my fender dimensions. These were cut, and bent on a large sheet metal brake for me by Derek at Grotrian Enterprises. The fender assemblies were welded directly the external body frame and reinforced so they could be stood upon. An addition after the San Rafael adventure was shocks. The spring rate was right on, and articulated beautifully, but it did have a tendency to bob and weave at slow speeds over trail obstacles.
Paint, Reassembly, and Finish
Once all the hard chassis and body work had been done, the old aluminum Surco roof rack I had on hand was modified to fit the trailer. The rack had come off of an old Jeep XJ Cherokee that had passed through my hands. It was perfect since it was very light weight and modular. This allowed me to partially disassemble it, resize it, and reassemble with ease. Some external tie-down hooks were also fitted to the body. These were removed from an old Mazda B210 pickup bed that was sitting in the pasture. Tie-downs were also fitted to the inside of the bed for further cargo lashing. Mounting holes for all the lighting were also mocked up at this time. Once all of the major assembly and welding was completed, I disassembled the entire trailer and prepped it for paint. The painting was done in my shop and around the shed as necessary. I couldn't resist the temptation to color code it to my Wrangler with PCH blue. After letting it dry a couple days, the final assembly began.
First thing was installing the trailer brake hubs on the axle along with the 33" tire setup. Next came bolting the body and bed plywood onto the chassis and then the external frame. Then, I moved on to reinstalling all of the tie down points, installing the Tuffy box I had sitting around onto the tongue, and bolting up the modified roof rack. Once it was all back together and sitting on its' wheels, I was getting extremely pleased. Then came building the wiring harness and installing all the lights. The YJ needed a brake controller and a 7-way RV style trailer socket, so this was also done at this time. I dropped the extra cash for a Prodigy P3 controller, and I'm glad I did. Plenty of adjustability for the different conditions the trailer is used in. The break-away circuit was mounted on the tongue and the brake backup battery was installed in the Tuffy box. I used all commercial LED trailer lights to minimize power draw and increase long term reliability. I also sprayed the bed interior with Herculiner at this time. Cheap, yes, but a reasonable choice for the experiment. A cargo net was procured from Surplus Center, and modified for the trailer. It was made out of wide seatbelt type webbing. The net was permanent mounted on a bar bolted to the inside front of the bed. Now, I needed to figure out how to mount my new Hi-Lift jack and the Pull-Pal on the roof rack. I ended up fabricating some mounts out of scrap and some old bushings which were then mounted on the hinge side of the roof rack. This provided an excellent counterbalance for the lid when open. Where the lid contacted the body frame, I installed some teflon bumpers to prevent metal-on-metal contact. A pair of used Jeep Hood latches were used to keep the lid down and allow for ease of access to the bed. Finally, a pair of mudflaps were fitted to the trailer.

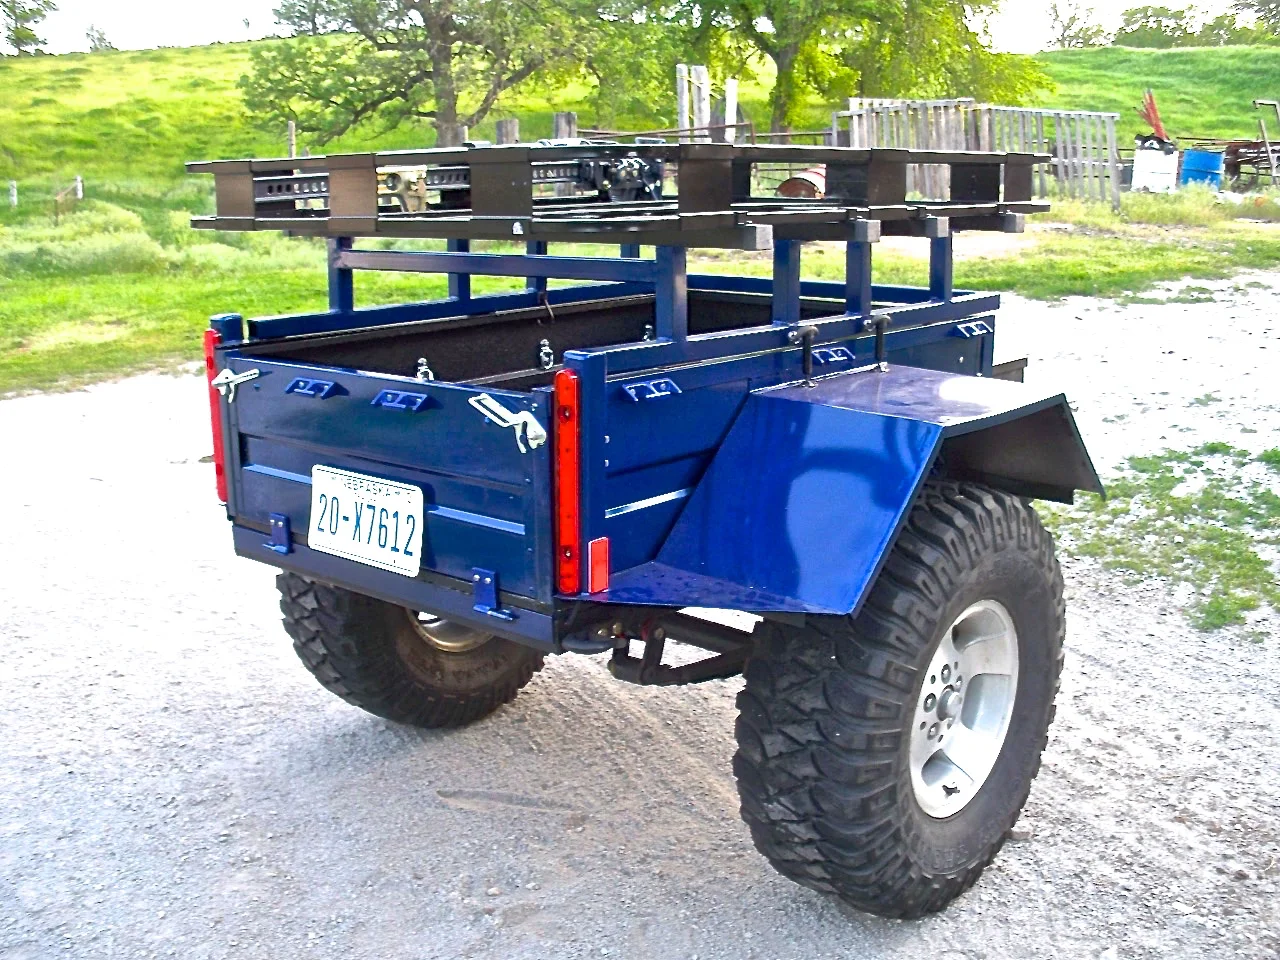
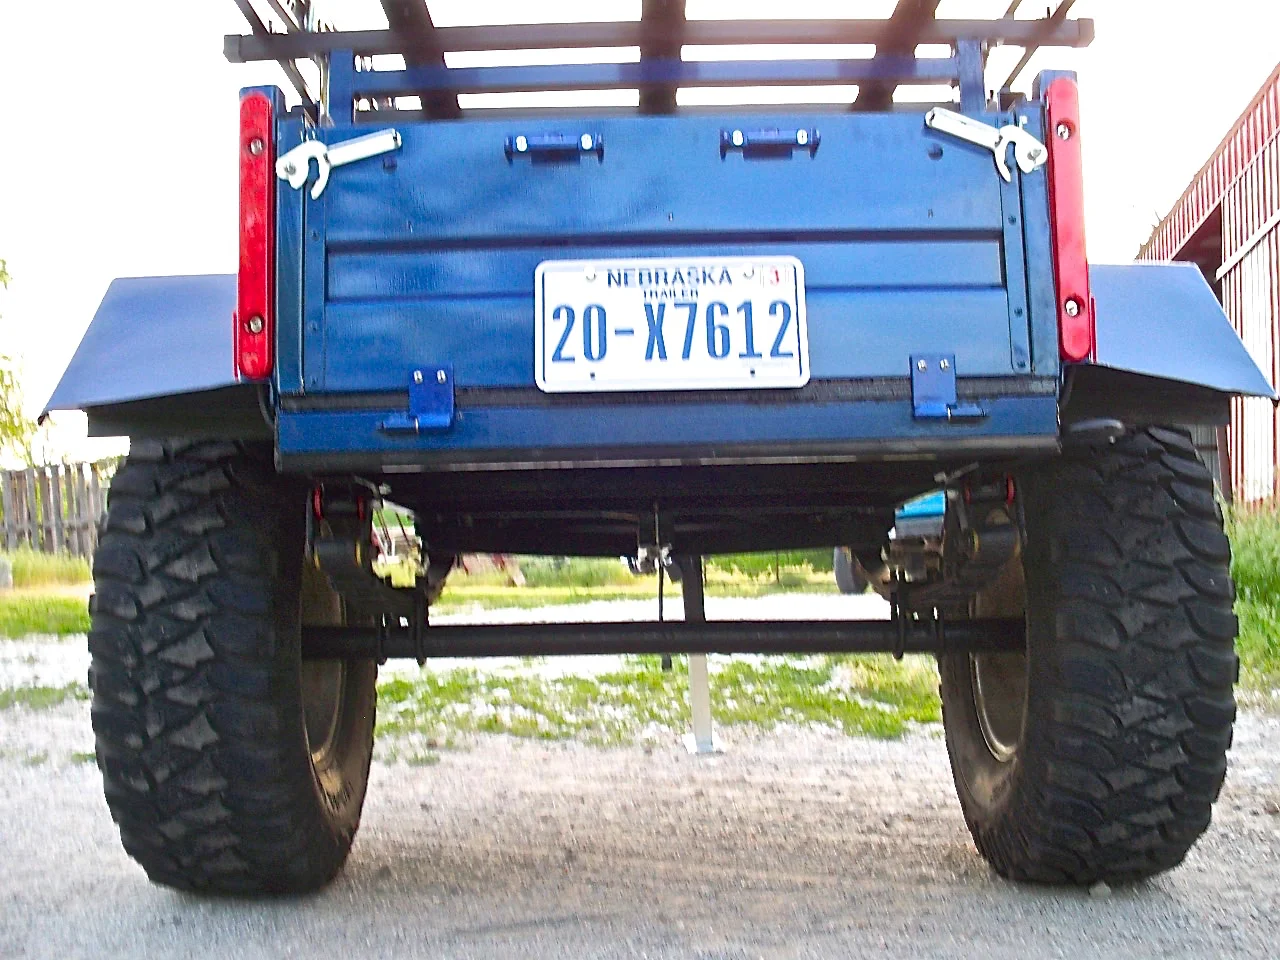
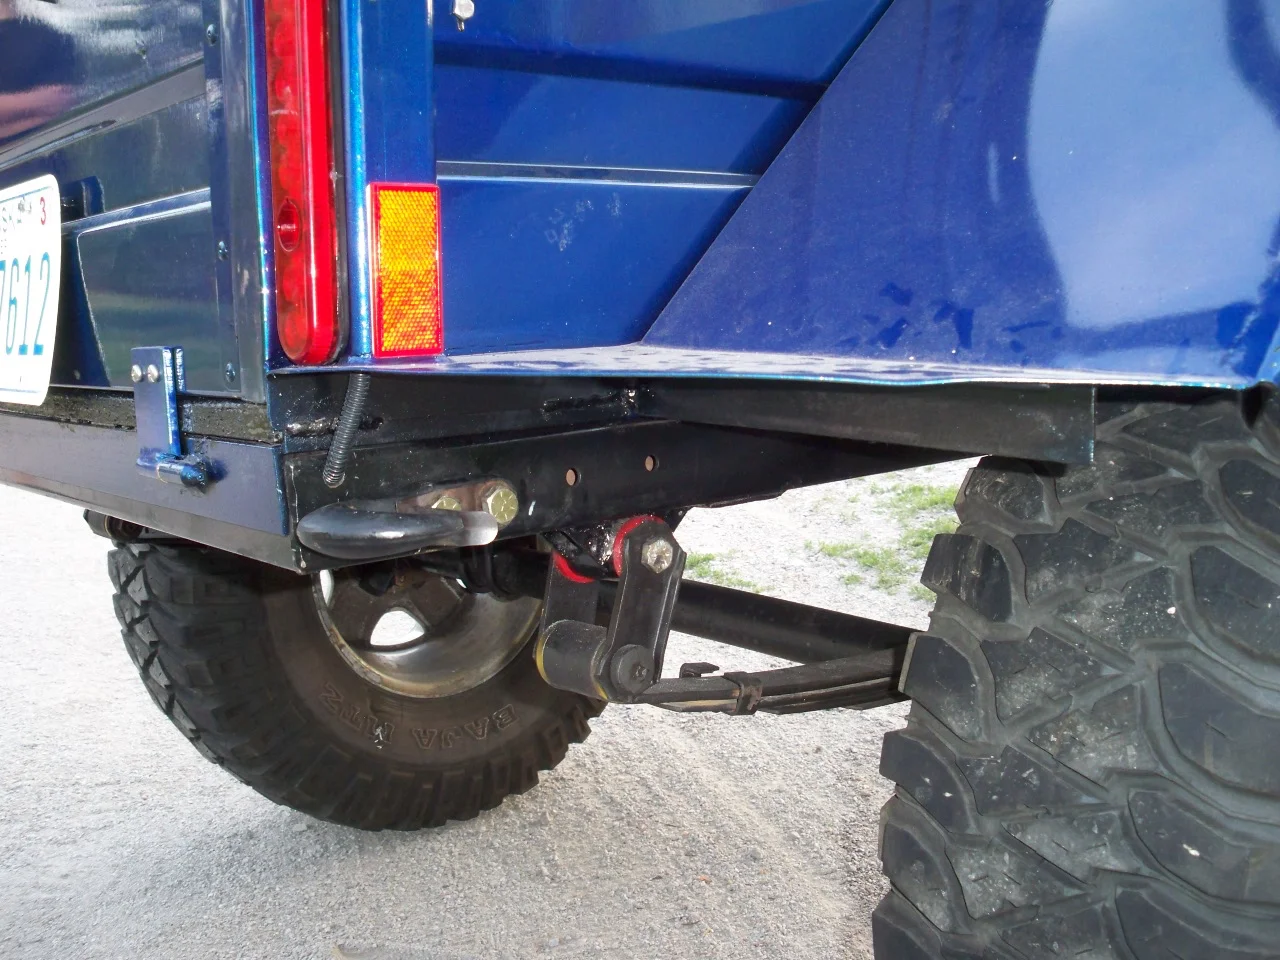


On the Road...and Trail!
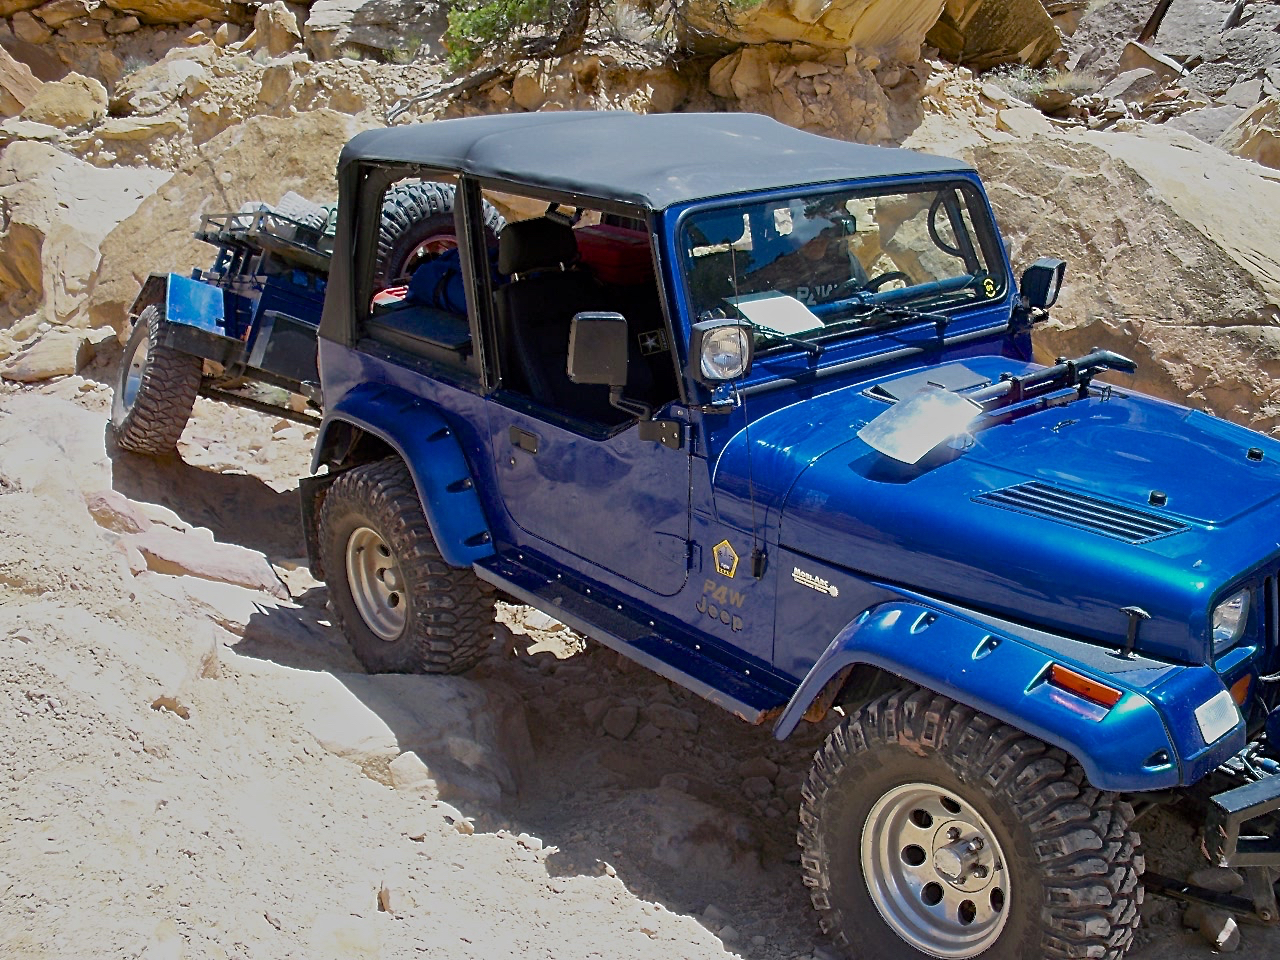
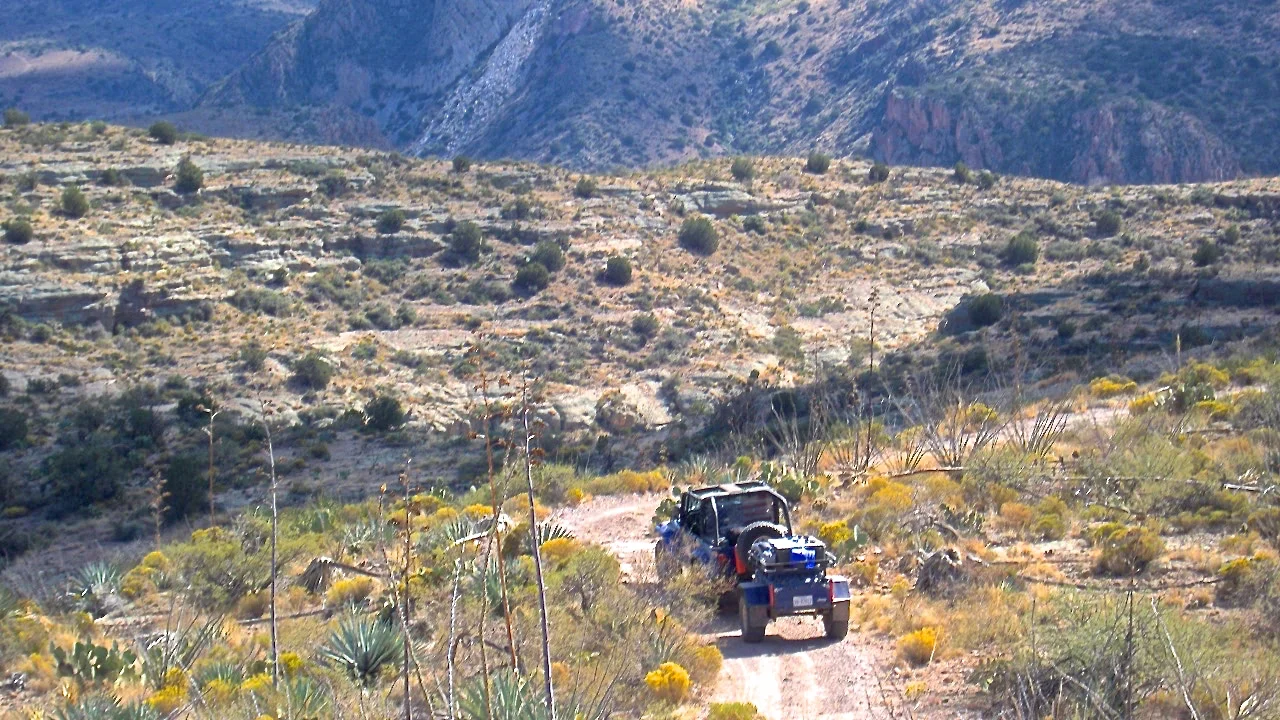
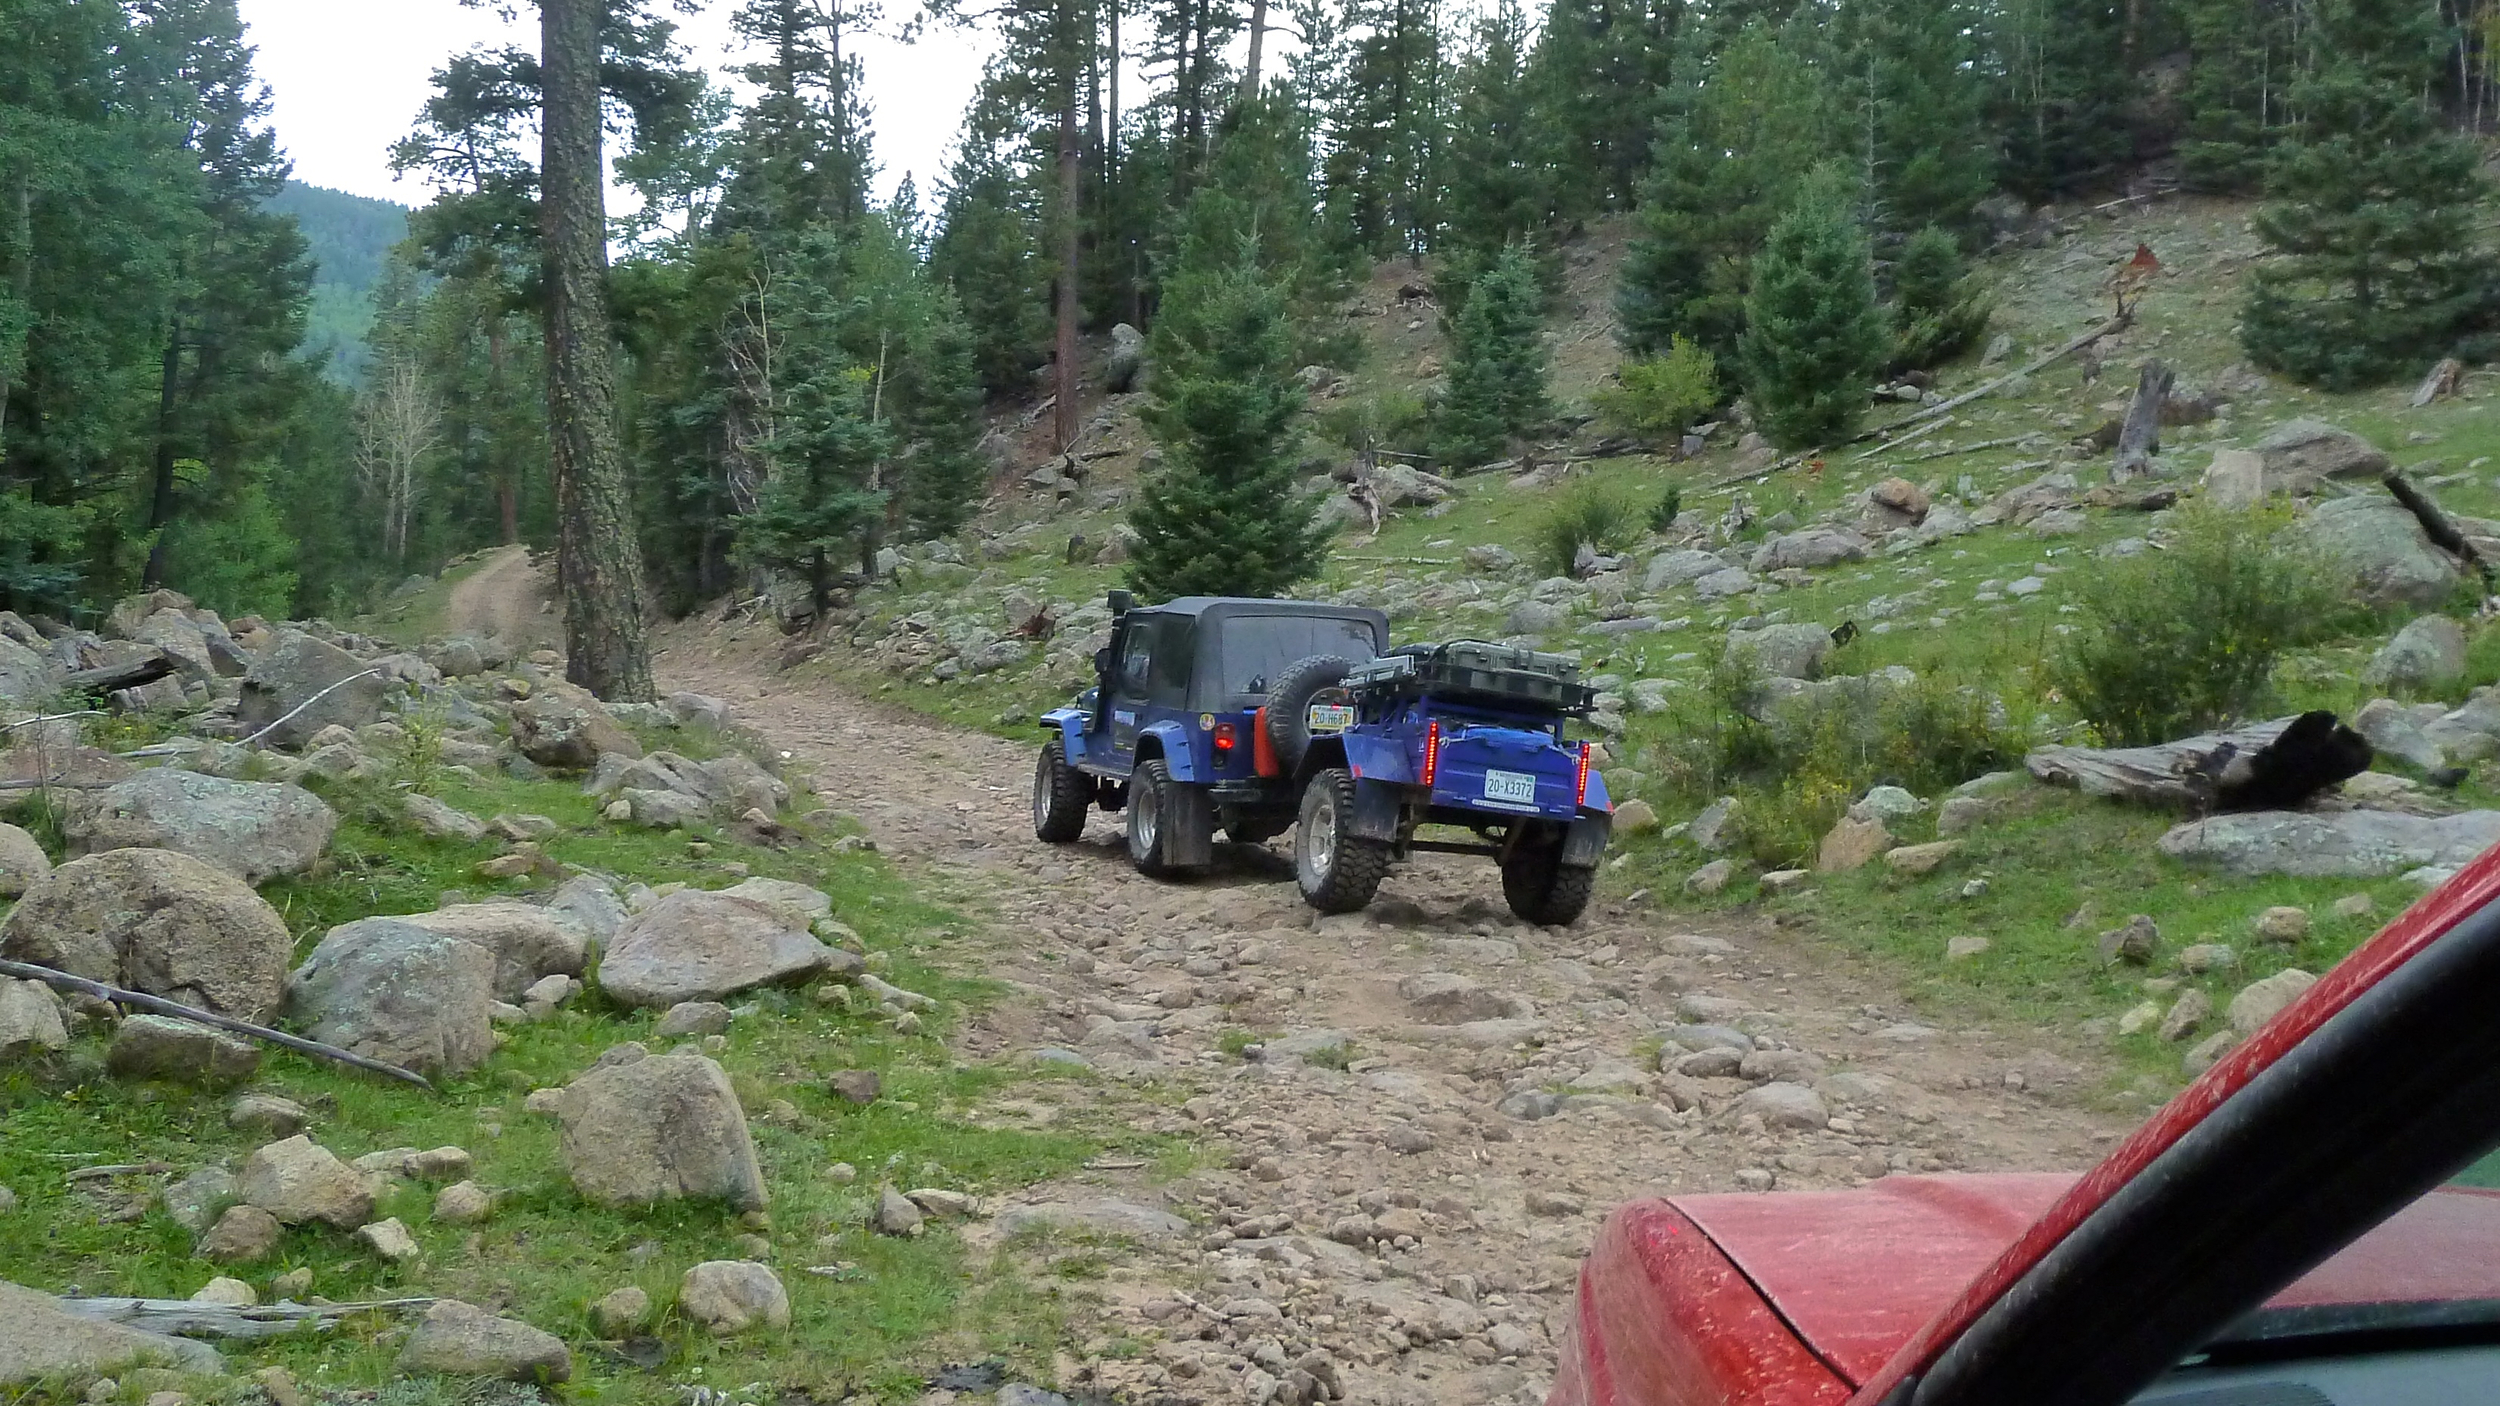
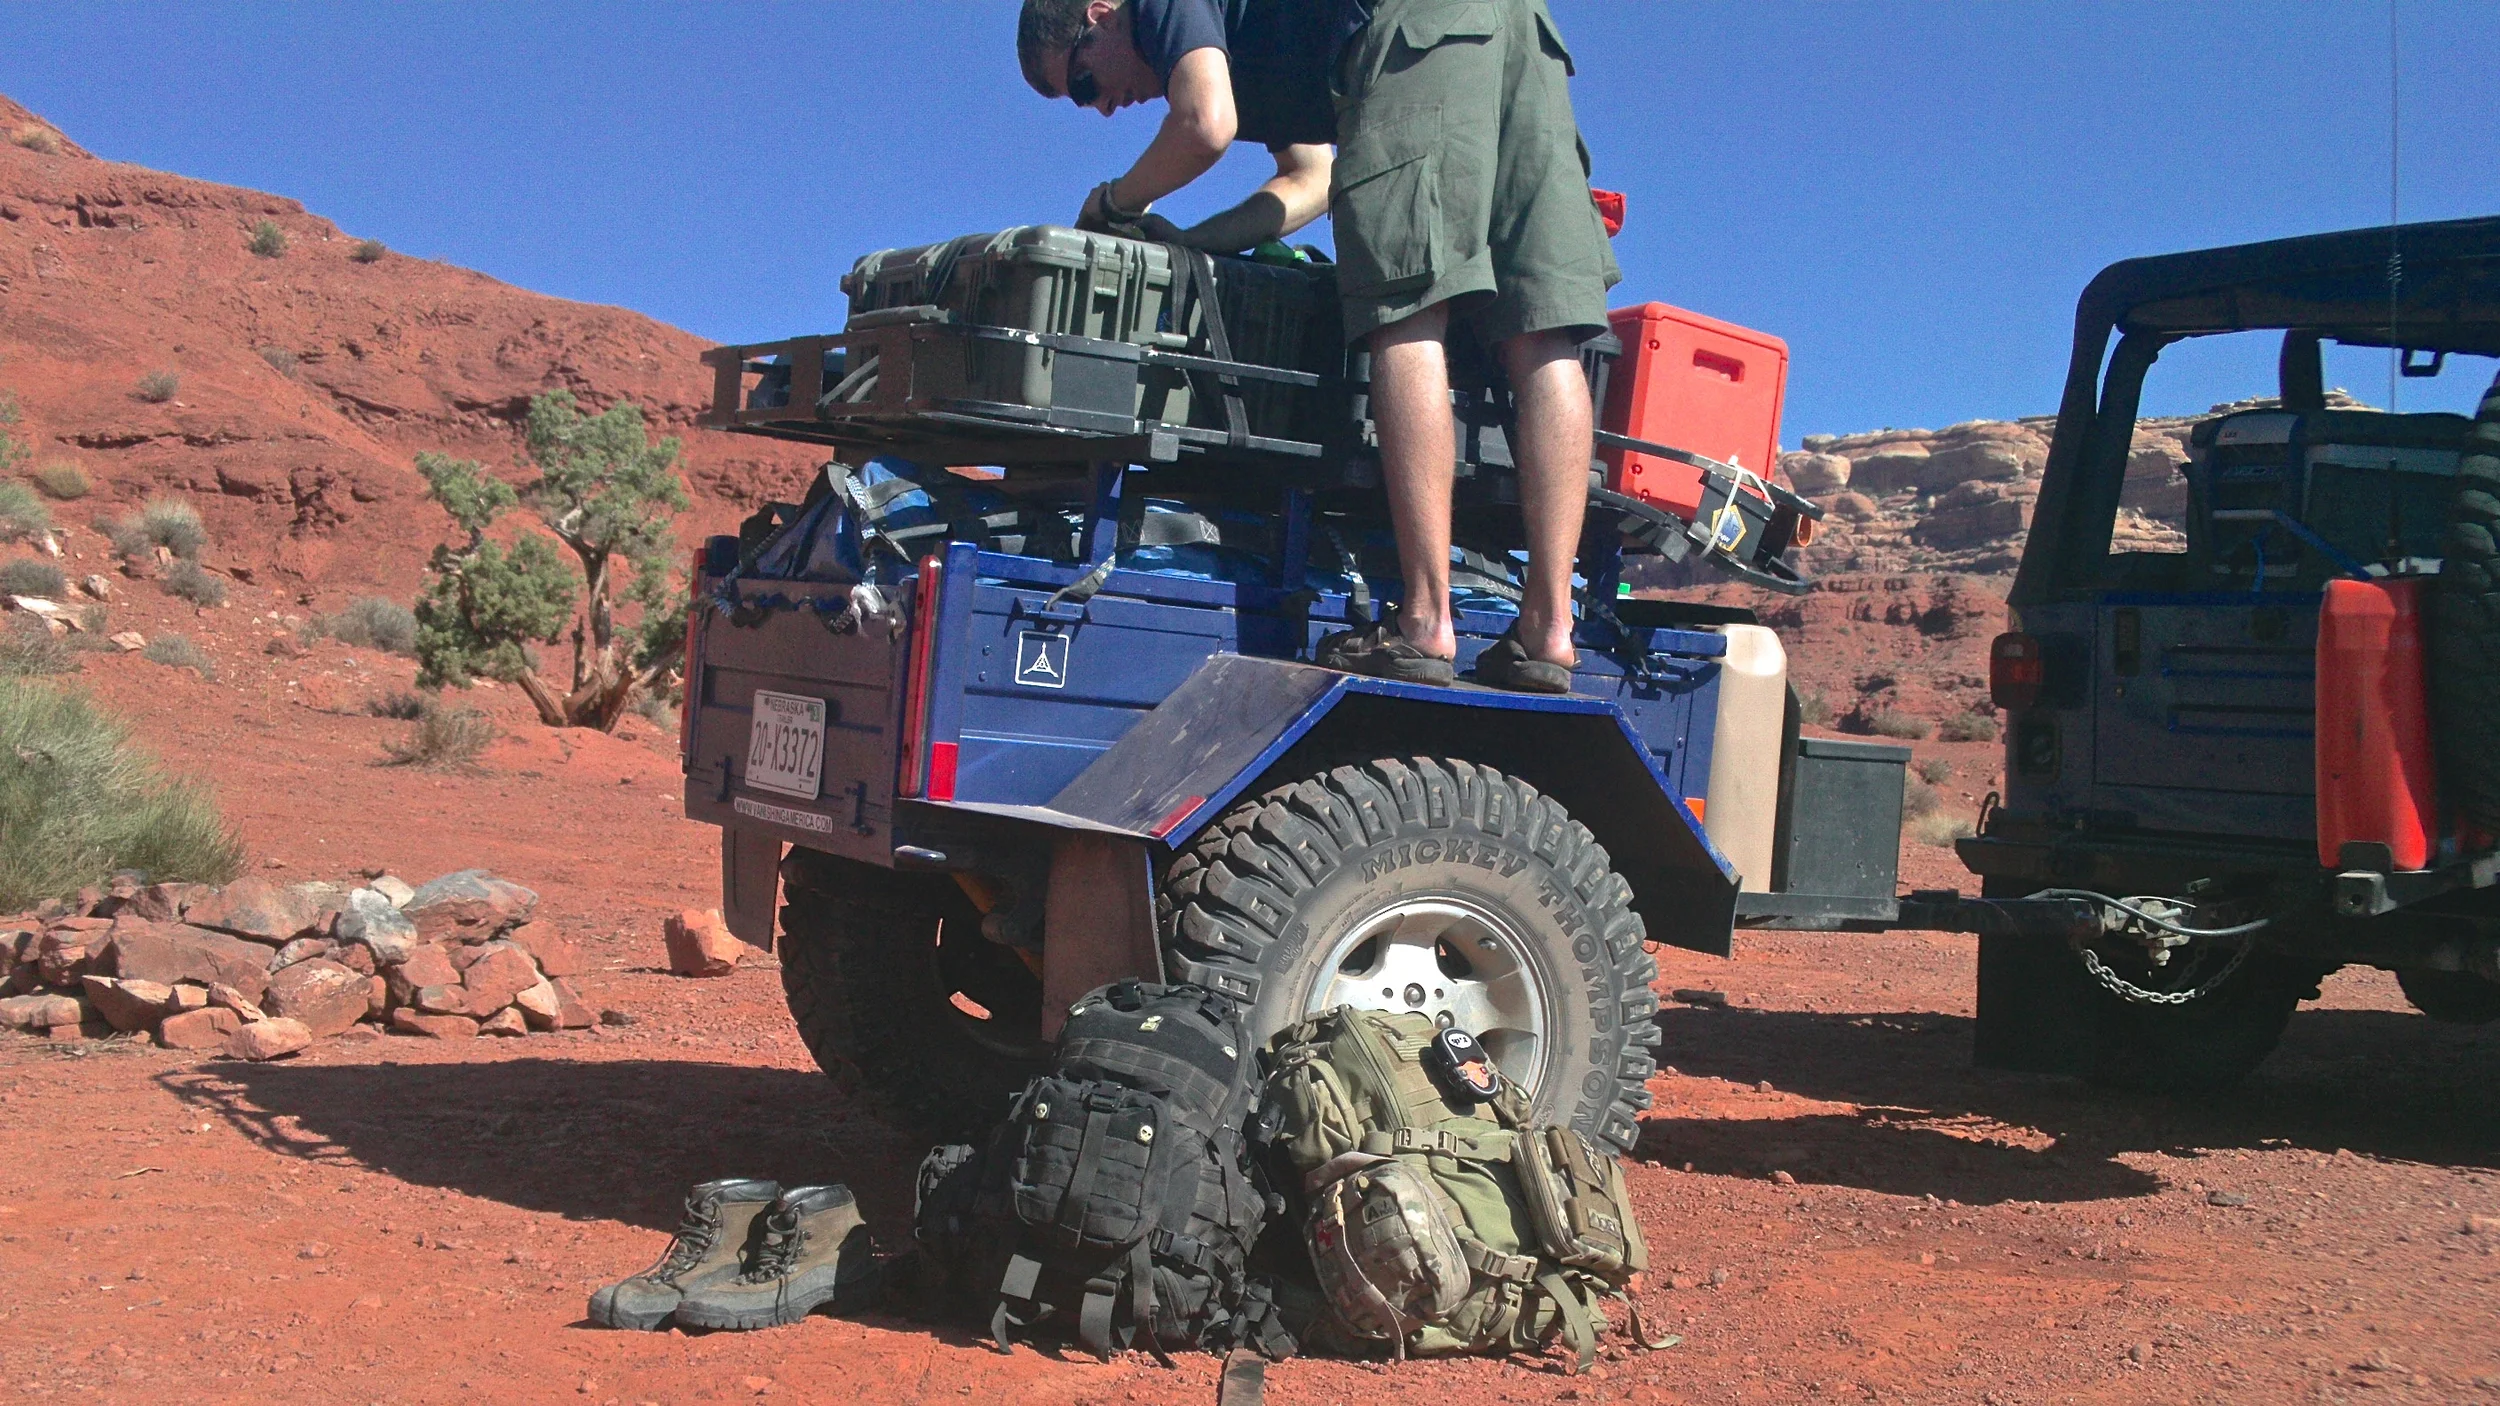
So, how did it all work out? Absolutely amazing! The "Pioneer" trailer exceeded all expectations on it's first adventure. I finished the trailer just in time to pull to Utah on our San Rafael journey. This was two days on interstate both ways with six days on all kinds of off road trails and ranch roads. The trailer tracked perfectly straight at speed on the highway, proved to be stable and tractable on Class 7 trails, followed the Jeep's turning radius in tight maneuvers, and held all the gear we needed it to. Heavier emergency parts like a unit bearing hub, starter, alternator, and axle shaft were carried in the Tuffy box along with our vehicle fluids. This is what makes a trailer so useful is that you can spread your overland load onto another axle. The Lock'N'Roll hitch was everything it was advertised to be. It allowed the trailer to be pulled without incident of some intense obstacles, and was silky smooth and quiet the rest of the time. It was very easy to forget I was pulling an overland trailer at all. The size and weight seemed to be "right" as I didn't encounter any issues when going through moving water crossings that were at least 30" deep. The trailer is obviously not "water tight", so that helps. And...yes, I think it looks cool as well. A good fit for the overlanding YJ. This was the experiment that went horribly right.
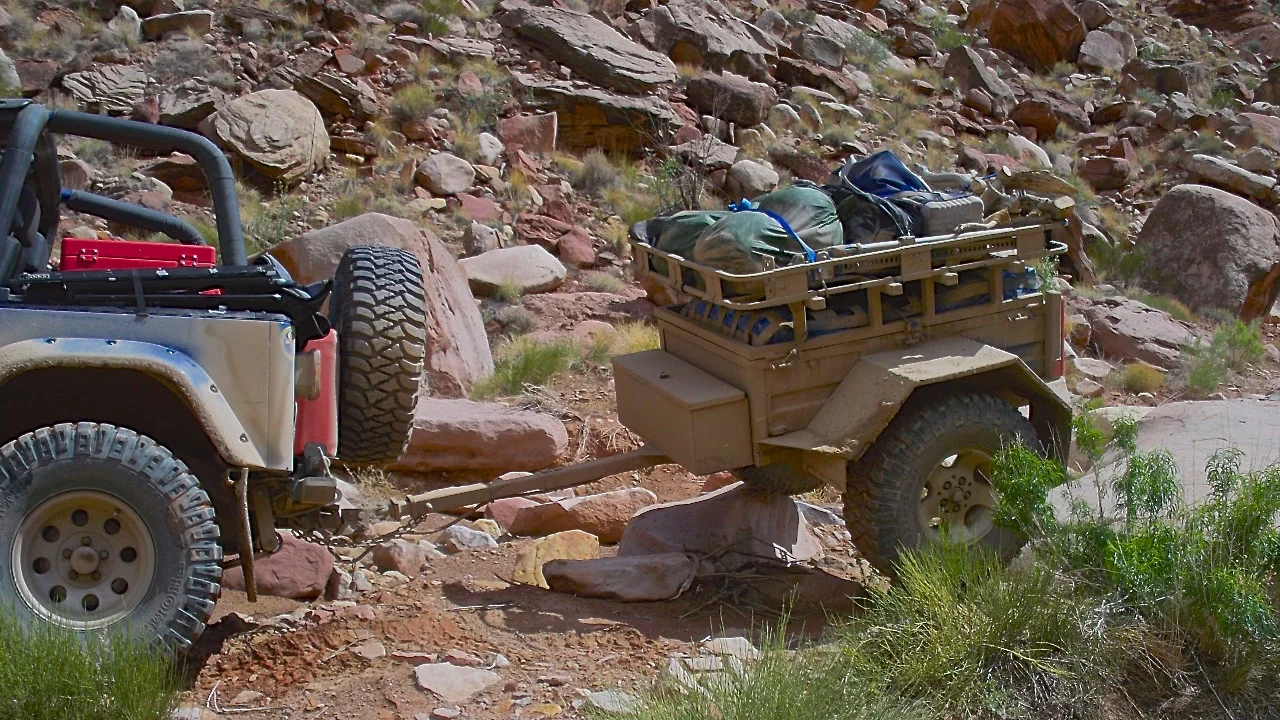






Lessons Learned and Modifications
Jerry can mount with axe mount and saw underneath rack
Since this initial build in early 2009, the Pioneer has received a few additions. As mentioned earlier, shocks were added soon after the first outing in Utah. This made the trailer much more stable when off-roading and extremely stable handling at speed on gravel roads. So much so, it was quite possible to "drift" the Jeep and trailer without much drama on deserted mountain forest roads. (Not that I would suggest or condone such things ;-) The cargo net along with all the tie-down points turned out to be some of the best design additions. In the end, I was actually pretty close to my budget on the initial build. I will caution, however, that if you built something similar, did not have the major components laying around, and had to pay full price for everything, I am estimating it would cost anywhere between $4500-$6000 to duplicate.
While in Utah, we had to replace the main tongue bar that went into the trailer chassis. Thank goodness it was a bolted in component. This allowed us to source some 2" tubing with 1/4" wall to replace it. My copilot had recently seen the documentary on the Baja 1000, "Dust to Glory" and suddenly thought the YJ and trailer were rally ready. The trailer was catching some air off some sandbars, and bent the tongue bar a little. Thanks to a mining supply company and the Mobi-Arc onboard welder, we were back in operation before the day was out. That was the only real repair the trailer has ever had to have. It's worked perfectly ever since, but some additions were made.
Shocks installed
Later in 2009, the shocks were added, and Derek at Grotrian Enterprises also fabricated a dual jerry can mount that sits in front of the bed with the Tuffy box in front. The mount is used to haul 10 gallons of drinking water in two Scepter military style water cans. I had wired in a used under hood light to the marker lamp circuit of the trailer for some cargo lighting. The under hood light had a gravity switch, so would only activate when the rack lid was raised. However, it also had a tendency to come on when the trailer tilted off camber on large obstacles at night. So, this was replaced with a waterproof LED courtesy lamp with a switch. Really, that is the entirety of the fixes and modifications for the trailer. Thinking it through thoroughly before the build helped tremendously.
The KBOXXX
However, what is carried in the trailer has evolved dramatically. Part of the trailer experiment was a field kitchen. The initial one was a "chuck box" that Tom used when his kids were in the Boy Scouts. The concept was definitely sound, so I approached some very talented friends to design and build an overland worthy field kitchen. What Seth and Josie Stauffer delivered was utterly breathtaking and exceeded my expectations. There will be more on the "KBOXXX" in another article. Instead of all the random bags and tarps used to transport gear this first trip, I invested in two Pelican 1650 cases to carry most of the camping gear in, a couple composite military cases, and an ice chest to safely and cleanly transport food and gear over hundreds of dusty miles and thunderstorms. Those cases have been some of the best investments for overland adventures. A dedicated chain saw and plastic transport box have also been part of the trailer's permanent kit, but the very old McCollouch saw bit the dust during the CDR, and I now carry a (mostly) shiny new Husqvarna. The trailer still does carry a bow saw with extra blades and a nice Fiskers combination axe/maul for splitting wood. These trail tools have seen lots of use on our many journeys and I suggest they become a part of your kit if they aren't already!
Rollover on Mosquito Pass
"ROLLOVER! ROLLOVER! ROLLOVER!" That's not something you want to hear over the radios on an expedition. But, I had to on the CDR. My friend, Matt was driving as we came down the west face of Mosquito Pass in Colorado. The trail was steep, off camber, on a switchback and strewn with potholes and large rocks. He brought the YJ down perfectly, but the trailer came off the obstacle just a little fast, so Matt tapped the brakes. At that moment, the left tire of the trailer dropped into a 24 inch hole on the ledge as the Jeep and trailer rounded the switchback. In slow motion...it bounced and slowly tipped over. The trailer rolled onto its top resting next to the Jeep. Since I had taken jack-knife dimensions into account of the tongue length, the trailer cleared the Jeep body. The Max Coupler I was running as a hitch allowed the trailer to roll without damaging the hitch, tongue, or the Jeep frame. It took a little time, but we rolled it back over manually, hitched it back up, and went on our way. The light duty roof rack took some bending, and the blow-molded chainsaw case took a beating, but not scratches on the Pelican cases, and only a little scratched paint on the left fender of the trailer. That's it. None of our cargo was damaged or went flying. Man, I love this trailer.
This trailer got me hooked on overland trailers. I can have the technical terrain capability of my Wrangler and still take sufficient gear along for comfortable overland camping and long distance self supported adventures. Now, my new trailer design, the Lakota, is underway......
2017 Refurbishment
The experienced Pioneer trailer went into some disuse not very long after the CDR expedition. A couple years of sitting outside and some uncompleted modifications took their toll on the chassis. The plywood floor had begun rotting away, surface rust was spreading, and the rack was in need of replacement. Not to mention the fact that there were some additions to the design in need of installing. The YJ tow rig had seen some cosmetic changes as well that needed to be duplicated on the Pioneer. However, the Pioneer first needed a full refurbishment in the way of a frame-off disassembly and repainting. No major changes in this department were planned. It looked pretty good to begin with, the coatings had just taken a beating over the years. The entire trailer was disassembled down to the rolling chassis and a new coat of Chrysler PCH code blue paint was reapplied as well as some needed chassis black.
The plywood floor of the trailer from it's inception was never going to be a permanent solution, but the original budget build didn't allow for much more. Initially considered as part of the design was an ABS plastic floor, and even an aluminum over solid wood decking. Material sourcing for the plastic was an issue at the time, and a wood or metal replacement each presented some undesirable traits. Some HDPE 3/4" thick sheet was finally located for the 2017 refurbishment. HDPE plastic is quite stable, easy to machine, very durable, and available in an attractive textured black. The challenge was finding HDPE (or any plastic sheet) in an appropriate size that was also 3/4" thick. The thickness had to be very close as the trailer body and frame integrated around the flooring. A change in that thickness would result in an untenable amount of fabrication. The HDPE floor ended up costing over $250 once sourced. Expensive, but it will not have to be replaced.... ever.
All the original lighting was reinstalled because it proved to be just about right, and it all still worked perfectly. However, some reverse lighting was installed to make night time parking and trail maneuvers much easier. A water resistant 12 volt power outlet was installed on the front wall of the trailer bed to provide a place for plugging in the ARB fridge. Traditionally, the fridge was carried in the Jeep, but this will allow for some more cargo flexibility. Some more additions to come will likely be some switched rock lights for the trailer, and a rear fog/dust light for convoy safety. A new Surco aluminum rack was sourced to replace the damaged original. Some of the gear mounting brackets were reused, but most have been redone as the loadout of the trailer has been streamlined. Finally, some AEV Pintler wheels with matching Toyo Open Country MT tires were installed. The YJ had experienced an upgrade, but the Pioneer trailer had not. Finally everything matches and looks amazing.


