

Grand Cherokee for Overlanding
Grand Cherokee for Overlanding
The Grand Cherokee for Overland Adventure?
I have always liked Grand Cherokees, even the ZJ when it was released in the nineties. I remember sitting in a red Laredo ZJ in a dealership one afternoon. I was super impressed that Jeep was building a solid axle SUV with coil suspension and a manual transmission with a real transfer case. Heck, it was pretty much a Wrangler with a roof! Well, that was the only manual ZJ I would ever see and probably one of 17 that Jeep ever built. However, the ubiquitous “Grand” has been, and remains a huge success for the Jeep corporation. It has some truck parts underneath to give off road capability yet is also a quiet and comfortable unibody car. To many, it’s the best of both worlds. Jeep isn’t joking when they claim it’s the most rewarded SUV….ever. If you’re going to name something “Grand”, it had better be.
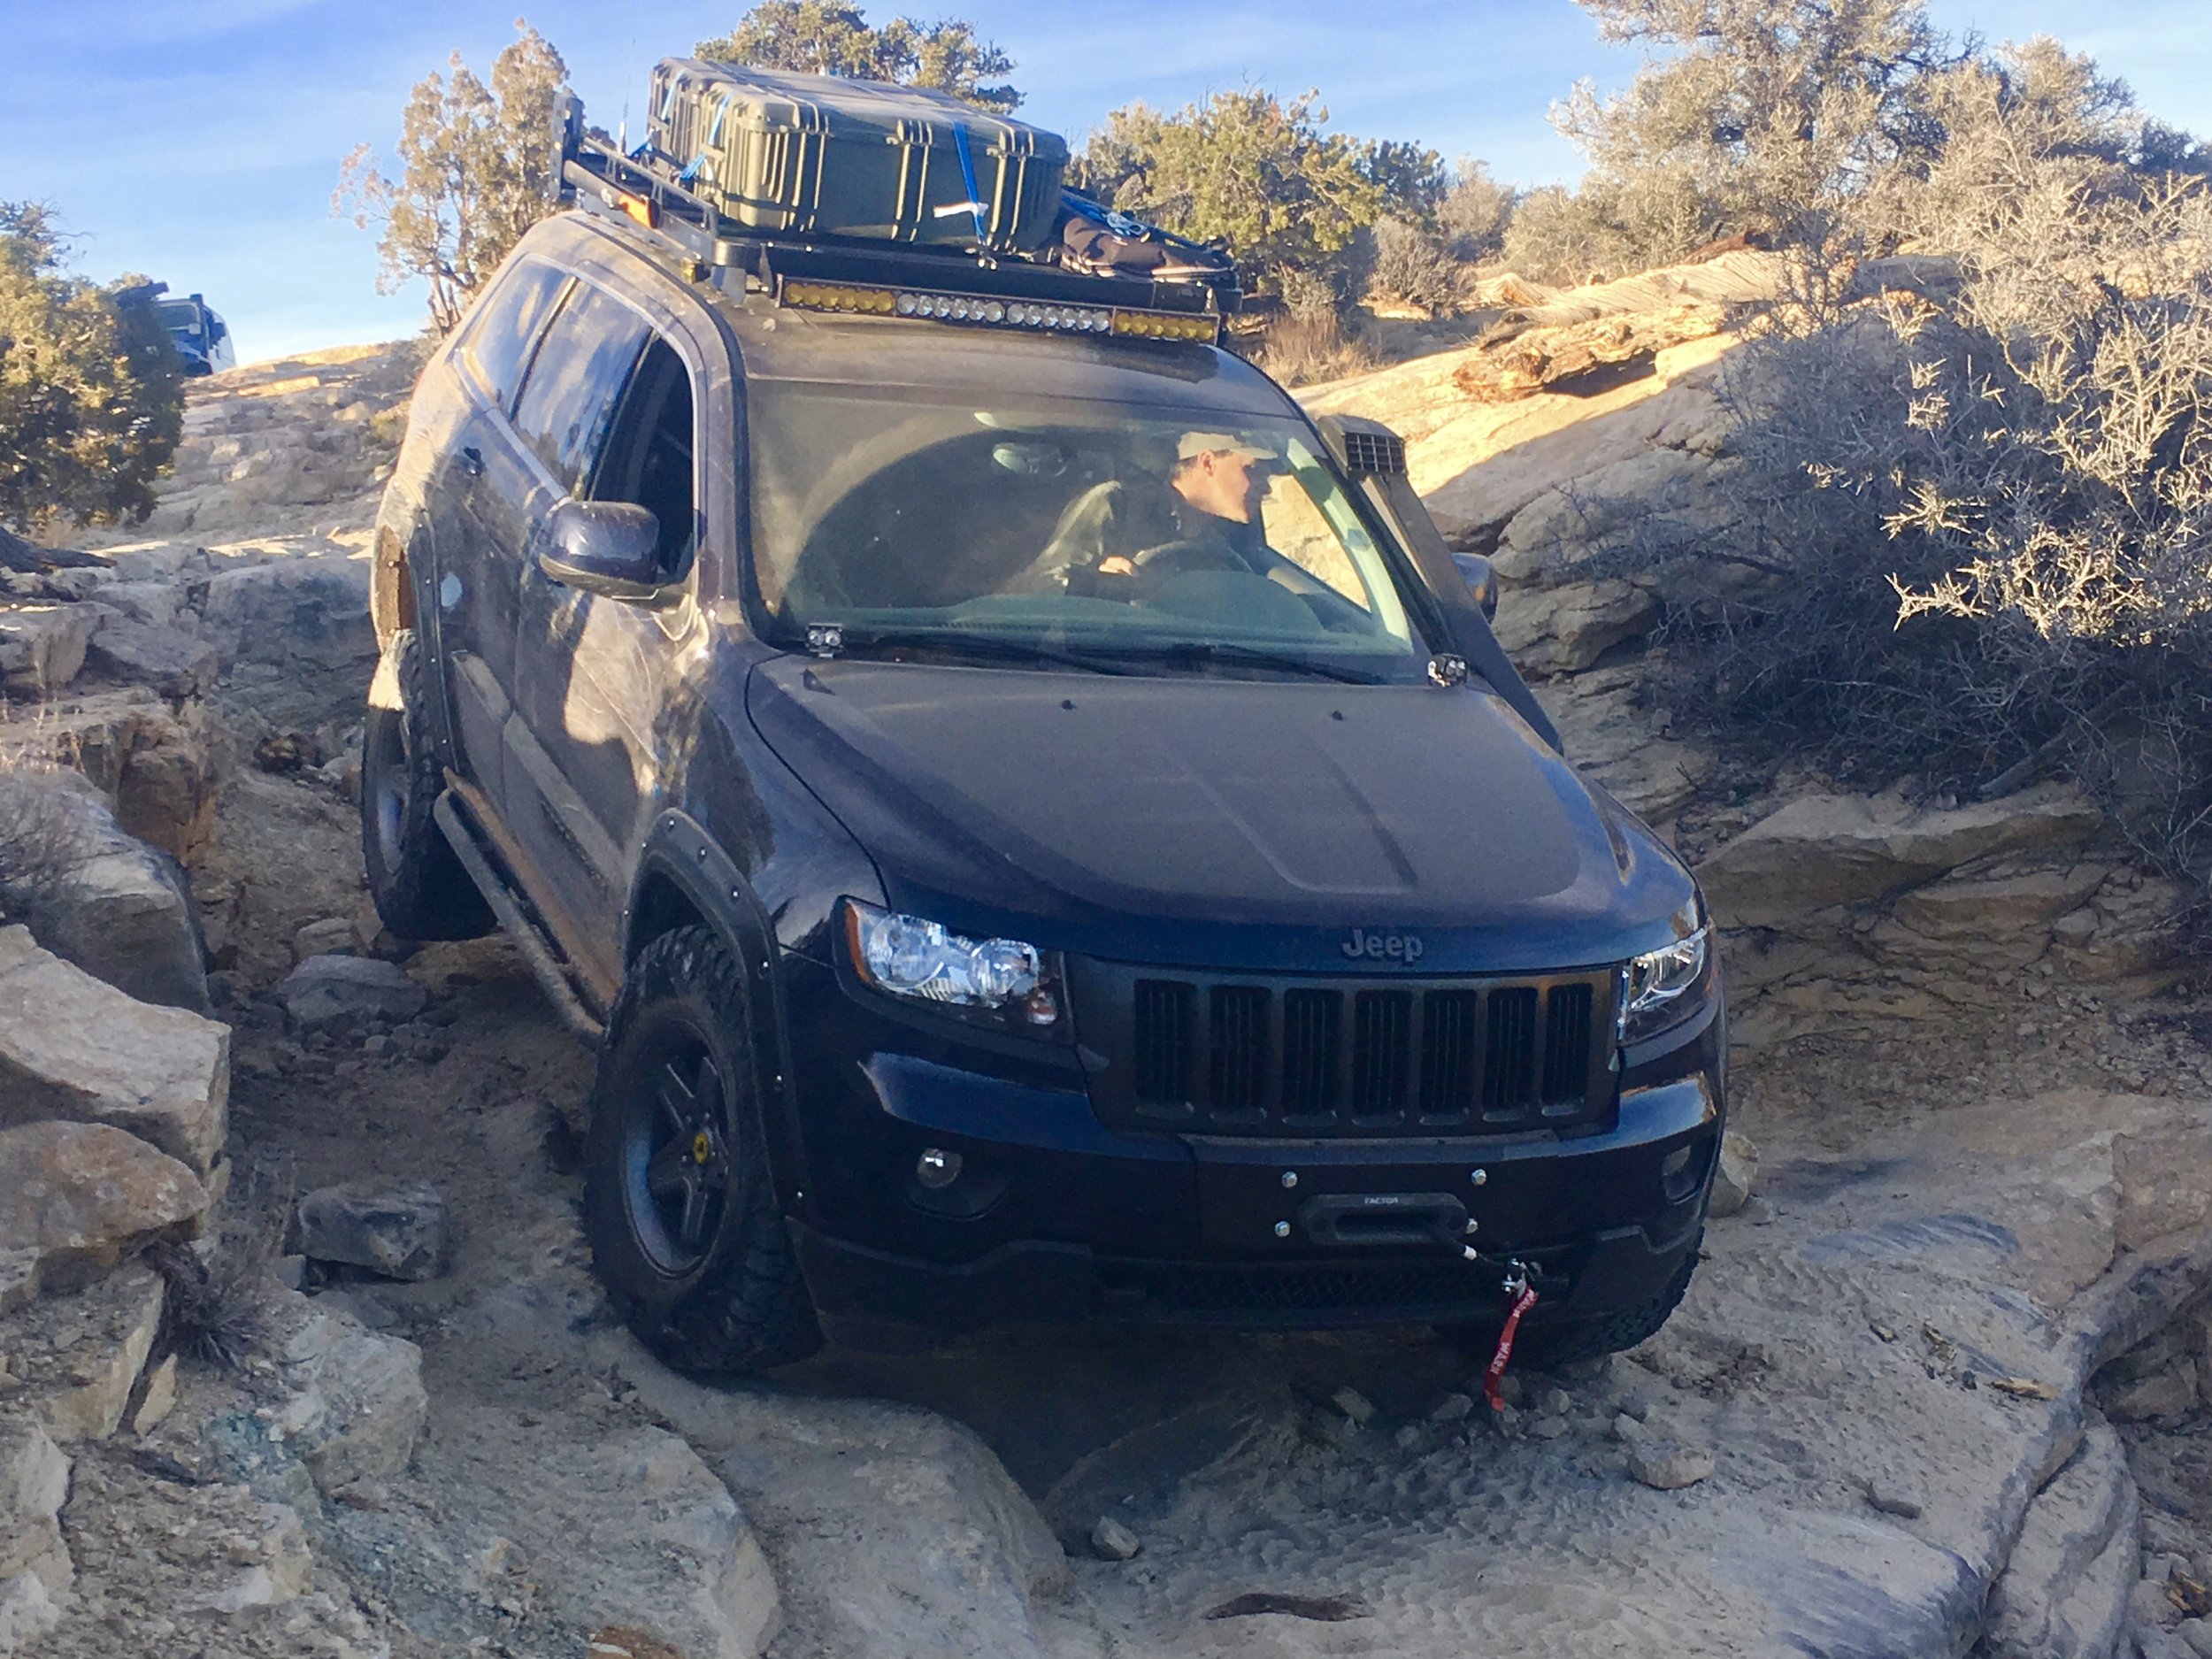
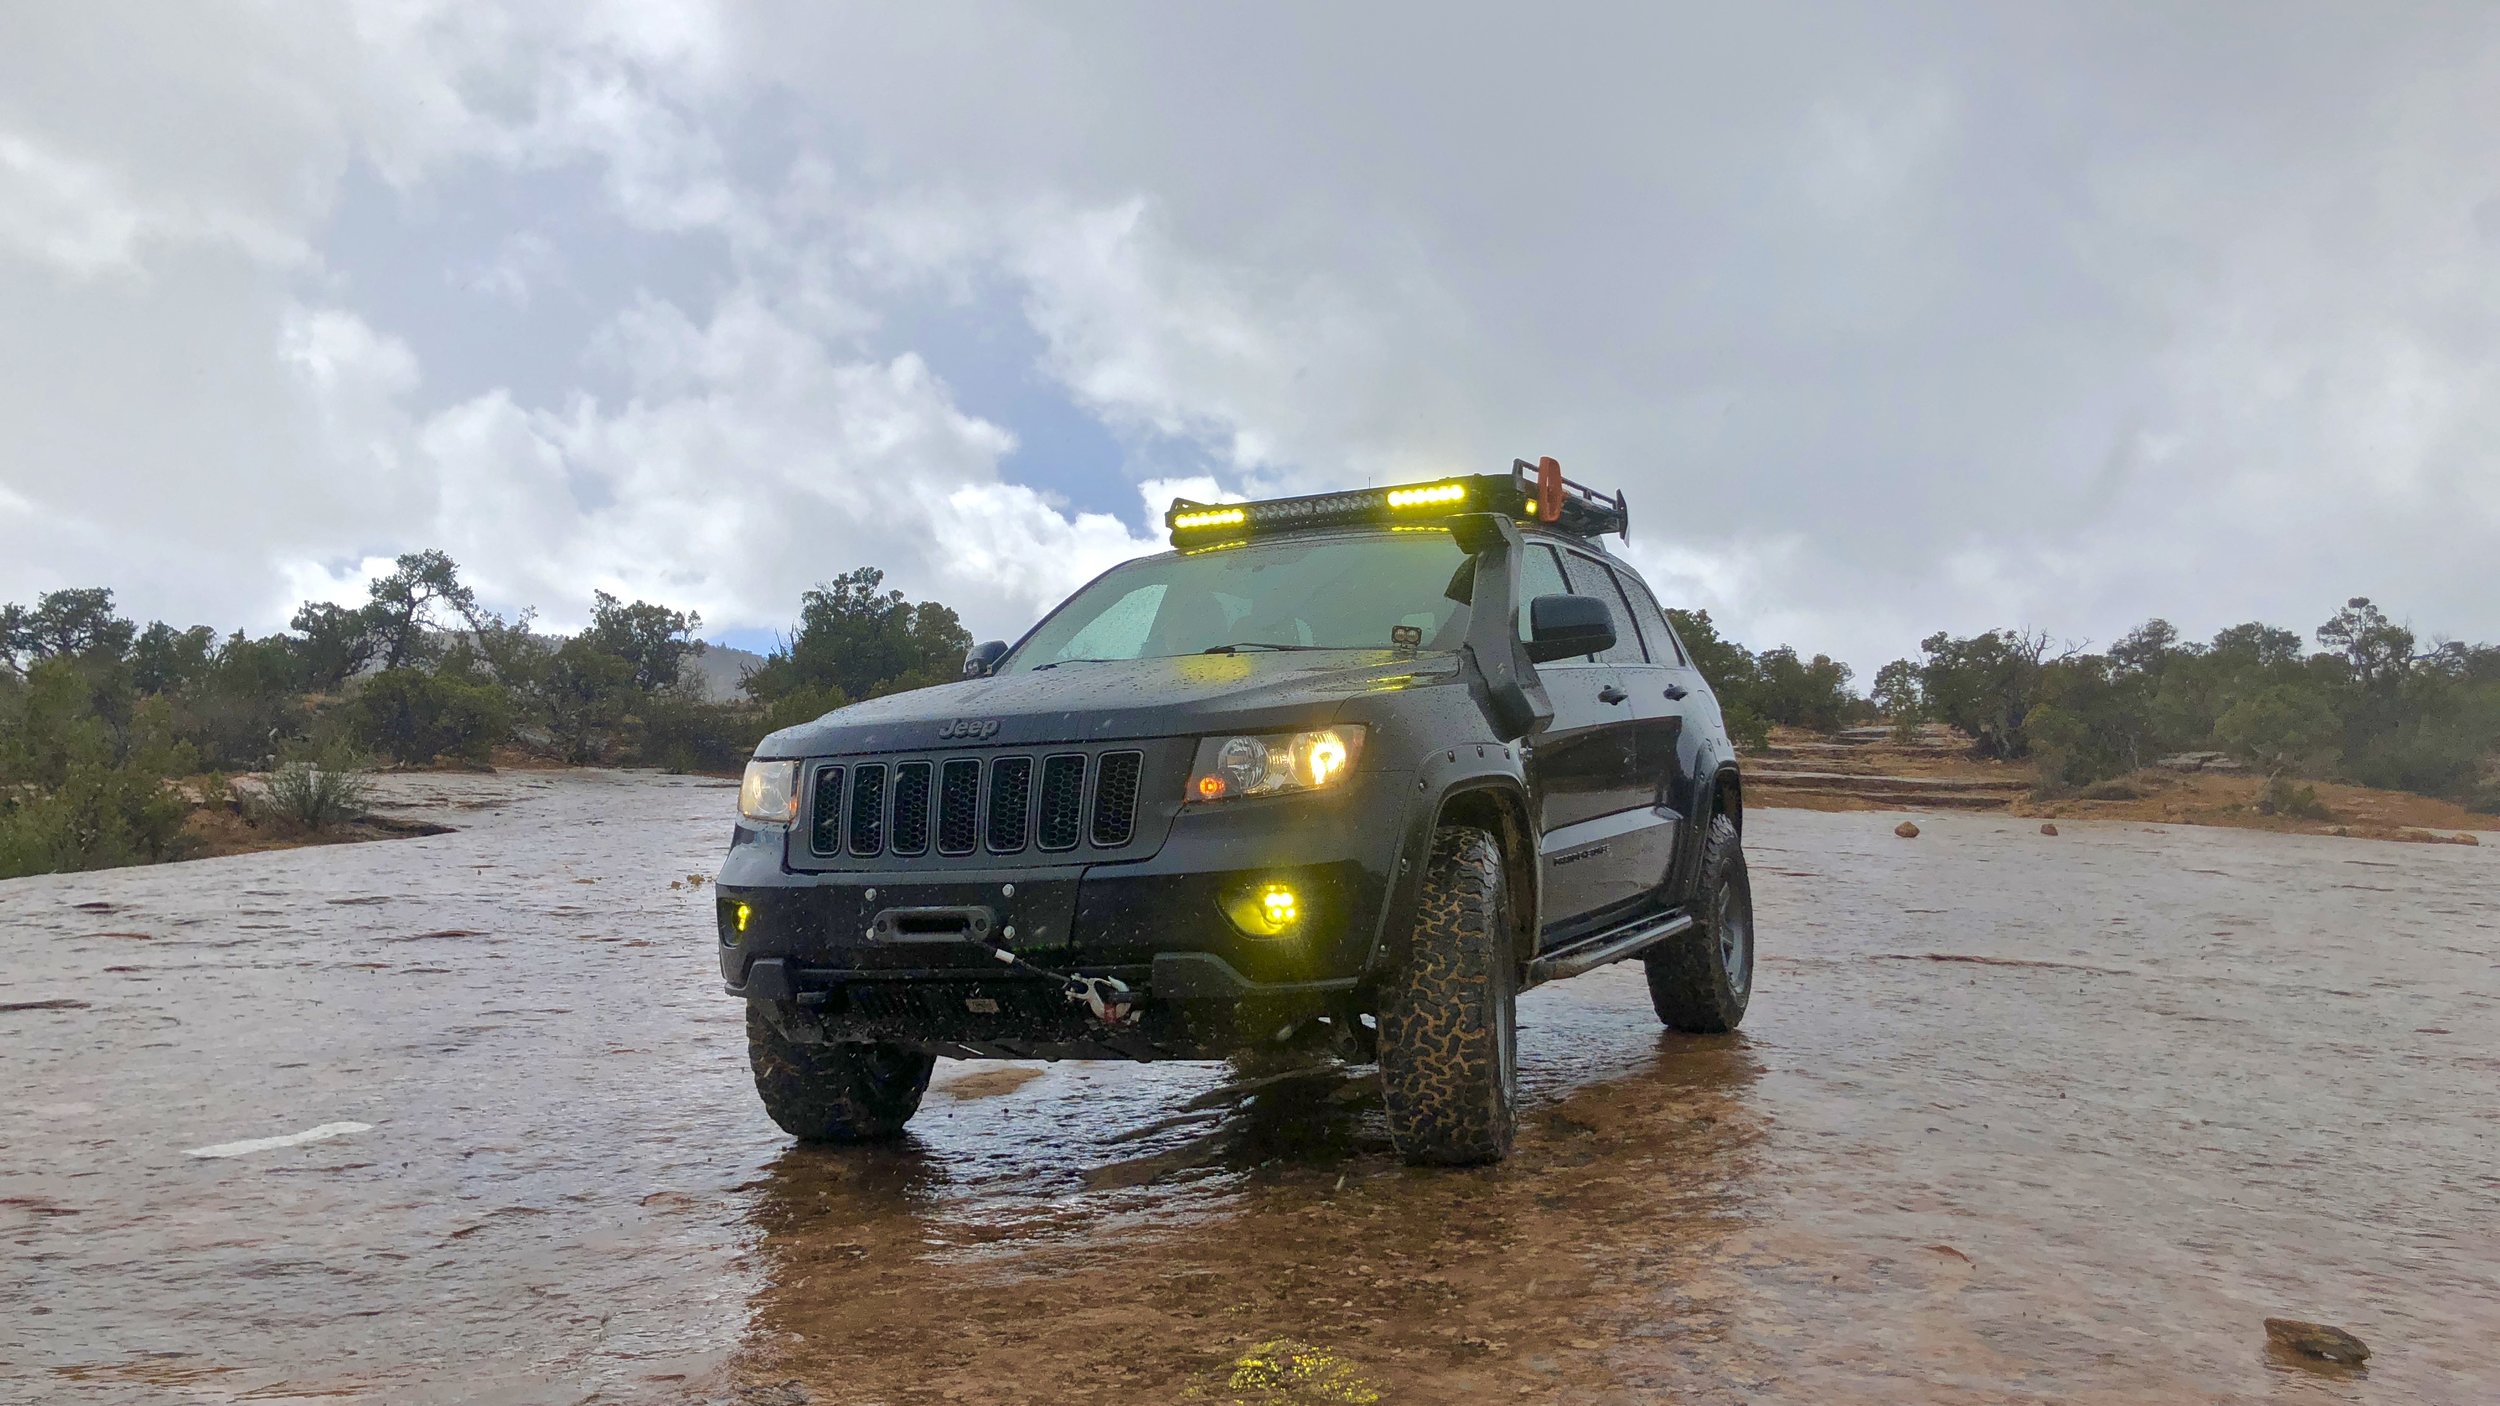
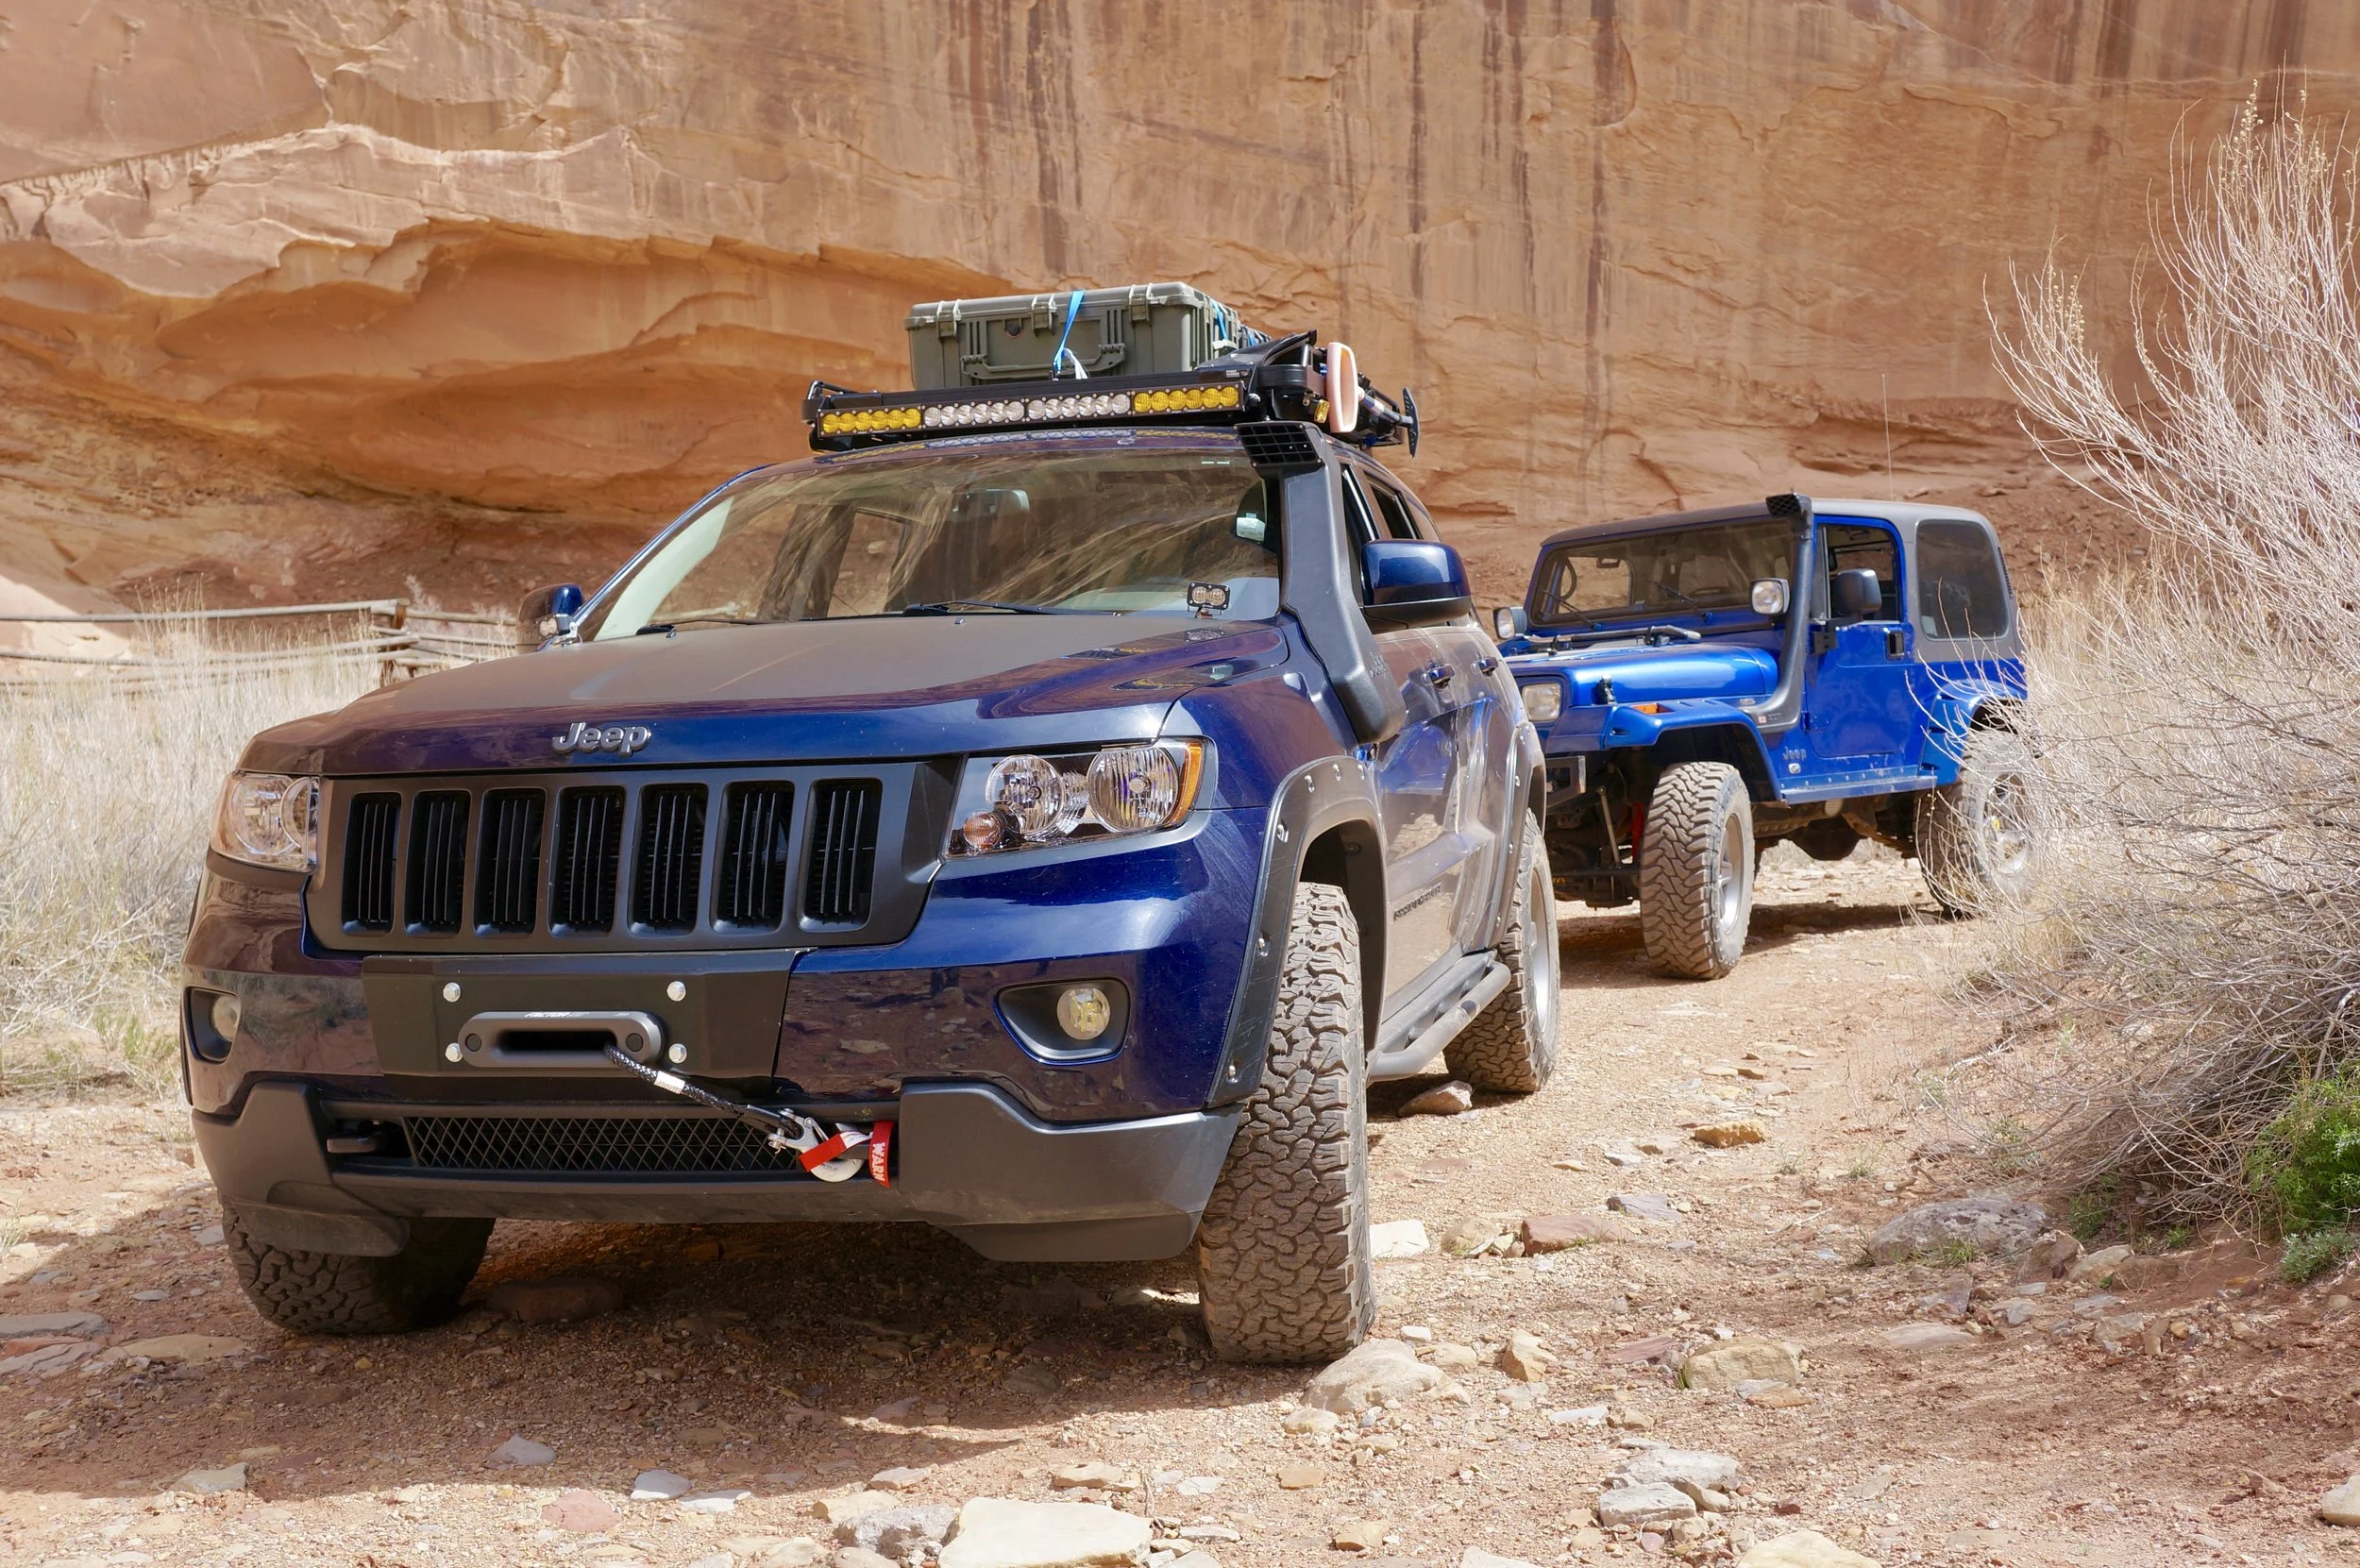
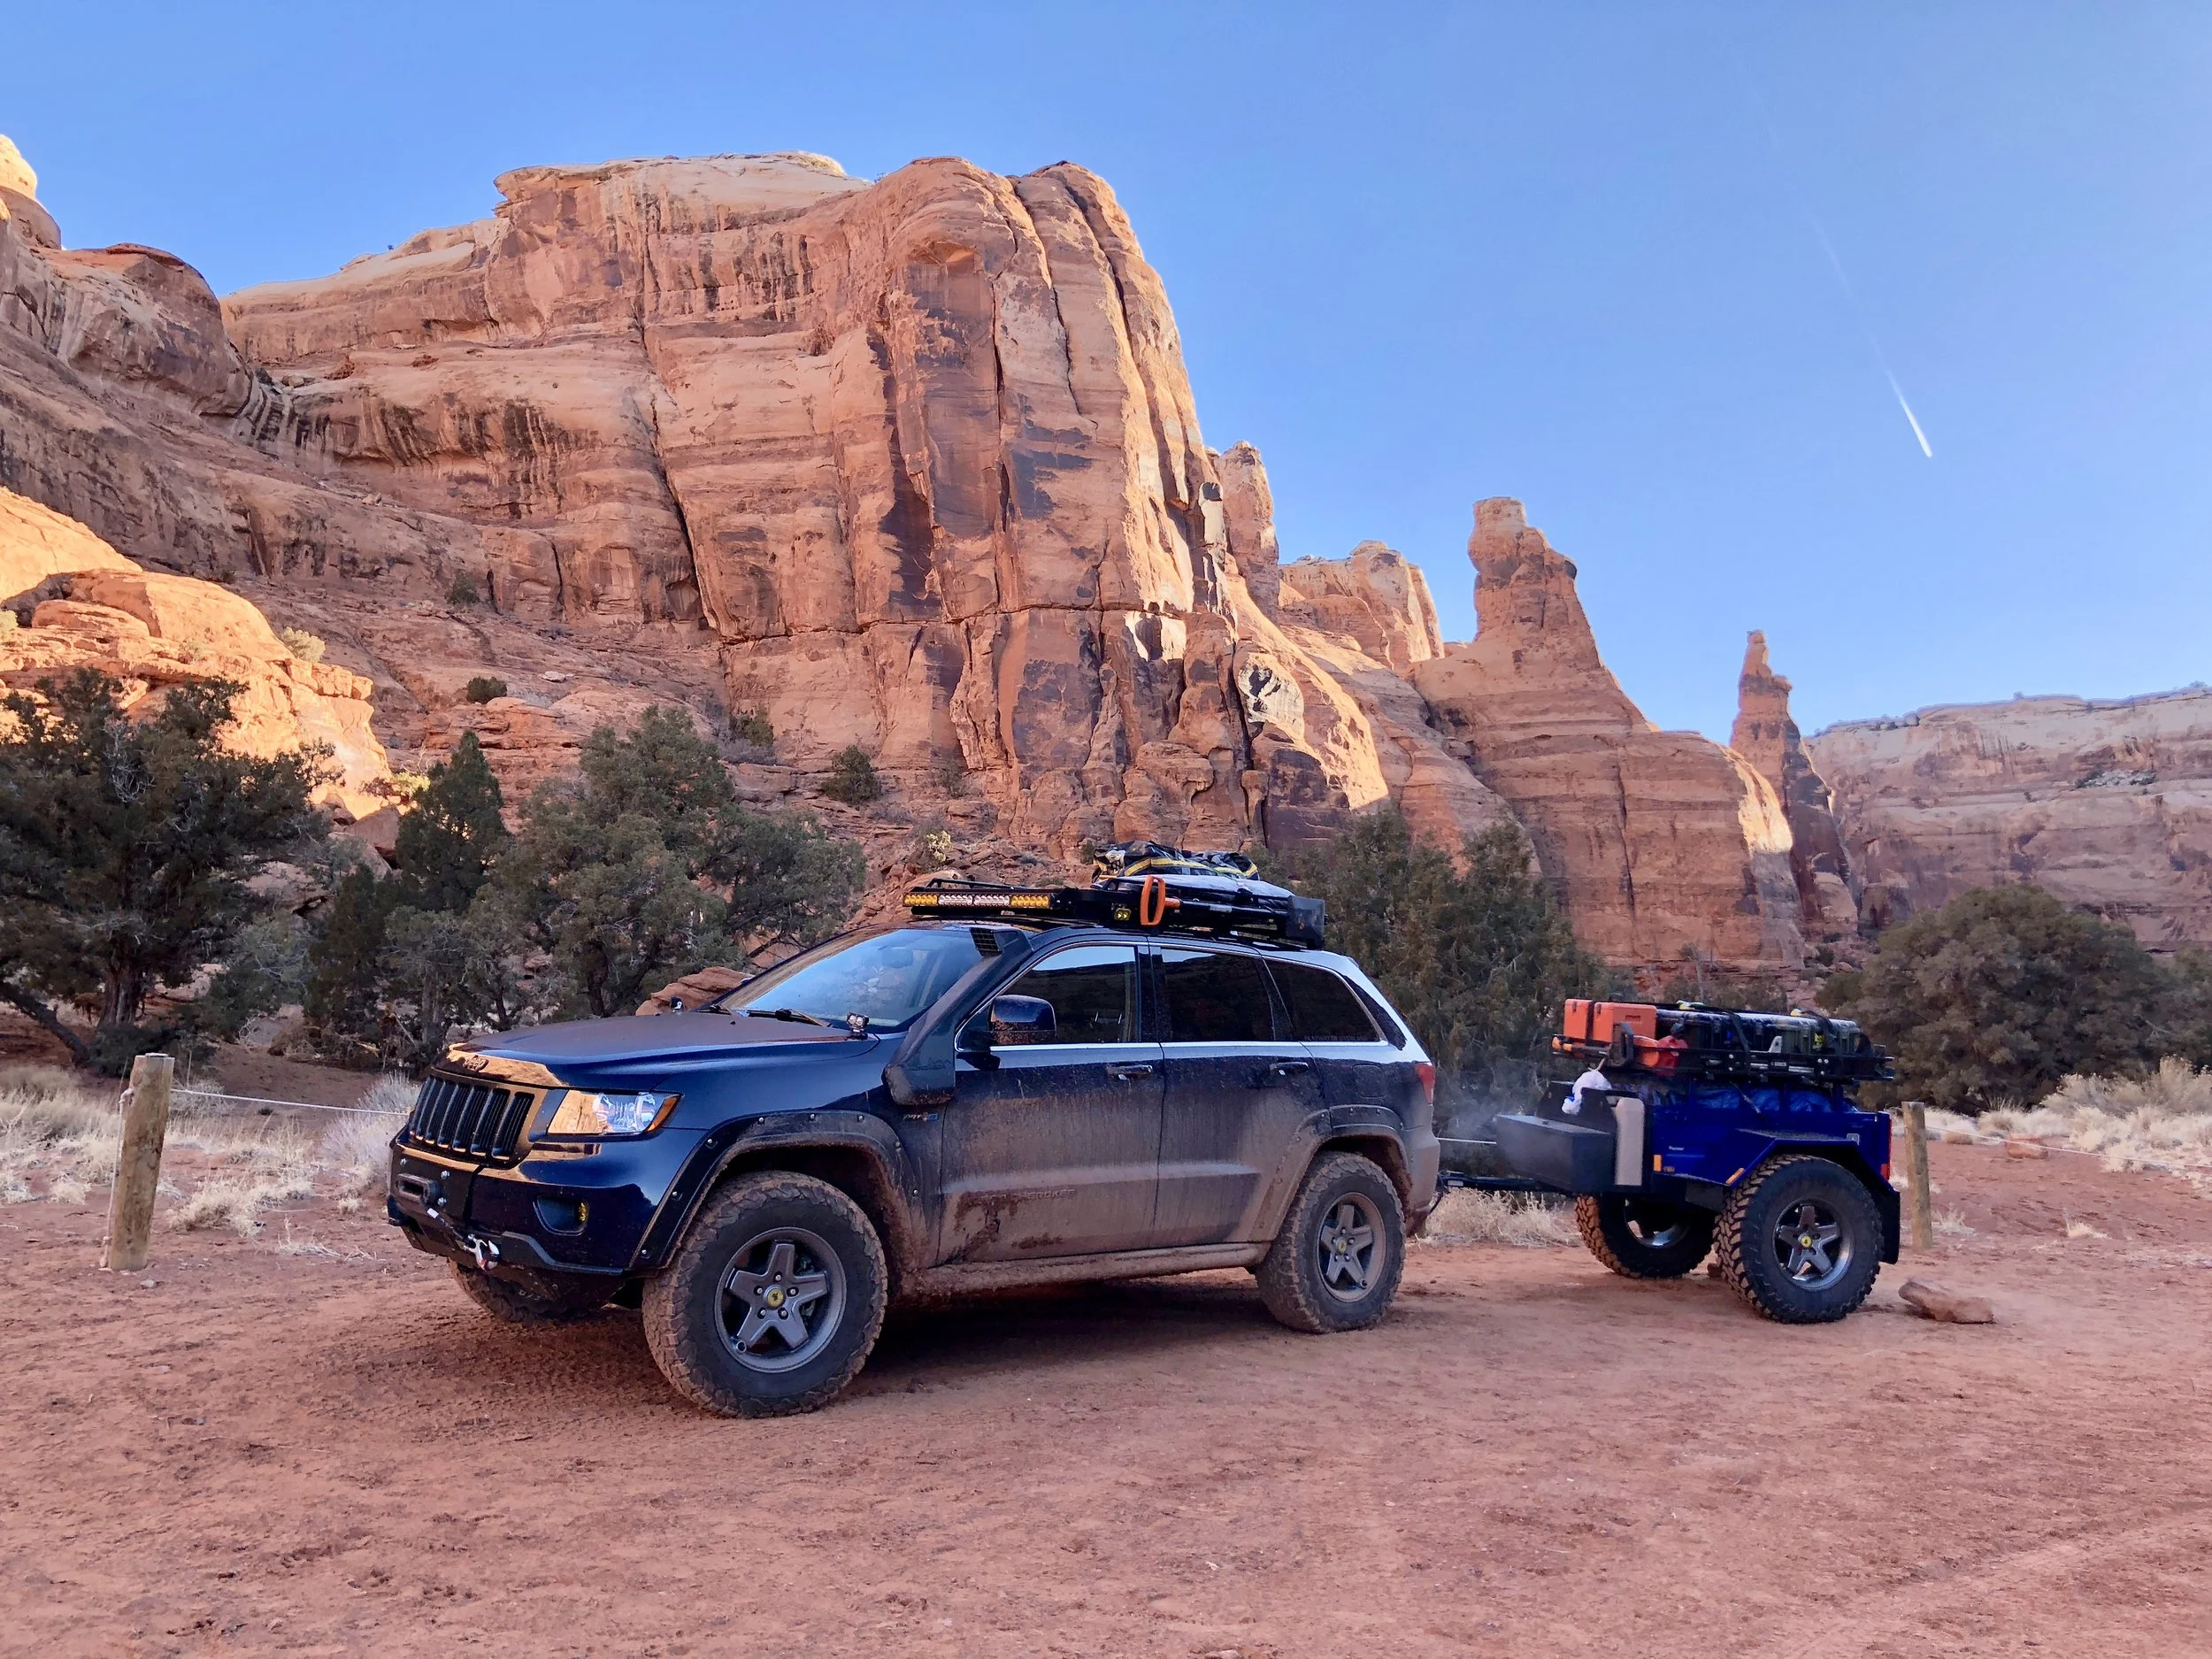
The current configuration of the Trail Wolf near Moab, Utah.
Well, I didn’t buy that red ZJ, I had recently bought a 1991 YJ Wrangler SE and was in love with the topless freedom and short wheelbase. You can’t blame me, I was in my twenties. Flash forward twenty more years…. I am over a decade (and thousands of dollars in modifications) deep into my second YJ, and it is thoroughly built out for overland adventures, complete with an expedition trailer. I wanted something capable for my continuing adventures but also comfortable and quiet for the long trips. After returning from another “trip” to Afghanistan, I purchased a 2005 WK Grand Cherokee Laredo with a 4.7 V8 and a pile of miles. That WK was a revelation. The cruise control! The air conditioning! The digital media navigation radio I could actually hear on the interstate! The roominess! The ride! The fuel economy! Oh, I was in love, and this was just a Laredo! Not fancy by Grand Cherokee standards at all. The WK proved to be capable enough that I didn’t hesitate taking it on some weekend warrior missions. I was convinced it may even replace my YJ on the next big trip…
So why repent of a beloved YJ so well built? Why leave behind years of R&D that resulted in a one-of-a-kind Wrangler that can take you wherever you want to go and back? Well, that YJ is as uncompromising in its capabilities as it is compromised in comfort. It isn’t “X-TREME!”, but it’s still a Wrangler. Driver fatigue at the end of the day is real. You will read all the time from Jeep vehicle enthusiasts and overlanders how they want a diesel or V8 powered Jeep. The enthusiasts with deep pockets end up spending tens of thousands of dollars making that dream happen. You can also certainly pony up $80-100 thousand for an AEV JKU350 or Brute Double Cab and have a world class overland platform. Or… you can walk onto pretty much any Jeep dealer’s lot and drive out with a V8 (or even a turbo diesel!!) Grand Cherokee for less than half that. Your aftermarket support isn’t nearly as diverse as with the Wranglers, but for some of us, what we can’t easily buy, we can build if we need it bad enough.
Stay tuned to see how the True Blue WK2 becomes our next overland hero!

The 2012 WK2
The 2012 WK2
Grand Conversion
Life changes prompted a consolidation of resources that resulted in the loss of a couple family vehicles and the acquisition of a low miles 2012 Jeep Grand Cherokee “WK2”. The previous Grand, a white 2005 WK was well liked and was far on its way to being set up for some overland adventures. The new WK2 will be carrying that torch onward. Before we dig into how this 4th generation Grand will be equipped, a little background on the how and why it came to be.
Fresh off my last Afghanistan deployment, a more suitable vehicle for long distance overland travel was at the top of the investment list. The heavily modified YJ Wrangler and trailer that has been my overland platform continues to work flawlessly in any weather and terrain that can be thrown at it. However, it is still a Wrangler and has it’s own compromises in spite of being uncompromising in capability. Namely, comfort and capacity. The “Pioneer” trailer helped in the capacity regard remarkably, and some further additions such as OEM full steel doors and an OEM hard top bumped up the comfort incrementally. Still, as any owner of a Wrangler, CJ, FJ40, Defender, or other short wheelbase 4x4 knows- they can definitely be fatiguing to drive long distances. The amazing YJ is still in the stable and used for adventure, but the time has come for something more appropriate to current needs.
The 2005 WK and the trusty 1995 YJ that have served well
When the decision was finally made for the new platform, a Grand Cherokee was again at the top of the list. A brand new vehicle wasn’t in the cards financially, so I worked to find a low miles Grand that would fit the bill. It was harder than I planned. Some compromises had to be made in what I wanted in order to find a WK2 that was low miles, had the required base features, and still fit in the budget. What I ended up with was a 2012 Laredo X trim with the 5.7 liter “Hemi” and a tow package. The Hemi requirement I had is what made the search difficult. There are far more 3.6 Pentastar powered Grands than 5.7 Hemi in the market. I had ideally wanted an Ecodiesel, but they were out of the price range I had set. The diesel would have perhaps been a better start for an overland platform for the fuel consumption aspect, but the cost would have pushed back some needed additions and modifications for off pavement travel.
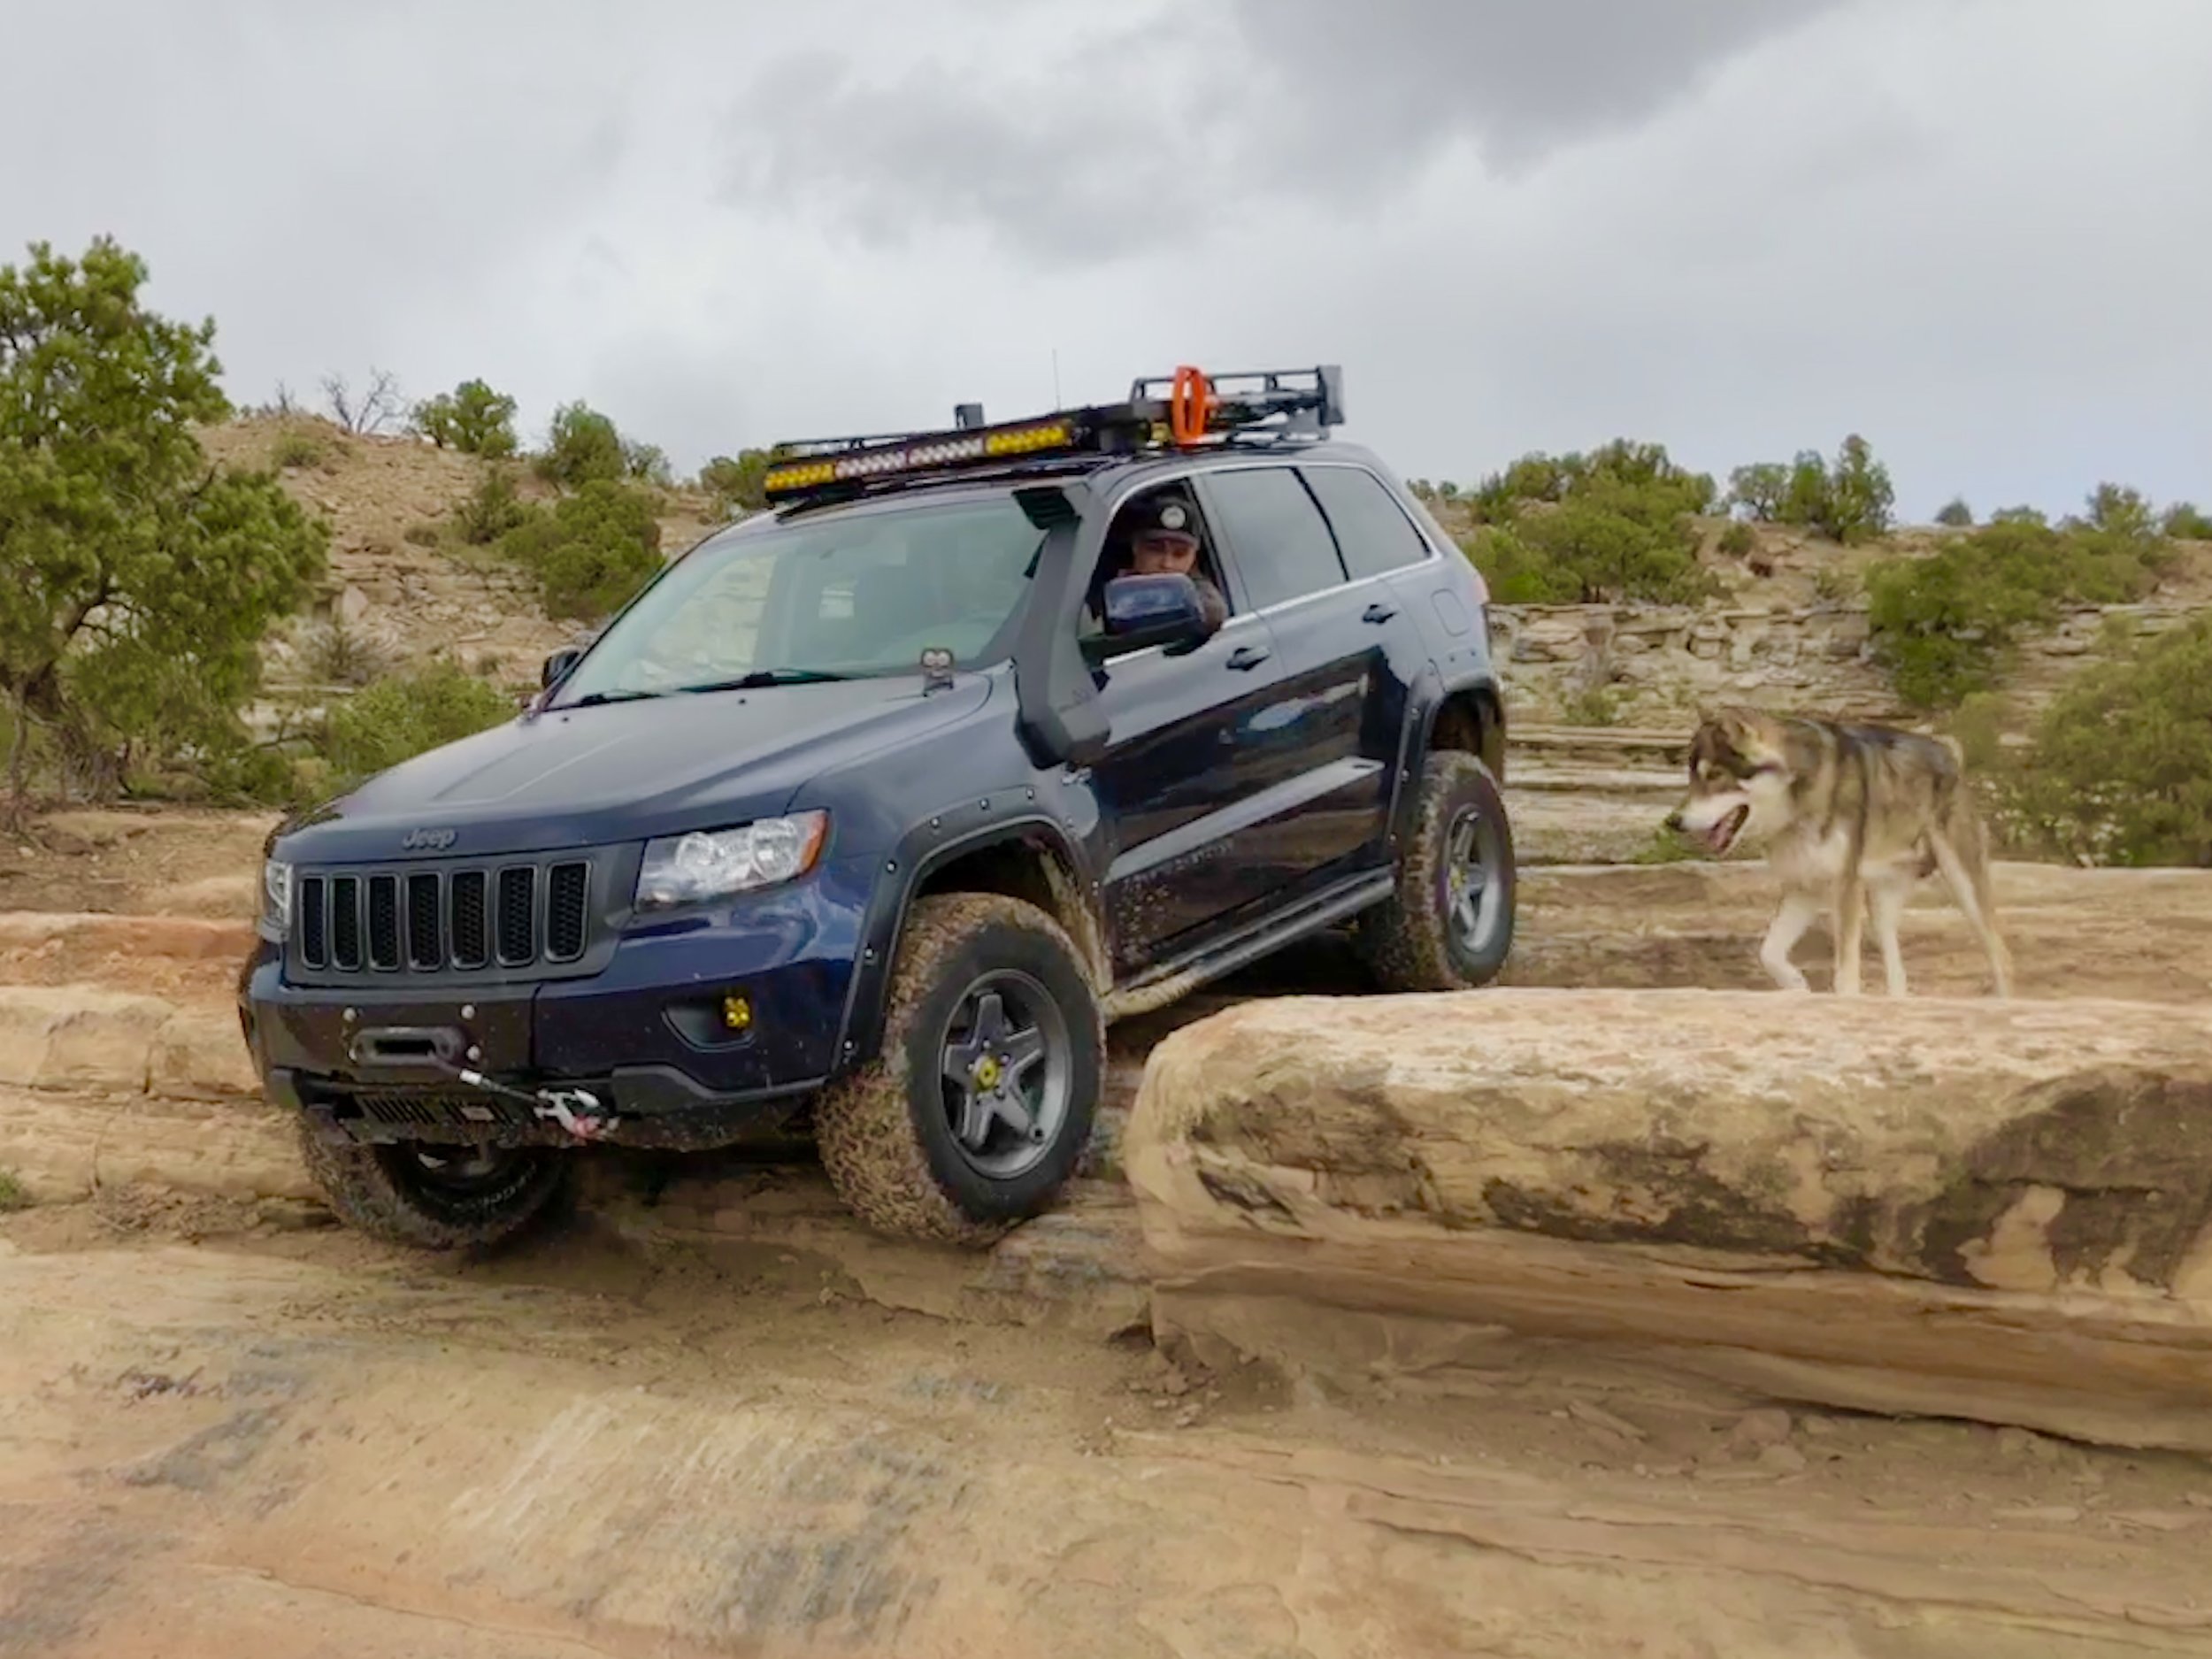
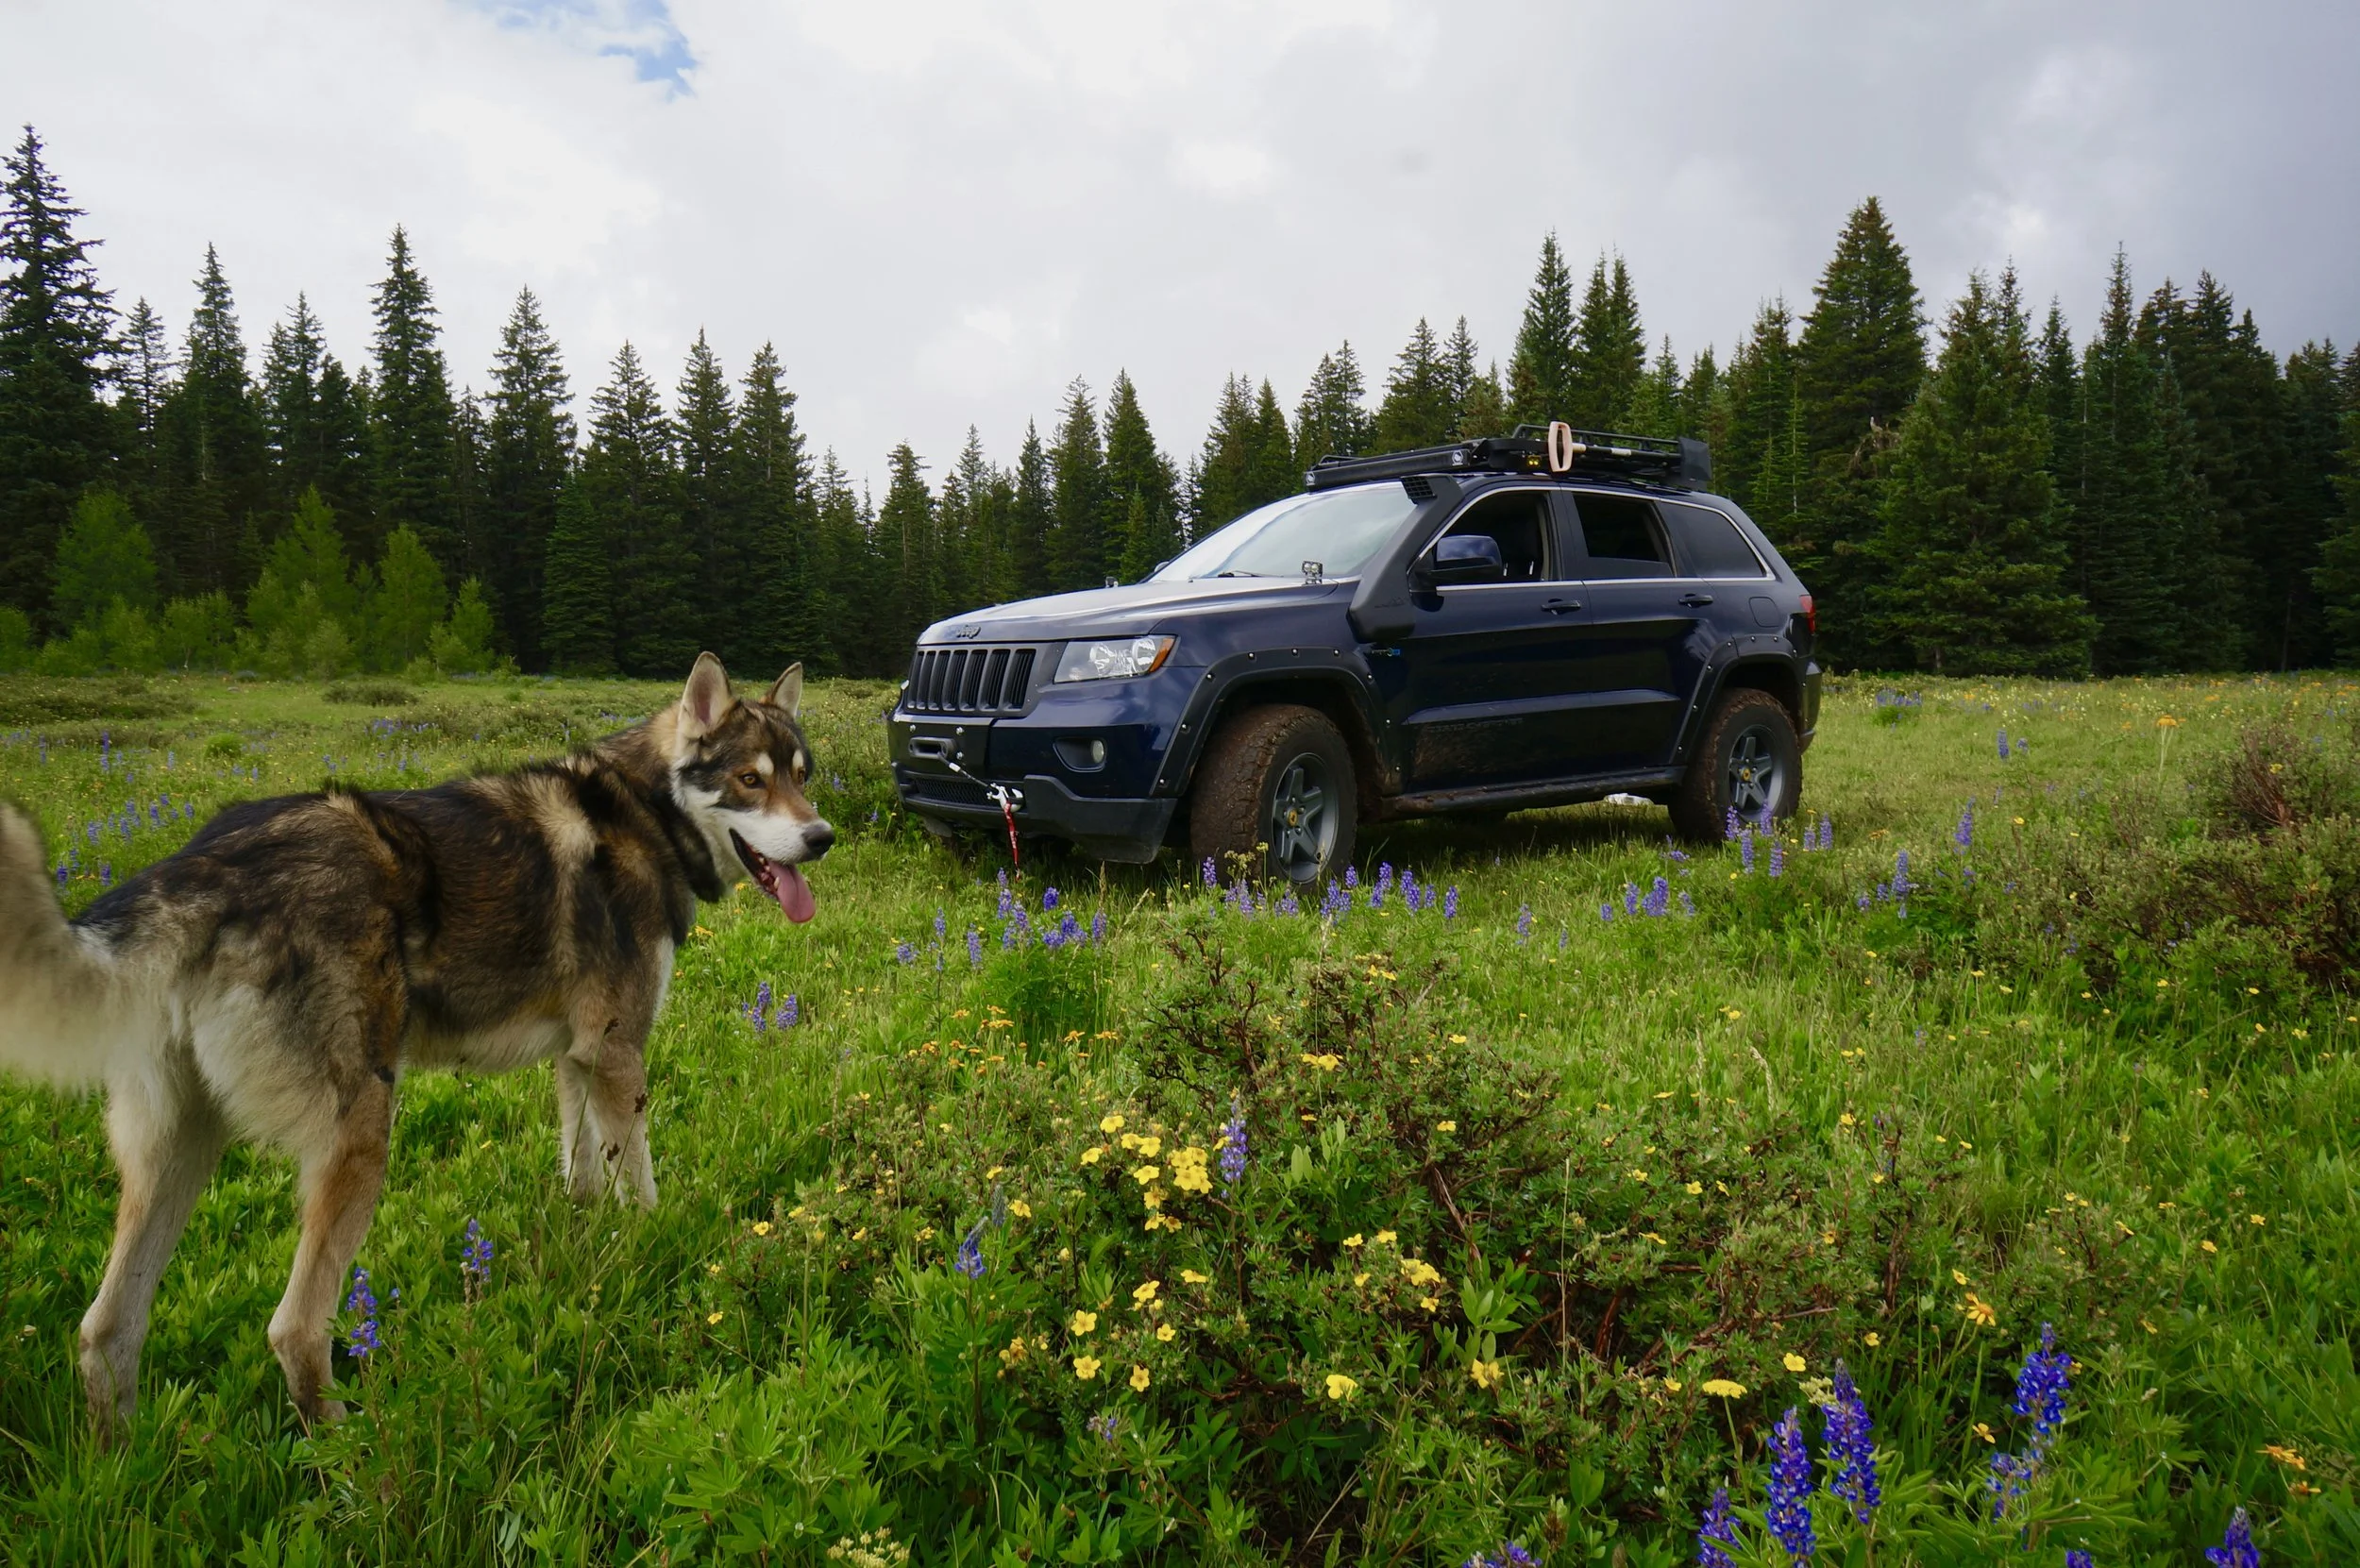
Below is the Jeep the day it was picked up from PRO Chrysler Dodge Jeep Ram in Plattsmouth, Nebraska. We have decided to give this Jeep the code name “Trail Wolf” in honor of the handsome four legged critter you see in the photo. Follow along as we prepare this wonderful Jeep vehicle for the next round of Flatwater Overland operations!

The Best Combo
The Best Combo
The Chosen Combination
Achieving the best combination of reliability, capacity, performance, and comfort from any platform for overland use is a huge challenge. The easiest and most cost efficient scenario is to leave the vehicle as stock as possible. Heavily modified vehicles require extensive testing to be reliable enough for extended backcountry travel. Here at Flatwater Overland, the policy is full disclosure- we are "Jeep people". Although we remain very egalitarian in regards to vehicle platforms, and several were considered, the WK2 Grand Cherokee never left the top spot of consideration. It's true there are several notable 4x4s produced today, and many types of older platforms well suited to overland adventures. I must personally admit that a significant part of my choice was shallow and that I simply like Jeeps and that not too many people are using and modifying the WK2. Here in Colorado, you can't swing a dead cat and not hit a modified Wrangler or Toyota.
It should come as no surprise that even as the WK2 Grand Cherokee is a very capable and comfortable platform, it won't get away without a planned brace of modifications for off pavement overland use. Before we dive into all the modifications, let's look at the foundation. There must be a foundation of what meets your needs in a very general sense for an overland vehicle prior to any modification. What is meant by this is that ideally, the basic vehicle should be able to fit your needs stock. If a vehicle requires massive modification (like replacing drivetrains and complete suspension redesign) to effectively use in all expected conditions-- you bought the wrong vehicle. Any vehicle can certainly be streamlined or focused within it's capabilities, but you shouldn't have to re-engineer a vehicle to make it usable for overlanding. I'll cover some notable highlights as to why I chose this WK2 Grand Cherokee.
DRIVETRAIN
The drivetrain and cargo capacity as well as durability of an overland vehicle should be the first things considered before a purchase. There is a fine balance to achieve. Some good advice at this point would be to NOT assume capability and reliability based upon some kind of manufacturer popular reputation. Not all Jeep vehicles are Rubicon capable and not all Toyotas are reliable. An underpowered vehicle will struggle on the highway when loaded, and may not have the capability to overcome certain terrain conditions as well. However, an overpowered vehicle can have the tendency to break critical drivetrain components and be very inefficient for extended backcountry use. Thankfully there is a decent selection of drivetrains available for the WK2 Grand Cherokee to suit just about anyone. As a Toyota 4Runner owner once told me, "At least you can get a real engine in those".
“Some good advice at this point would be to NOT assume capability and reliability based upon some kind of manufacturer popular reputation. Not all Jeep vehicles are Rubicon capable and not all Toyotas are reliable.”
Several variations of the WK2 were driven before a final purchase was made. The Pentastar V6 drivetrain is quite sufficient for normal use by most users, but I was concerned it would be underpowered when used in mountainous areas or when the WK2 is fully loaded and kitted out and pulling an off road trailer. The turbo diesel variant would be perfect, but comes with a premium price. The decision was made to go with the 5.7 liter "Hemi" as the middle ground. The particular vehicle purchased is a "Quadra-Trac II" which came with the 65RFE transmission, the MP3023 transfer case, and standard ZF axles. Overall, it has proven to be more than adequate in the power department, applies amazing traction in nearly every condition, allows for driver input off road, but does suffer in fuel consumption when driven hard. With long term experience, even with passengers, a loaded roof rack, and a trailer, the V8 Grand has no problem tackling highway or trails up to a Class 7. It's worth noting again a person just cannot easily get a Hemi or diesel Wrangler without some very deep pockets.
All WK2 Grand Cherokees now come will fully independent suspensions (more on that below) and ZF differential housings. There are a couple different transmission variations and transfer cases depending on options. This WK2 came equipped with the 65RFE 6-speed automatic. (2014 and later come with the ZF 8-speed shift by wire transmission) It allows for fully automatic operation and "Autostick" operation. The latter being a manual selection of allowable gear ranges. This feature is extremely useful for control of the vehicle when out on the trail. For a rundown of WK2 transmissions in detail, go HERE
Since this WK2 is a "Quadra-Trac" instead of "Quadra Drive", it does not have any locking differentials from the factory, nor is it reasonable to add them. The Quadra-Drive option on the WK2 found in the Trailhawk and some Overland trims only adds an ESLD (Electronic Limited Slip Differential) to the mix. On the older Grand Cherokees, the Quadra Drive option was a significant factory upgrade option for those wanting to go off pavement. However, the sophistication of the current Select-Terrain drivetrain management is simply incredible and makes the addition of the rear ELSD in the Quadra-Drive only a marginal real world improvement in my opinion. What this means, is if you are wanting to upgrade your spring rates for heavier loads and trail use with a permanent lift, but were more concerned about having a "locker" (it is worth noting that aftermarket locking differentials remain unavailable for the ZF differentials in the WK2 Grand), I would personally suggest foregoing the ORA2 package with Quadra-Drive and Quadra-Lift. This will allow you to install a permanent lift and heavier duty springs yet maintain a still impressive traction control. However, a Trailhawk does fit the bill for a lot of adventurers in its stock configuration.
All WK2 ZF differentials are equipped with Gore-Tex breather vents. This is a wonderful development. When traversing deep water crossings in any 4x4, water ingestion through axle breathers is always a concern. Many factory stock 4x4s do not come with appropriate axle venting from the factory. This typically requires the owner to route long hoses with breather vents high into the vehicle in order protect critical drivetrain components. The Gore-Tex breathers accomplish this task at the differentials without needing long hoses. It may be a small thing, but it's clear Jeep designed the WK2 to actually be used off road.
The GORE Automotive powertrain breather vent
The Quadra-Trac II is actually very impressive in nearly every condition, and can be set into different drivetrain behavior algorithms by the console dial. These positions do actually change the drivetrain (and suspension) behavior. It's not a gimmick. When in Rock mode, hill descent control is available, and can be quite useful on very steep and loose grades off road. Without mechanical lockers, there is more wheel slippage drama before the traction system fully engages, but this is only something to get used to. There is a marginal performance difference between the two 4x4 drive systems offered, but there is a difference. Sadly, to get a WK2 with the ELSD and Quadra-Drive, one must purchase the Off Road Adventure 2 package from Jeep which also includes Quadra-Lift air suspension. For a detailed description of WK2 transfer cases and 4x4 systems, go HERE
One notable option this Grand Cherokee (and I would suggest for ANY vehicle used for overlanding or off-roading) is the factory towing package. This was a potential deal breaker since I needed the factory package which integrates the trailer wiring harness, heavy duty cooling capacity, and a Class III hitch. It was easy to install a trailer brake controller and prepare for trailering. Typically, the Grand won't even notice the 1600 lbs. cargo trailer I usually pull for camping with its 7200 lbs. rated towing capacity.
This brings us to one of the pillars of an overland vehicles, capacity. Two things are key to capacity- payload and towing capacity. Payload is what the vehicle itself is designed to safely carry itself, and towing capacity is what you can pull. It is of primary importance to pay attention to payload first as this will determine the total weight of additional modifications, passengers, and cargo that can be carried. There are actually very few 4x4 wagons on the market today that have a payload capacity sufficient for overland travel. Most of the SUVs that do have sufficient payload are typically full-size vehicles that have limited technical trail capability. The Grand Cherokee is nearly a perfect balance of capacity, capability, and performance. The WK2 has a payload of approximately 1300-2000 lbs. with a towing capacity of 3500-7200 lbs. depending on drivetrain and trim level. This is quite sufficient for even modified overland use and is a class leading rating.
SUSPENSION
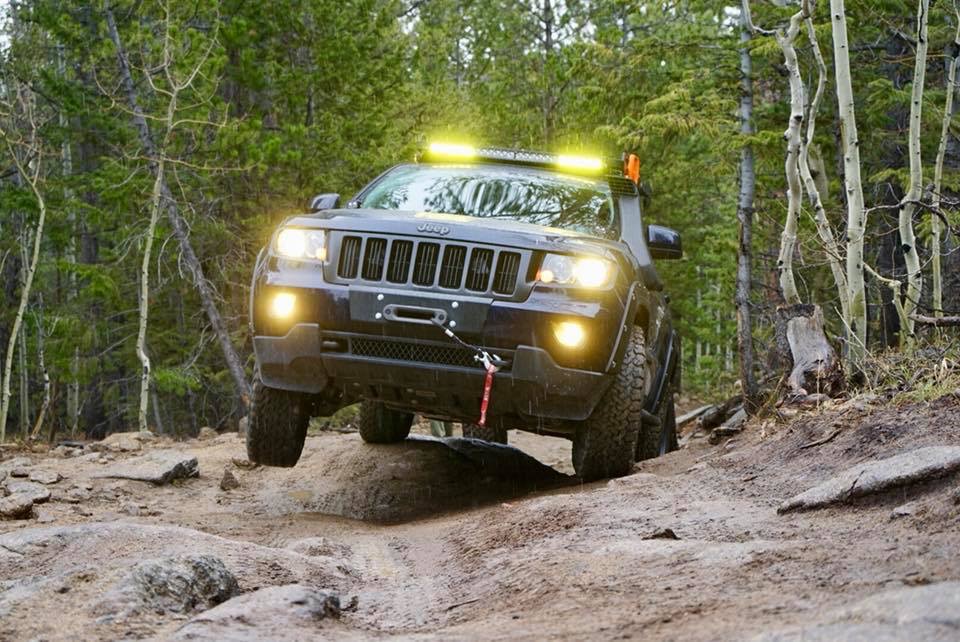
The WK2 Grand Cherokee was the first true Trail Rated Jeep to be fully independent in the suspension department. I'll say it again- the WK2 Grand Cherokee has FULLY INDEPENDENT SUSPENSION. Other vehicles, like the military HMMWV, some Land Rovers, Mercedes-Benz M class, Lamborghini LM002, and a handful of others have successfully used fully independent suspensions in the past for off pavement prowess, but Jeep stuck with solid live axles as long as the market would allow for good reason. When off-road, solid axles maintain your ground clearance when passing over obstacles for superior chassis clearance and tire contact. This is why the Wrangler continues the design. The down side is compromised high speed handling characteristics and ride characteristics. Properly executed fully independent suspensions provide adequate suspension travel with remarkable vehicle control and ride on rough terrain and roads, but can actually make the vehicle lose ground clearance when the suspension cycles over obstacles. In more extreme terrain, fully independent suspension vehicles exhibit a tendency to lift a tire or two in the air while traversing large obstacles. Sophisticated traction control and good skid plates are the order of the day for fully independent vehicles like the WK2 to successfully operate on the trail. Thankfully these are available in spades for the Grand Cherokee.
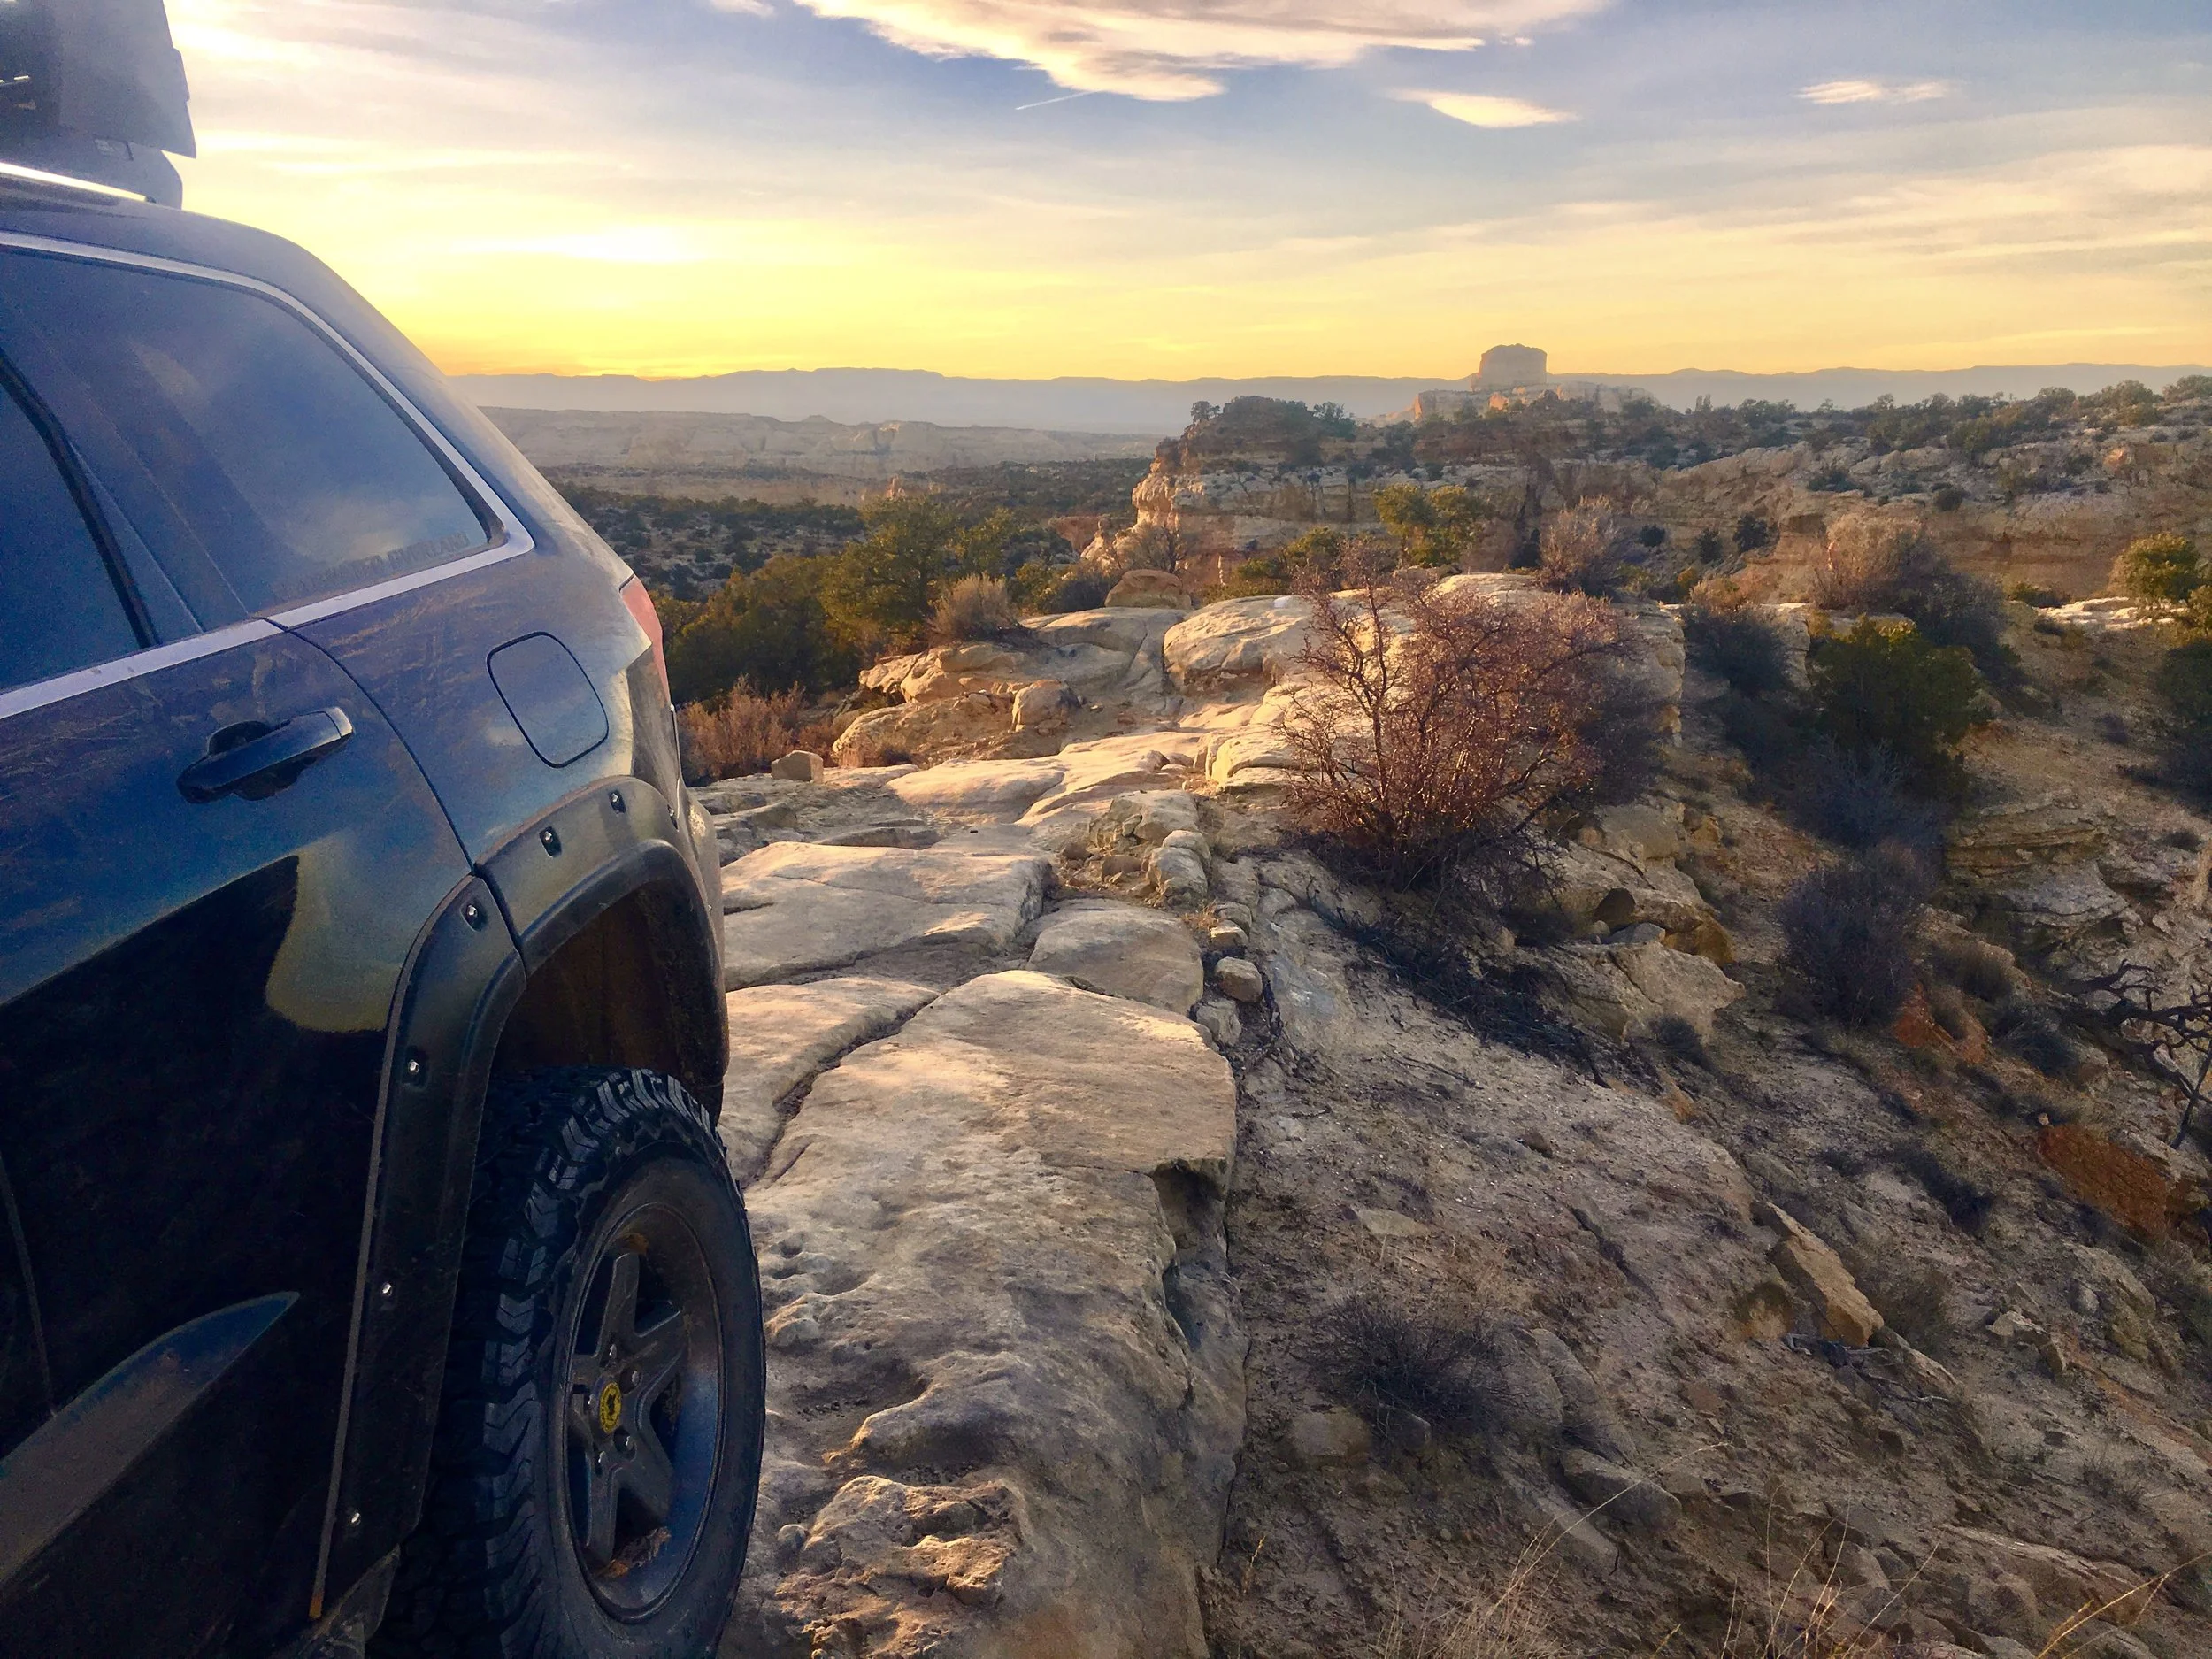
Navigating the "Devil's Racetrack" trail in the San Rafael Swell of Utah. A BLM black-rated route.
The Flatwater WK2 is puposely a standard suspension vehicle, which allows for customization of springs and ride height to a degree. Other WK2s, notably the Overland and Trailhawk models, are equipped with the more advanced Off Road Adventure 2 package. This gives you the previously mentioned rear ELSD, low range transfer case, skid plates, and the Quadra-Lift adjustable air suspension. I must admit this fully rounded package may be a great option for some drivers that do not wish to permanently lift their Grand, or install larger tires. There is even some electronic aftermarket witchcraft available to trick the air suspension into keeping the vehicle in a "lifted" configuration. However, I have read some reports of these accessories damaging some components of the Quadra-Lift. The air suspension is controlled by the Select-Terrain knob on the console and also automatically adjusts vehicle height for parked step-in, highway efficiency, and off road terrains. It's a very impressive system, but also complicated and not conducive to modification. The Trail Wolf WK2 was getting larger tires and permanent suspension modifications for load carrying and trail use, so the Quadra-Lift wasn't really an option for me.
TRAIL PROTECTION
Factory supplied skid plates can be less than desirable in many circumstances, necessitating a strong aftermarket support of the vehicle or personal fabrication skills. Surprisingly, the OEM skid plates for the WK2 are quite good. Selecting either Off Road Adventure 1 or 2 options gets you the full factory skid plate package. The WK2 I acquired did not have this option installed, so a full suite of factory skid plates were installed along with the MOPAR rock rails. These are perhaps the best sill protection available for the WK2, but they are also expensive and difficult to install. They follow the lines of the Grand perfectly, provide excellent protection, and cover the entire rocker panel area between the axles. Unfortunately, MOPAR is rumored to have ceased production on them. The rock rails come standard only on the Trailhawk model for the most part and do not have the protective tubes. I will discuss some additional trail armor later in the modifications section.
TIRES, WHEELS, AND BRAKES
Most WK2 Grand Cherokees come equipped with some rather large wheel combinations. The WK2 does enjoy some very large and effective brakes that require larger wheels, but "Twonties" are not an off road wheel unless you are driving a medium duty truck. If you are not familiar, the ideal situation is to have a tall and flexible tire sidewall in order to absorb minor trail obstacles and protect the wheel from damage. Late model vehicles- particularly trucks and SUVs are becoming fitted with some very large brake combinations. This is good overall, but can cause some wheel and tire size combinations more suited to on road than off. If you do not want to start cutting up the fenders and bodywork on your SUV, or installing excessive lifts, this limits what tire size you can use. There are two notable brake packages on domestic non-SRT Grand Cherokee. They are typically referred to as "HD- heavy duty" (BR6 factory build code), and standard (BRY factory build code). The issue here being the HD brakes will only reasonably allow an 18" rim size to be fitted, while the standard brakes are good for a 17" rim. A smaller rim means more tire sidewall and wheel protection off road. The WK2 I purchased was originally fitted with 20" wheels which were a big no-go for off pavement. However, it was fitted with the BRY brakes, so a 17" rim was possible.

Modifications-appearance
Modifications-appearance
Appearance Modifications
The visual modifications…
We all love to personalize our vehicles. Many appearance modifications are secondary effects of functional modifications, and so some of the items here were done for functional reasons, but are mostly noticeable as a visual modification. We’ll start with purely cosmetic items and move on.
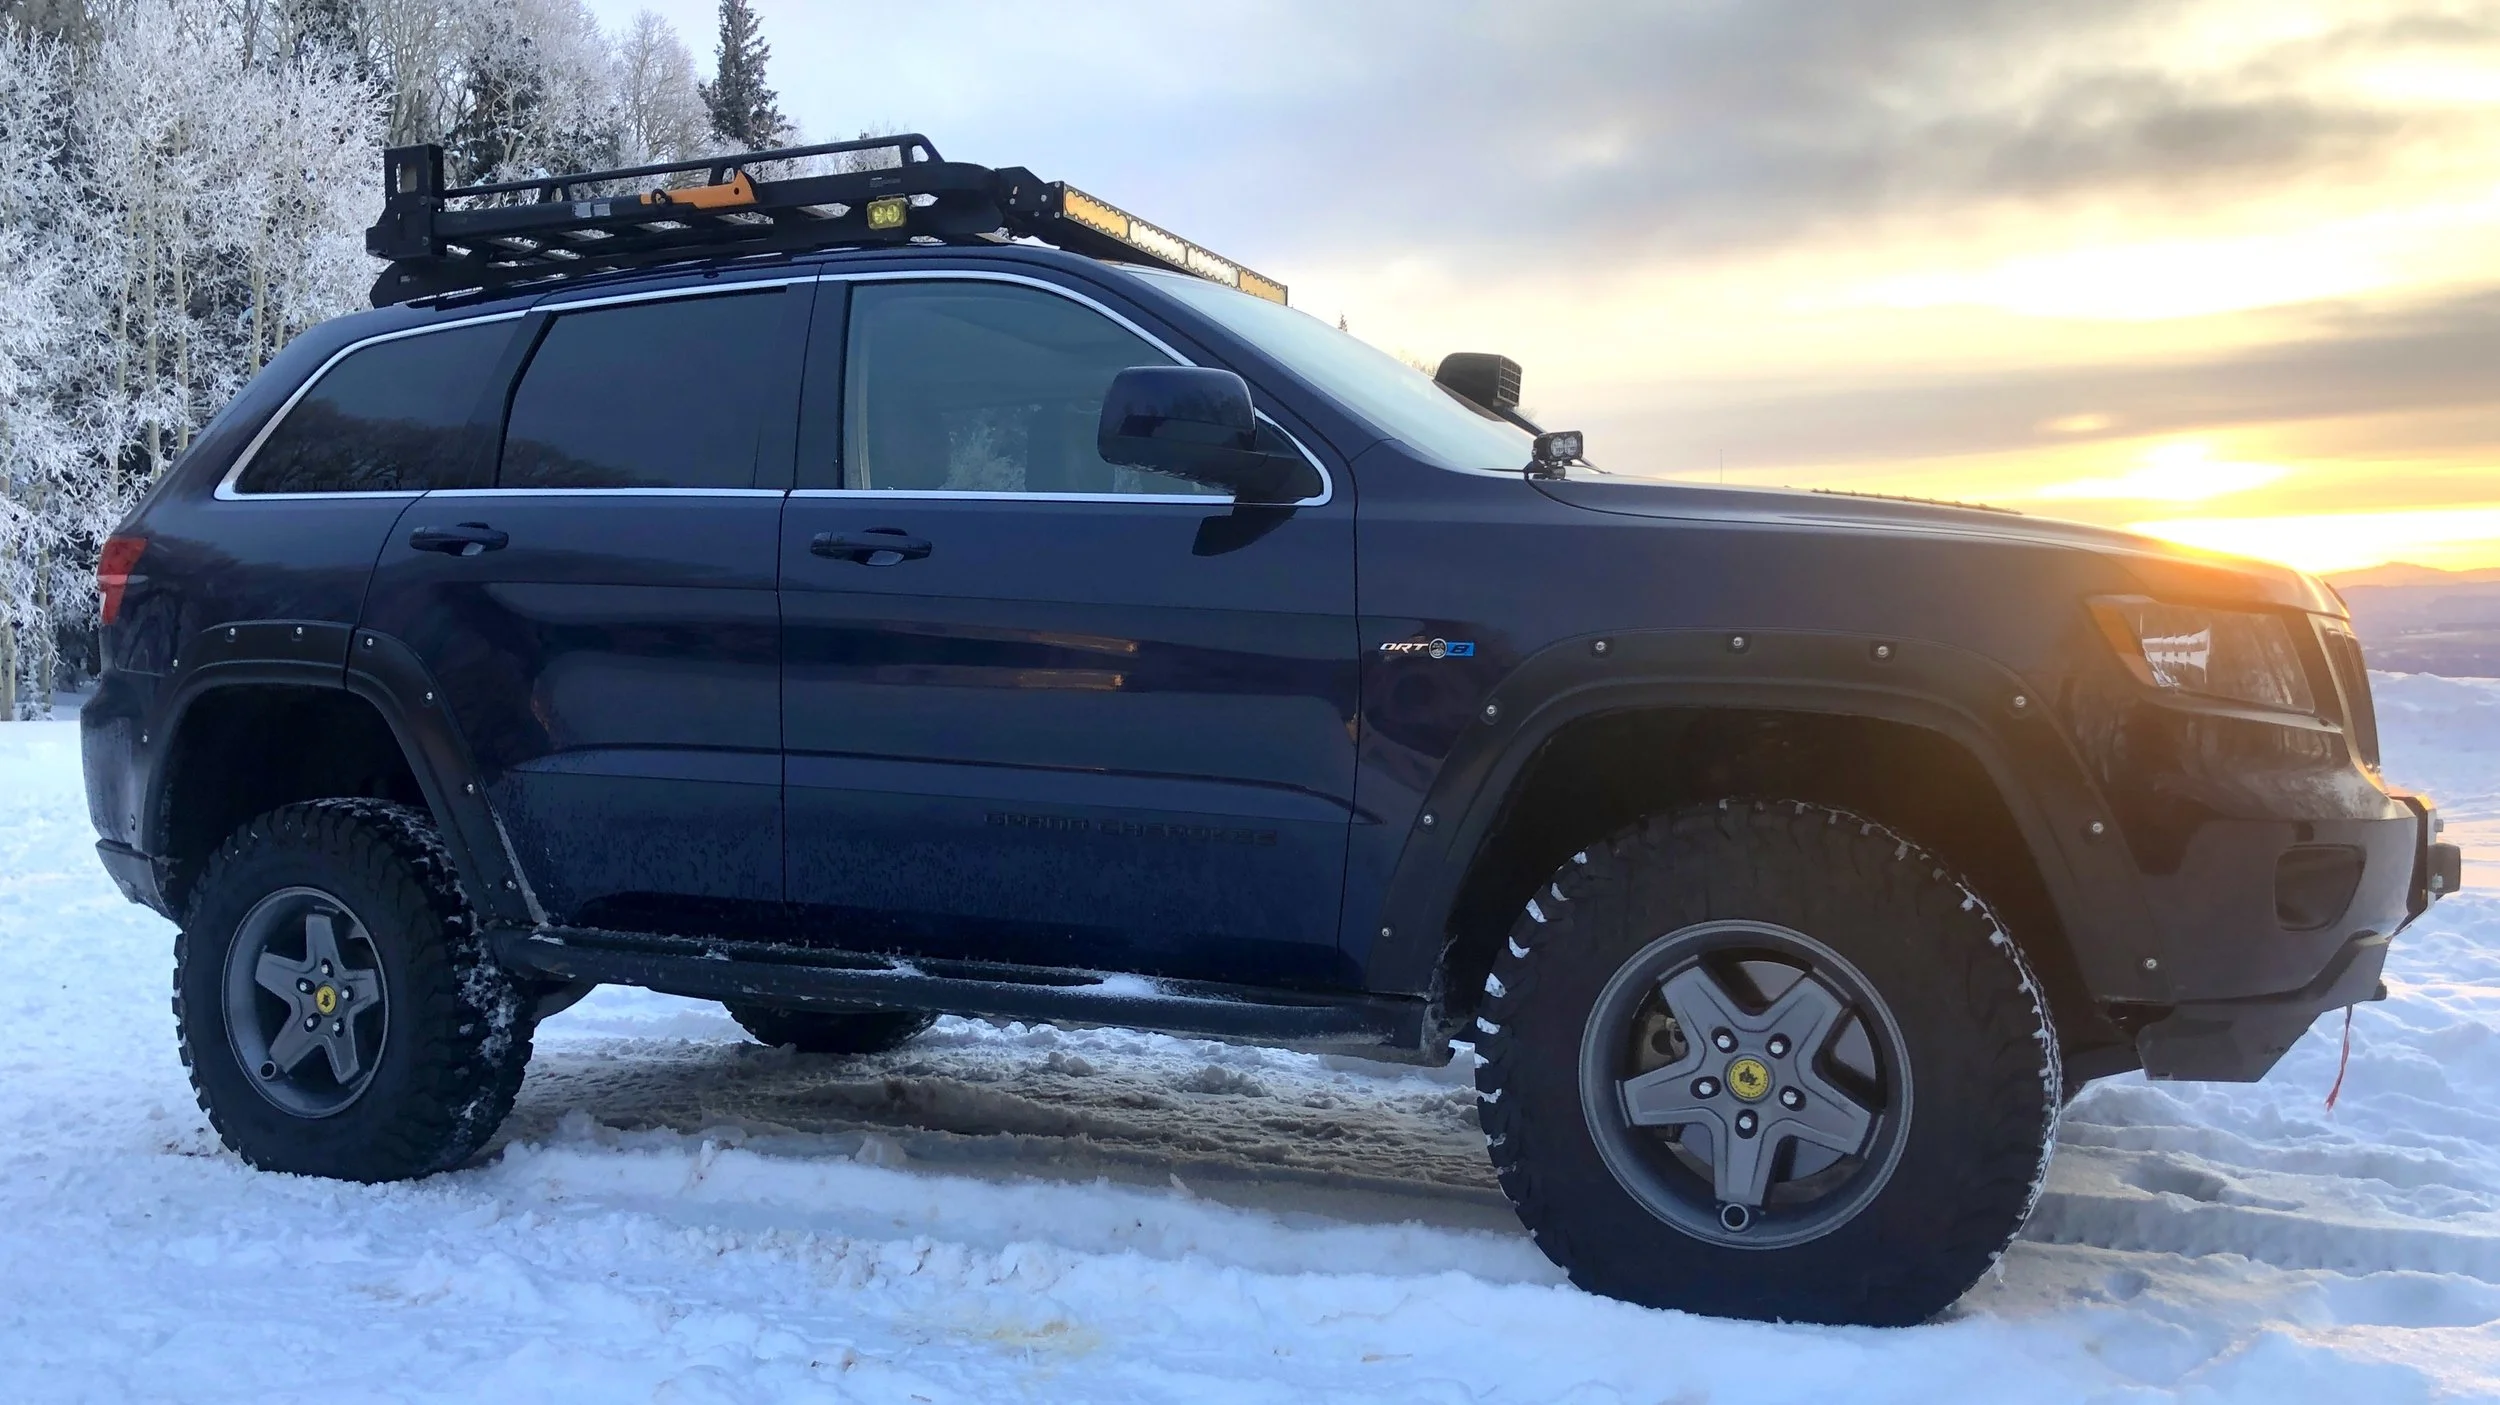
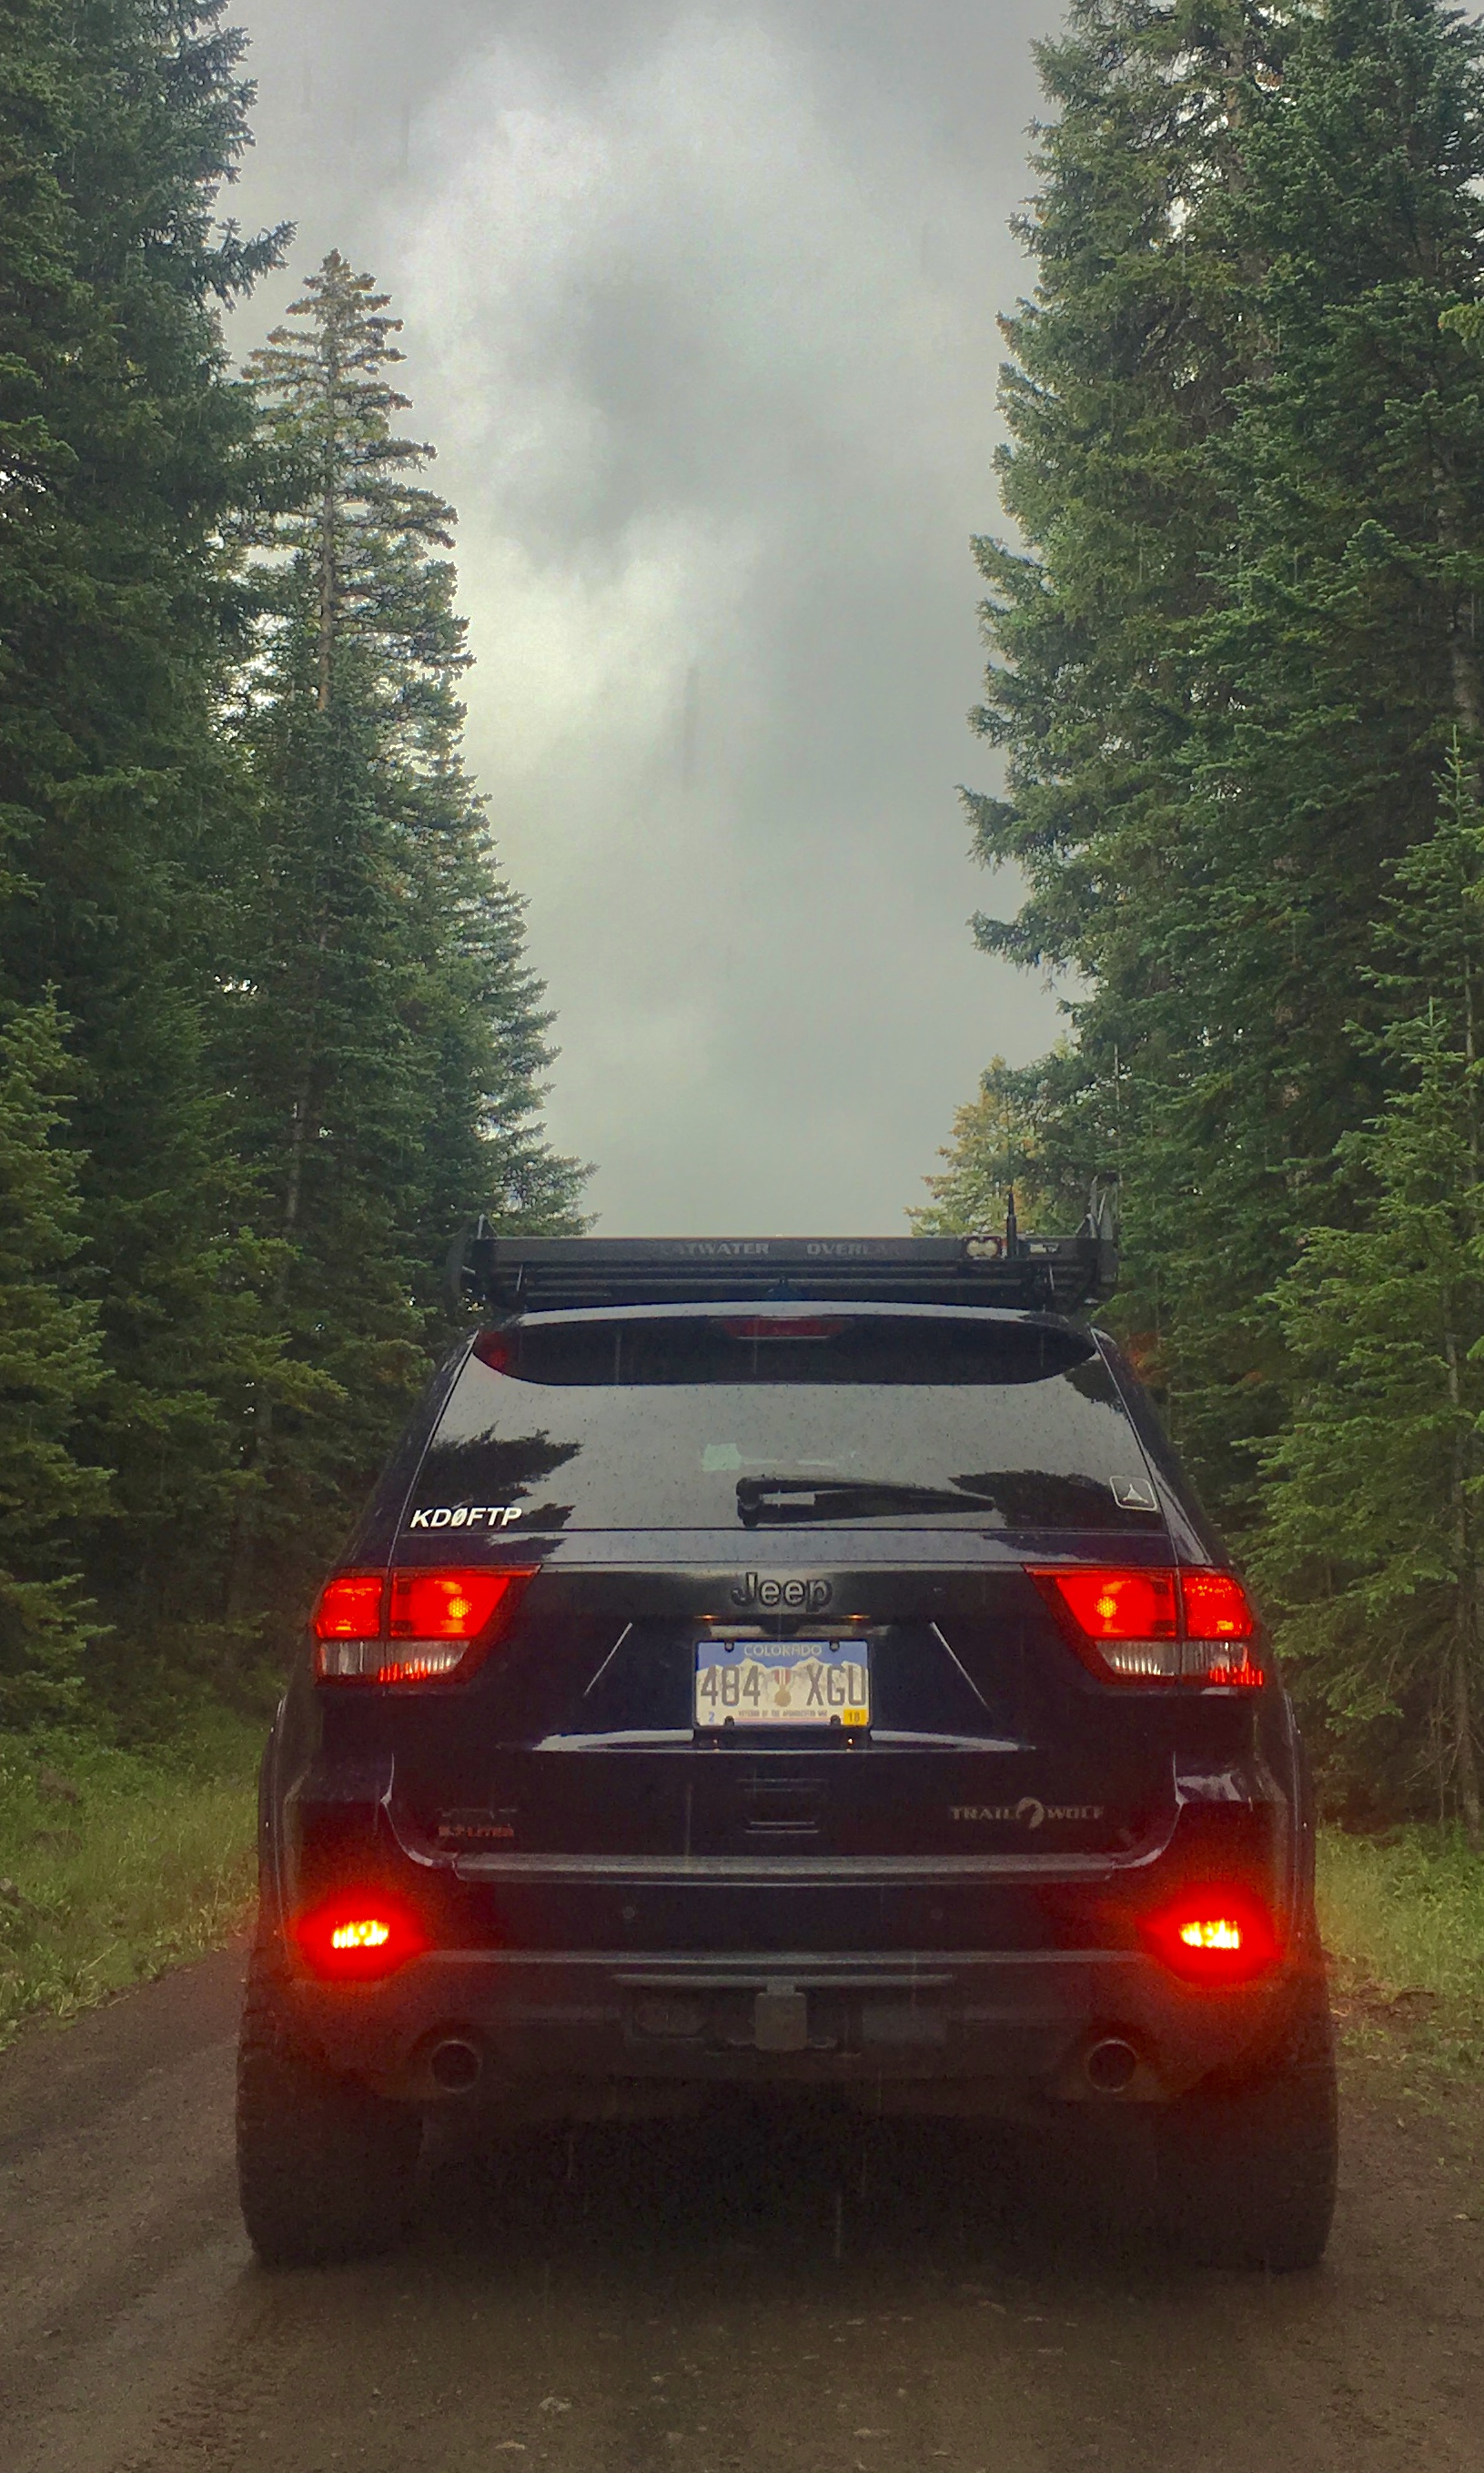
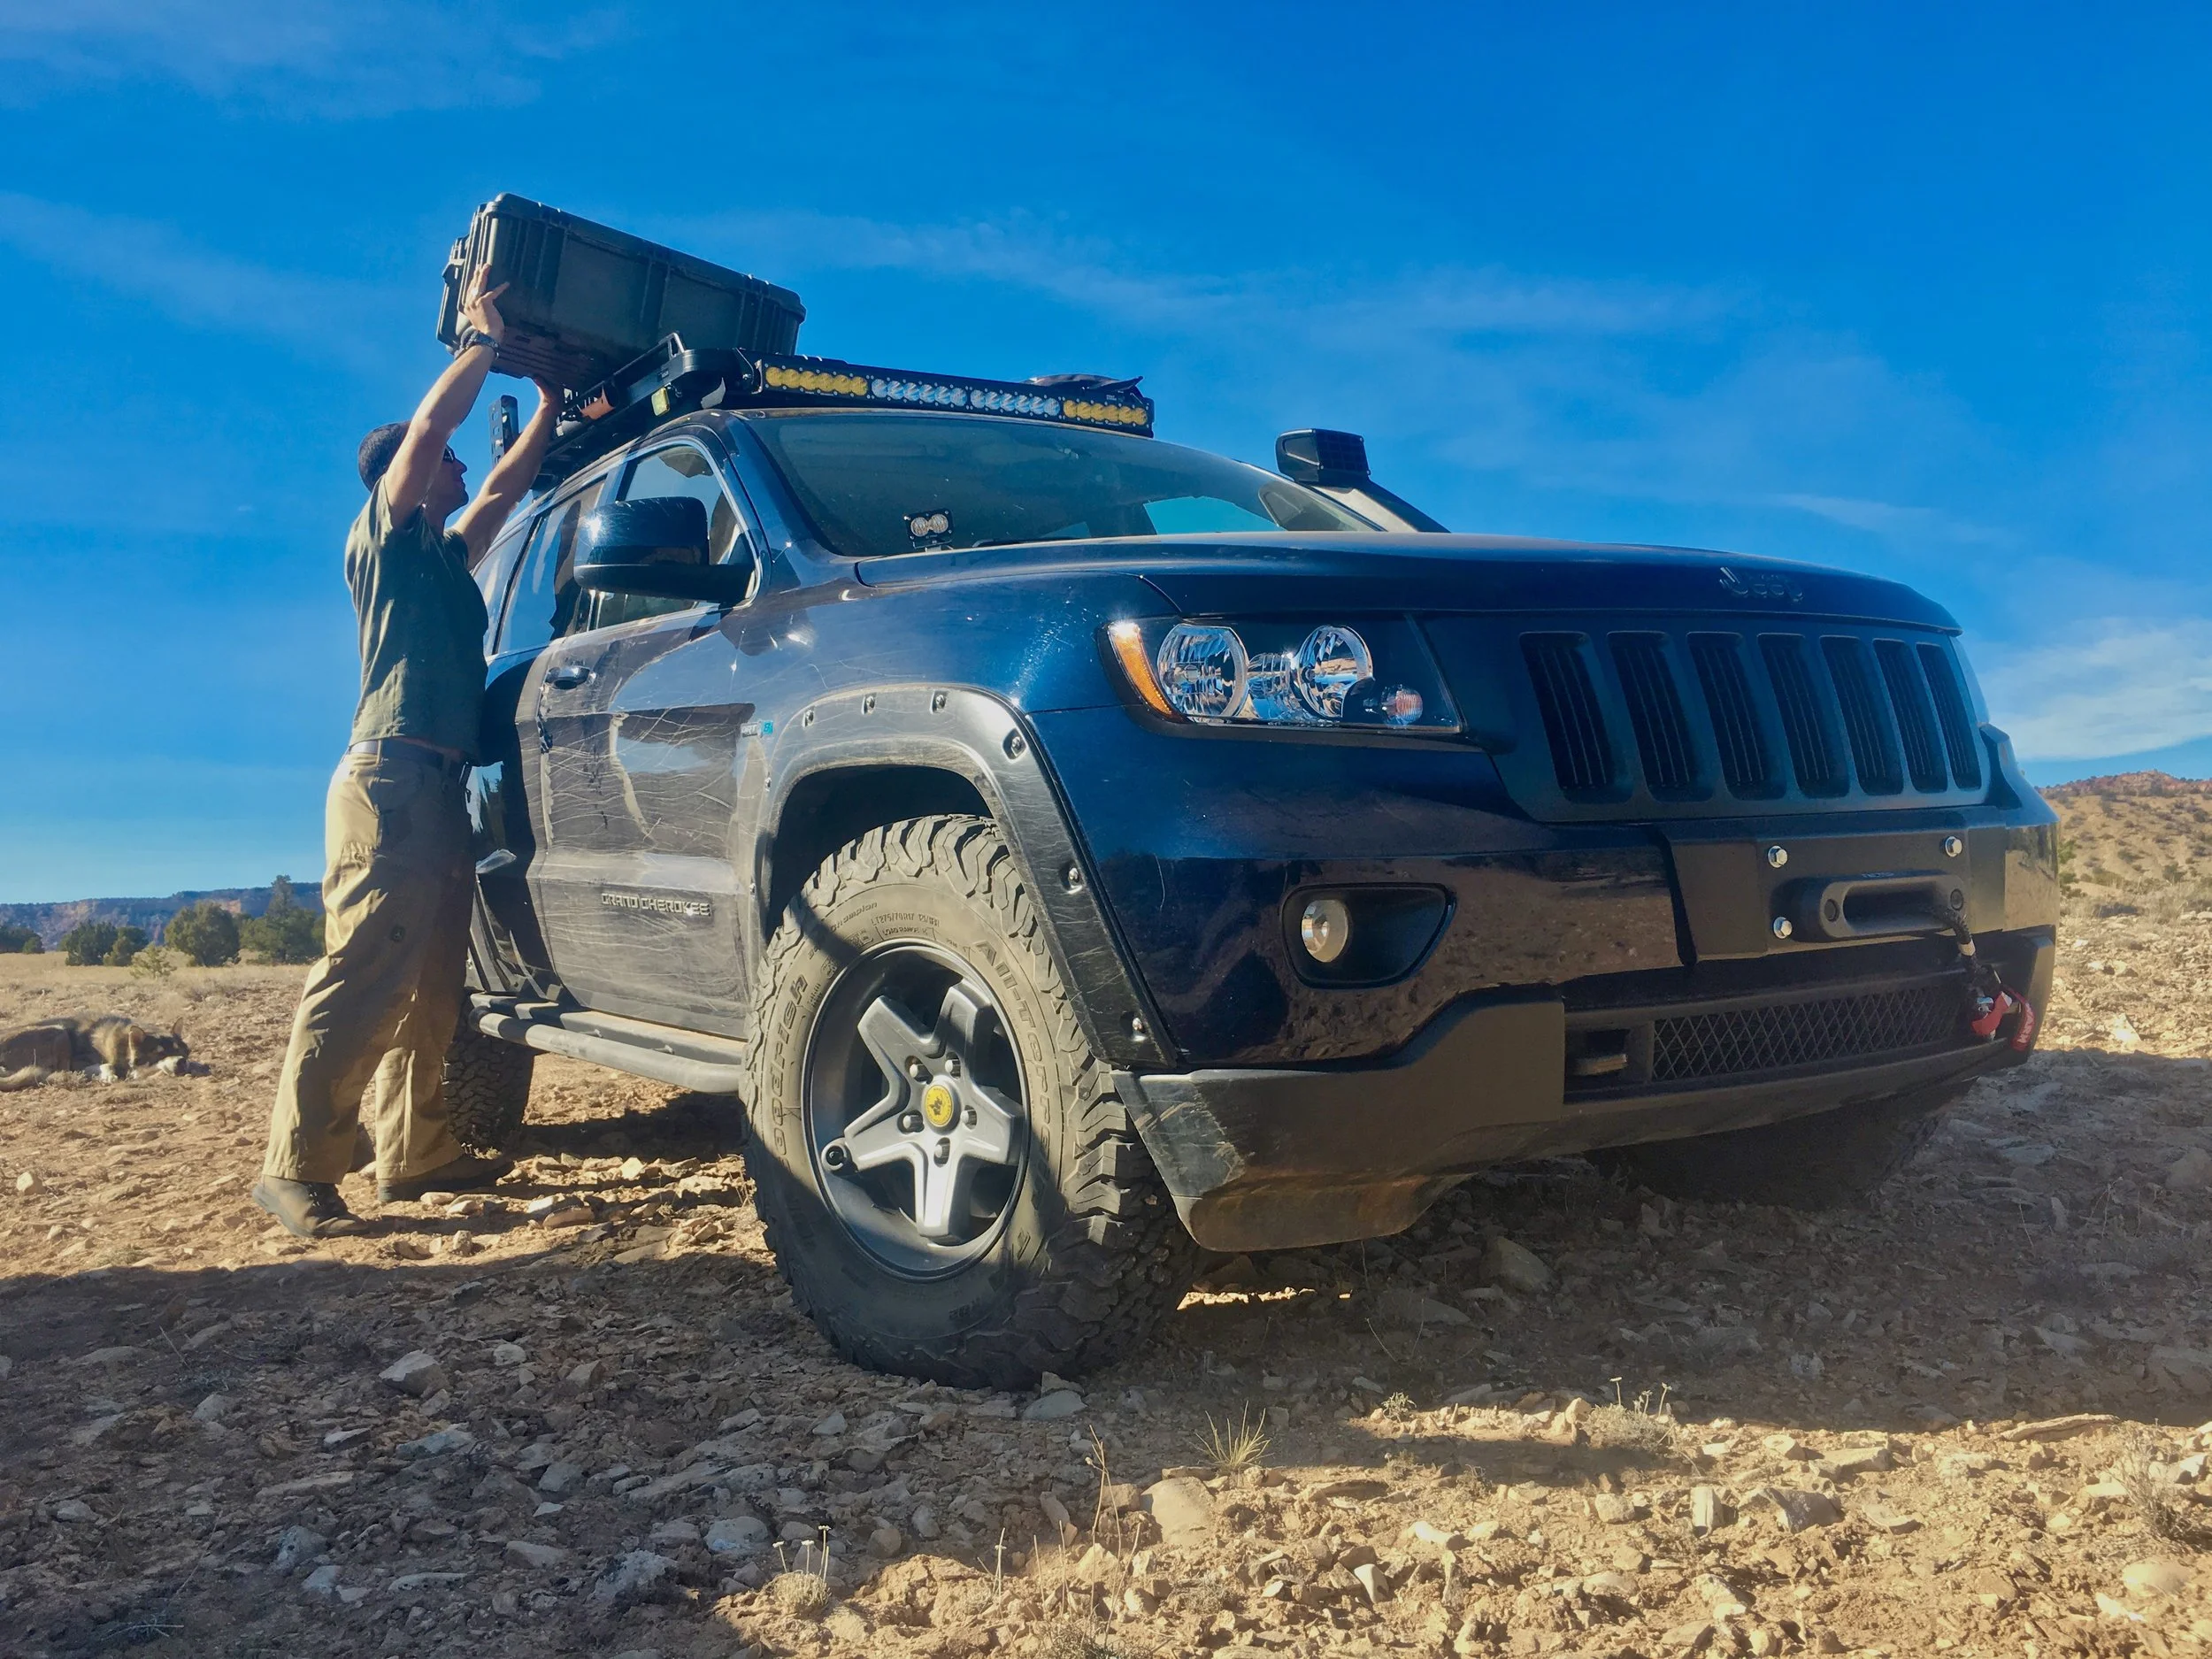
I’m not a huge fan of shiny stuff for the purpose of being shiny. Stainless steel for corrosion resistance is fine, but a de-chrome operation commenced fairly quickly on this Grand Cherokee Laredo X. Like most Grands, it had lots of chrome applique. What could be removed was, some was covered, and others were replaced with Altitude or SRT parts. The body side mouldings were completely removed and replaced with black Altitude “Grand Cherokee” emblems, and currently replaced by 2018+ black “Grand Cherokee” emblems. Some fun “ORT8” badges were placed on the front fenders. A blackout “Hemi” badge was added on the rear liftgate with the custom “Trail Wolf” badge. The custom Trail Wolf and ORT8 badges were made by ReBadge Design. The grille was initially painted matte black along with the tailgate trim panel. The newer chrome covered plastics are extremely difficult to paint, and the paint has a tendency to chip off easily regardless of how its applied. An SRT grille was eventually painted matte black with gunmetal accents and swapped in the front. Of note, the SRT8 grille is not a 100% direct replacement with a Laredo bumper fascia. Some trimming and extra fasteners was required. Altitude headlight housings with blacked inside surfaces were changed out as well.
The custom Trail Wolf badge
A large matte black hood decal made with vinyl vehicle wrap was added by a local sign shop, mainly to minimize glare from the 40” light bar to be installed. Although the hood slopes properly from the driver’s line of sight, this still has proven to be a good choice to add. A couple more cosmetic, but functional additions were Bushwacker fender flares and some hood louvers. The fender flares add a minimal amount of tire coverage, which ended up being about perfect for the AEV Pintler wheels, and certainly make the Grand appear more backcountry than suburban. A recent addition has been some hood louvers. An SRT8 hood was originally in the build plan, but adding louvers is certainly less expensive, and the Trackspec Motorsports louvers will vent more air than the small SRT8 vents- particularly at low trail speeds in the desert.

Modifications-lift and wheels
Modifications-lift and wheels
Suspension and Rolling Stock
Tackling some ledges at Bang’s Canyon ORV area
An ongoing experiment…
It was previously mentioned that a WK2 without the Quadra-Lift suspension was purposely chosen so permanent modifications could be made to the suspension for off road optimization. If you purchased a WK2 with the Quadra-Lift, you cannot effectively modify the suspension for a lift. Sensor links and even add-on controllers are available to trick the drivetrain controllers into lifting the suspension whenever the Jeep is in operation. These modifications are not without risk to the electromechanical systems, and frankly, negate the versatility of a Jeep equipped with Quadra-Lift. It is worth noting that there are modified WK2s out there in the world running up to 35” tires on a Quadra-Lift. The most notable are from Arctic Trucks out of Iceland. This is achieved through extensive custom bodywork combined with high quality custom built fender flares. It could be duplicated if you had the time and resources. The primary reason a standard suspension for modification was chosen is due to the permanent installations that add weight to the vehicle (such as the winch, rack, and future tire carrier), and because the Jeep will be used mostly for off-pavement adventures.
The current suspension configuration has undergone multiple changes, but may be finally finished. The front suspension is fitted with ARB Old Man Emu 3085 heavy rate springs, Bilstein 5100 struts set at the middle position, and Rocky Road upper A-arms. The rear is fitted with ARB Old Man Emu 3060 heavy rate springs and the self-leveling Nivomat towing struts. After trying several configurations, this is likely the final setup as the lift height and spring rate seems to be where I want it. It is possible to get close to 4” of total lift if you Frankenstein your setup on a WK2. It admittedly looks cool, but I ran this kind of setup for a time, and it has the suspension struts nearly topped out in a static running height. It was hard on the half shafts and when on the trail, the suspension would top out and clunk on almost every bump. The ride was also expectedly compromised. Of note is that some aftermarket “extended heavy duty” sway bar links were originally installed, but they did not have ball ends, so the mounting bolts broke on these when crossing Imogene Pass, eventually causing front half shaft damage. Those links also required frequent greasing and maintenance. Any lift that can reasonably be installed on a WK2 will still be within the original suspension operating parameters, so extended links are simply not necessary for a lift to function. Heavy use in rough terrain can certainly wear or break the factory link hardware at an accelerated pace, but they are not very expensive to replace, and do not require upgrade in my opinion.
An old adage is that “the only true lift in a 4x4 comes with tires”. Larger diameter tires are the only way that true ground clearance beneath the axles is achieved. Suspension lifts primarily provide clearance for larger tires, but can also assist in creating chassis clearance from trail obstacles, increasing the critical approach, departure, and breakover angles. Ultimate tire size on a WK2 is an issue. It is reasonable to only expect a 33” diameter tire fully functional on a WK2 regardless of suspension lift configuration. In stock form, a 265 mm wide tire in various wheel configurations is the largest fitted. This should be considered the optimum size for all WK2s. With certain wheel offsets and backspacing, a 275 mm tire can be ran with minimal rubbing of inner fenders. A 285 mm tire (such as a 285/70 R17 which is a true 33 inch tire) is possible with proper wheels, a lift, and some trimming in the front fenders.
The Trail Wolf is currently running the 285 tire. For this to work with the wheel and tire combo, it required the “pinch weld mod” and some trimming of the bumper plastic and modification of the Bushwacker flares. This involved cutting a thin pie shape from the flare and putting back together with a plastic welder. New hardware and rivet nuts were also used in the modification to reattach the fender flares.
It’s worth mentioning that to run tires this size on previous generation Grand Cherokee models required 4-6 inches of suspension lift and some fender cutting as well. A point of fact is that MOPAR featured an orange diesel WK2 at Moab in 2013 called the “Trailhawk 2” which featured 35” equivalent tires purportedly fitted with significant fender cutting and custom flares. A tire this size would obviously create some fuel consumption and drivability issues for regular use unless it became possible to regear the differentials. This is still not an option in 2022.
The Flatwater WK2 has been fitted with AEV (American Expedition Vehicles) Pintler wheels in the Argent colorway. (the metallic grey “Argent” color is no longer available) These wheels are meant for the JK Jeep Wrangler, but fit well on the WK2 with splined lug nuts. They have +10mm positive offset and added width at 8.5” overall, but still sit nearly perfectly under the Jeep. Wrangler JL wheels have a shallower offset and may be a better fit, but this is not independently confirmed on my part. Tires have been upgraded to 285/70 R17 BF Goodrich A/T KO2. These have been great all-around tires, but do have limitations. Fender and fender flare trimming as well as the “pinch weld mod” were requried to eliminate rubbing at full lock and suspension travel as described above.

Moddifications-electrical
Moddifications-electrical
Electrical and Lighting
The most extensive modifications…
Out of all the additions and modifications, the lighting and electrical upgrades have proven to be the most time consuming. If you spend a lot of time in the backcountry (or even just on lonely back roads), appropriate lighting is actually a safety issue. The lighting configuration chosen for the Trail Wolf WK2 is based on personal needs and experiences. Below, I will detail why this setup was chosen, but I want to be up front that it is personal and certainly may not reflect anyone else’s perfect setup. Something else worth mentioning up front is that if your vehicle is almost always used on road, spending any money on auxiliary lighting is really a waste. Most aftermarket lighting is not legal almost everywhere to use on public roads. Doing so isn’t just a selfish violation, they can cause very real hazards to other drivers. So, please don’t be “that guy” running his light bar on around town.
Before we dive into all the specifics here, it’s worthwhile to mention that not only is it important to choose lighting that is quality and fits your particular needs, the installation is probably more important. Substandard amateur wiring is a good way to cause damage, or even a total vehicle burnout, and poor placement and aiming of lights makes them ineffective at best, dangerous at worst. Also, not all lighting is created equal. That may be common sense, but understand what you are buying. There are major differences in build quality, real world output, optics, and operating characteristics with aftermarket lighting. Don’t kid yourself that a $120 LED light bar made by communist slave labor in Asia is “the exact same thing” as a USA made $1500 light bar of a similar outward appearance. It may be a viable alternative for you, but it’s NOT THE SAME. Yes, even if it looks the same, it’s not. Not ALL of the LED pods and bars are made in China, so it does potentially matter what you buy. Amazon and Ebay are absolutely teeming with cheap, substandard ripoffs of Rigid Industries, Vision X, and Baja Designs products. There are multiple reasons why, but that subject deserves its own article.
Factory Lighting: There were some modifications to the Jeep done even in regards to OEM lighting. It was mentioned earlier that Altitude model headlamp housings were swapped in. This was purely cosmetic in order to have a blacked out housing instead of chromed. However, aftermarket halogens were installed. The low beams were equipped with low frequency (2300K) bulbs and the high beams with a neutral white (3600K) high output. Halogens were retained in the housing mainly because that is what these particular 2012 housings were designed for, and so that the lenses would be self-clearing of ice and snow. The low beams appear quite yellow. This is purposeful as I live on the western slope of Colorado, and it is not uncommon to encounter weather with blowing dust, snow, and fog. The lower frequency low beams glare noticeably less and illuminate the near field better. Low frequency bulbs were also originally installed in the OEM fog lights, but there are now Baja Designs Squadron Sports in the fog pockets with yellow lenses. Courtesy light bulbs throughout the interior were replaced with higher output LEDs as well as the reverse lights. This is an easy upgrade for more lumens without a higher power draw or the need for additional fixtures.
The MOPAR rear fog light kit was installed in place of the plain reflectors in the rear bumper. The harness required some extensive labor to install through the vehicle, but they switch in line with the OEM fog light circuit as they should. There are aftermarket kits out there which turn these housings into additional tail lights, but I was not interested in that. I prefer to have rear fog/dust lights. They are activated by a relay controlled by the front fog lamp circuit.
Previously mentioned was the low frequency fog lamp bulb additions. In practice, the difference between fog and driving lights is optics. Fog lamps are meant to illuminate the near, wide field of vision in bad weather conditions while driving lamps are focused for longer distance road surface illumination. I was more interested in fog performance. Since installing the Baja Designs Squadron Pro lights, I have the best of both worlds. On the early WK2, 2011-2013, the OEM fog lamps are nearly identical to what is found on the JK Wrangler. This allows for using a “JK Fog Pocket Kit” to mount the Baja Designs lamps securely in the factory spot. (The fog pocket kit does not seem to be available separately anymore. Contact Baja Designs customer service if you want to customize the order) The sizing and shape of the Squadron lamps is perfect for the OEM location. They draw less current than the OEM fogs, so no circuit changes beyond the light connectors are necessary. Baja Designs lights, including all their LED products are truly American Made. They are also user serviceable which allows for swapping out different lenses in the housings appropriate for changing use if necessary. Their customer service and warranty is also second to none. The only downside to the Squadron Pros now in the fog pockets is their incredible output. Each pod emits a real world 4900LM/76,194CD. This is almost twice the output of both headlights from one pod! Obviously, too bright to use in traffic. A “downgrade” to Squadron Sports has since been done. These produce 3150LM each. Still extremely bright, but more suitable to road use. Baja Designs now has SAE rated Squadrons for legal fog lamp use and installation kits for many vehicles.
Auxiliary Lighting: Extra lighting is as ubiquitous on 4x4s as large, knobby tires. It’s not always necessary or useful. I prefer to have extra light when driving deep in the backcountry, or even on a lonely county road. Where I grew up and also now live, animal strikes at night are an important issue. Preventing these impacts can be as simple as being able to see the critter in time. Besides, who doesn’t like to see as much as possible when you are off road at night!
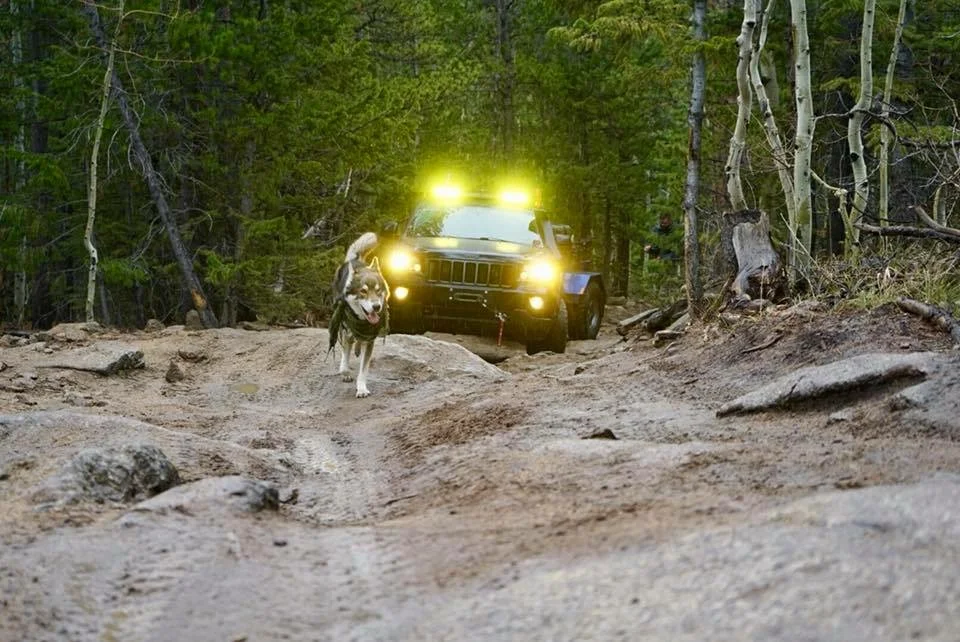
I found that having DITCH LIGHTS- auxiliary lights that illuminate areas to the sides of where the vehicle headlights reach- can nearly eliminate strikes and close calls. Since testing the configuration on my second Wrangler over a decade ago, every one of my vehicles gets ditch lights installed. Ditch lights are best mounted above the headlights and pointed in such a way that they illuminate the areas to the left and right of the headlights. This should include the ditch areas. The Ditch Lights on the WK2 are Baja Designs S2 Pro pods with the Wide Cornering lenses. These tiny pods produce 2,450LM at 24 watts! The pods are wired in a custom harness to automatically activate when the headlight high beams are activated. This prevents accidentally blinding oncoming drivers in traffic. The S2 pods were mounted on aluminum brackets from Shield Productions.
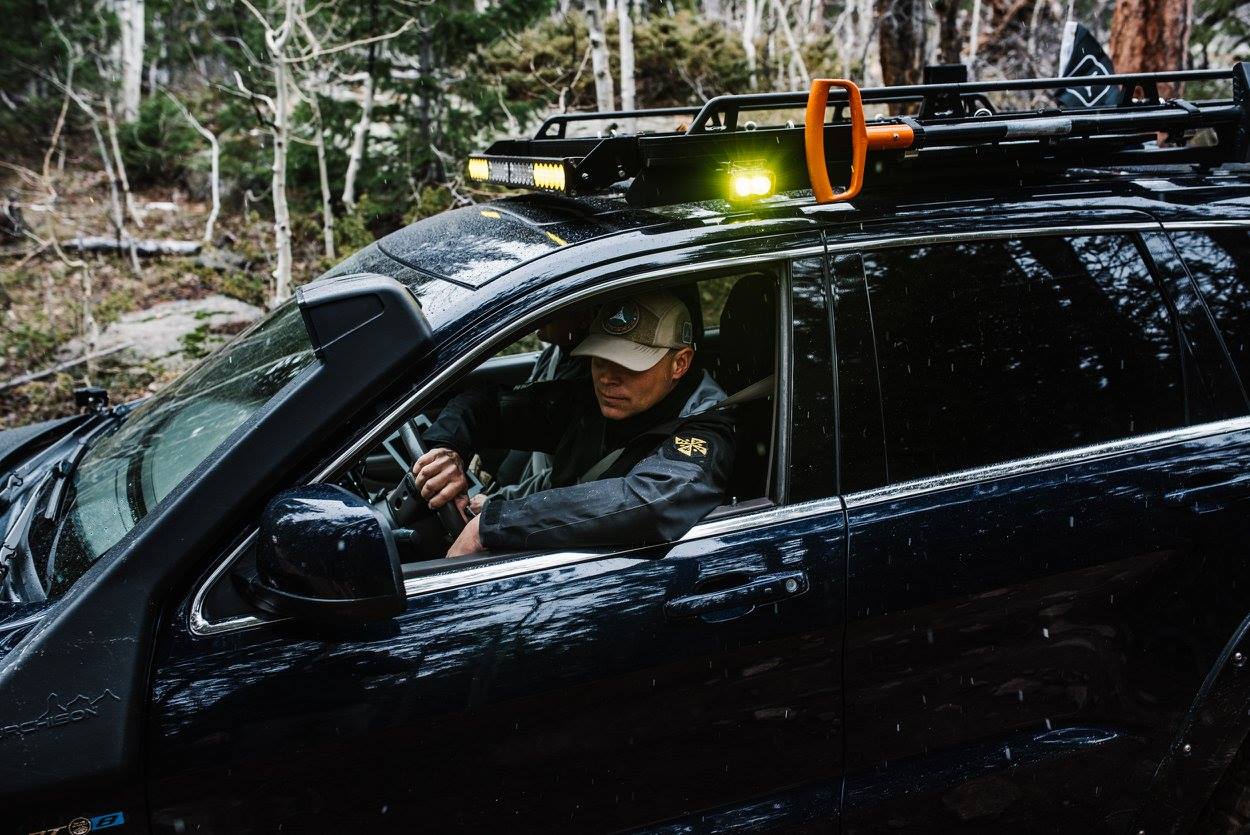
The notorious LED LIGHT BAR- was not an easy decision. I was long reticent about installing such things as I had been very unimpressed with their performance as not fond of the aesthetics they created. I tested out the concept on another Jeep with a cheap dual purpose light bar, and it seemed to be sound if one could have dual use for low speed/bad weather and also for long range high speed coupled with sufficient output. The only light bar I found that fit my requirements was the Baja Designs ONX6 with dual control. This is not an inexpensive piece by any stretch, but the overall quality of Baja Designs is without question. The bar produces a total of 29,400LM at 234W and 20A current (although in my setup, only half of the bar will be active at any time). The 40” ONX6 was employed with somewhat complex wiring. The bar as a whole can be shut down completely, but the amber sections (storm lights) can be controlled with the fog lamp circuit while the white center sections can be conversely activated with the headlamp high beams as desired. The “Storm Lights” are a combination of lights on the Jeep that illuminate the near field perimeter of the vehicle for safer operation in extreme weather. Activating the storm lights circuit will turn on the 2 amber sections of the 40” light bar, two additional side facing Baja Designs S2Pro pods on the roof rack, as well as the fog lights and headlight low beams. The “Trail Lights” is a combination of the center white sections of the light bar as well as the ditch lights and the headlight high beams. Although I did not wire it in this manner, each control circuit of the ONX6 Dual control has a third wire; when connected and switched dims the connected banks of LEDs. I simply didn’t require this function.
Additional off road lighting included a rear facing “Camp Light” that helps with a rear area illumination. It proves useful for more than setting up a campsite at night in the backcountry. This is another Baja Designs S2 pod mounted on a custom bracket off the roof rack. Lastly, some low profile LED rock lights were placed around the underneath of the Grand for those after dark trail rides. The rock lights are truthfully more useful to a spotter as wheel visibility on a WK2 is no where near as direct as when driving a Wrangler.
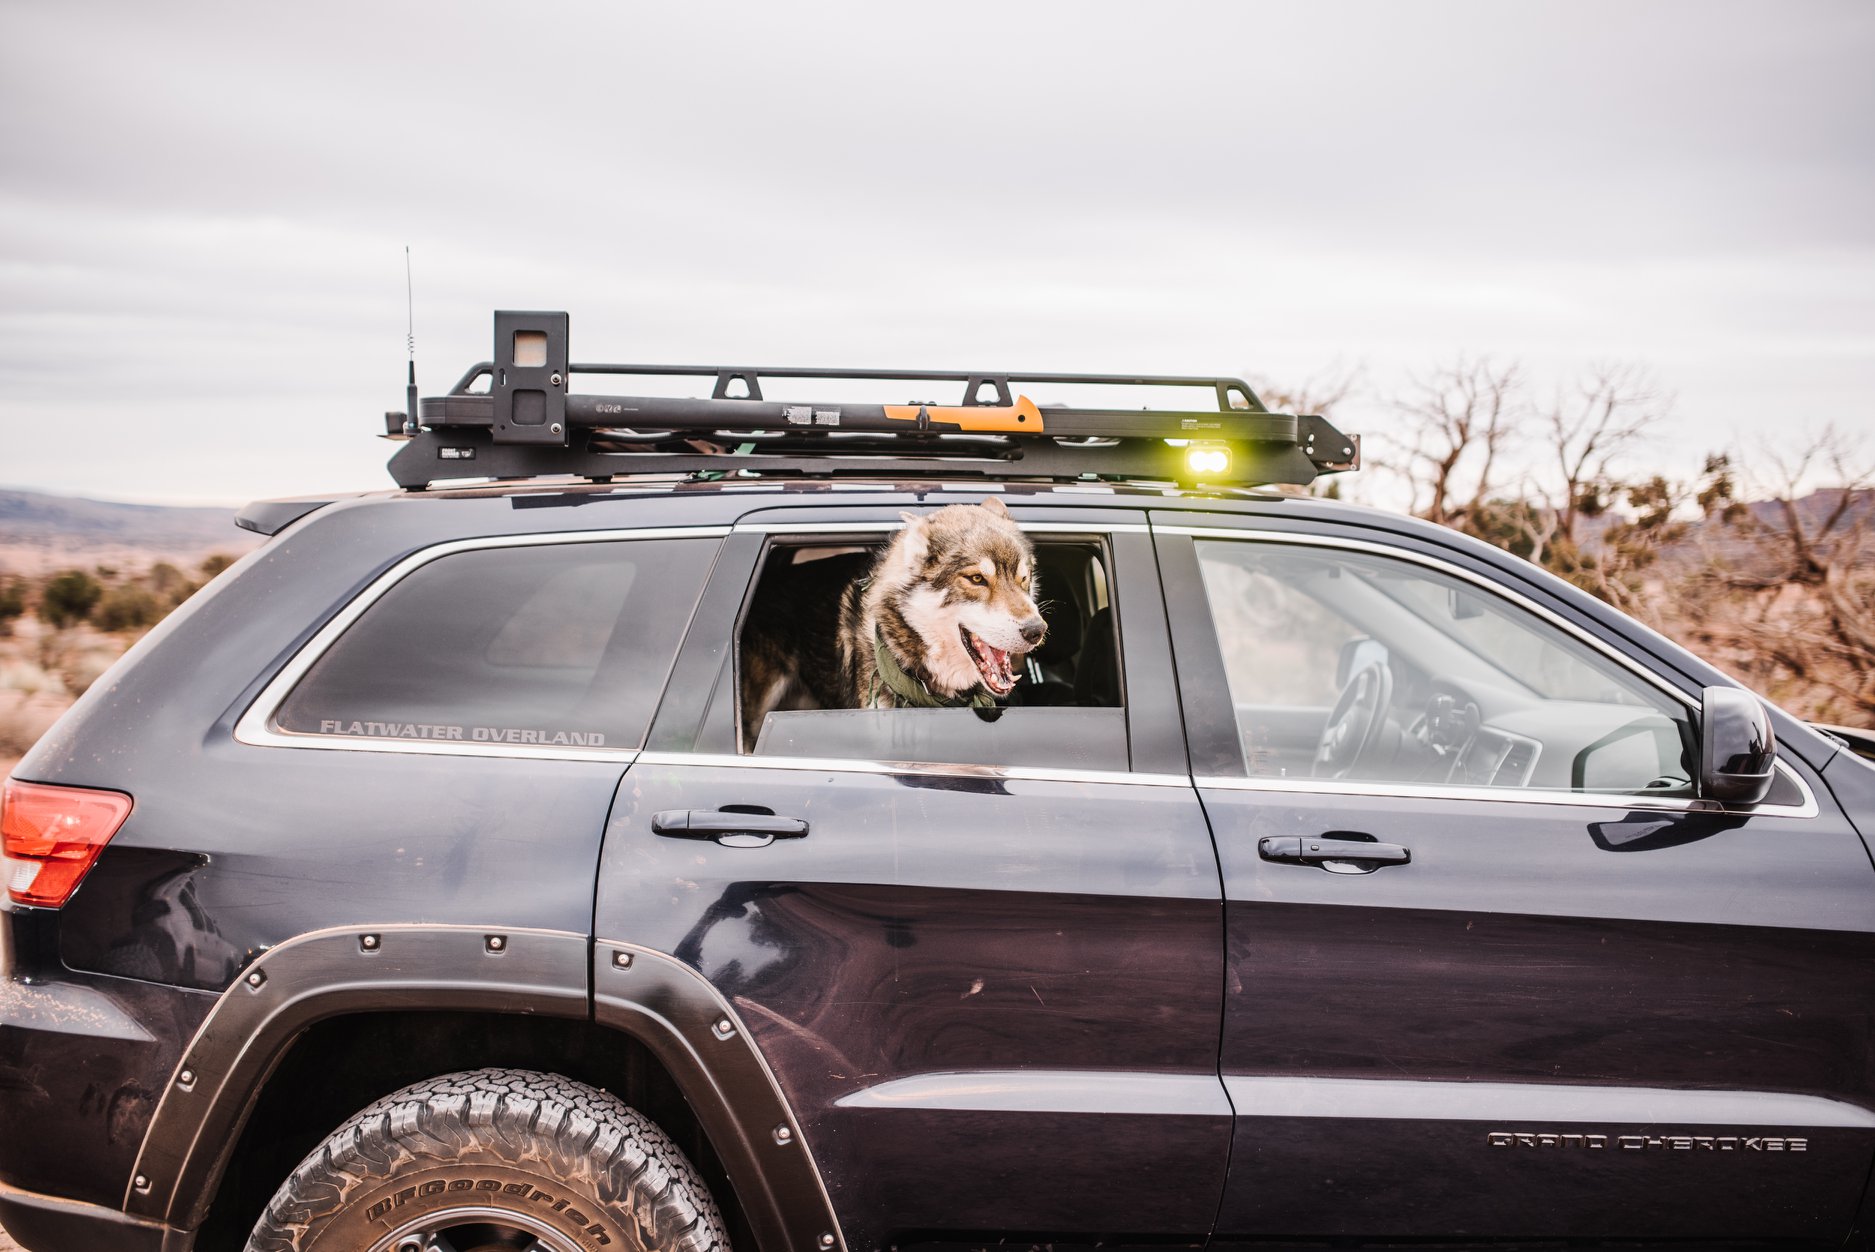

Communication: For overland communications, a HAM radio is truly best. CB’s (legally employed) are limited in range and affected by terrain and weather easily. On flat ground, a 40W 2M transceiver can get you about 50 mile range. Using repeaters and networks, range is nearly unlimited. Not to mention internet linking and APRS capabilities of modern amateur radios. Flatwater team members have FCC licensing and utilize Ham radios exclusively. CBs are fine for club trail rides, some highway use, and the like, but not terribly useful otherwise for long distance communication or data transfer. A Yaesu FTM-400DR is currently installed in the Trail Wolf. It is a fully digital radio with built-in APRS capabilities and a true dual band transceiver. It can also transmit data beyond just APRS location and station information. If communicating with other Yaesu radios with digital capabilities, even digital photographs can be taken, transmitted, and displayed as well as saved on removable memory. The FTM-400 is a remote mount radio. This means the control head/display and the transceiver portion are separate units and can be installed apart. I have the control head mounted to the dash on the right side of the steering wheel on a Kuda mount. The transceiver is mounted on the lid of the electronics bin under the driver’s seat. I also ran an audio cable from the transceiver through the console and up to the stereo head unit. This allows me to run the radio audio through the car stereo when operating. I first used this setup in my Wrangler out of necessity, but it is still a great way to go. The antenna is mounted on a custom bracket on the right rear of the Frontrunner roof rack with the camp light. A spare antenna is also carried. Typically a longer whip with higher gain for use in the backcountry. A stubby is usually attached when running around town.
Electrical Infrastructure: Perhaps more important than what light housings are used is how the custom wiring and other electrical infrastructure is installed in a vehicle. Poor wiring components and installation can easily lead to disaster in an overland vehicle. Since the WK2 comes from the factory with an AGM battery and a 180 amp alternator, little is needed in the power production department. A dual battery setup with an IBS controller is in the works for the Trail Wolf, but not yet installed. More to come on that.
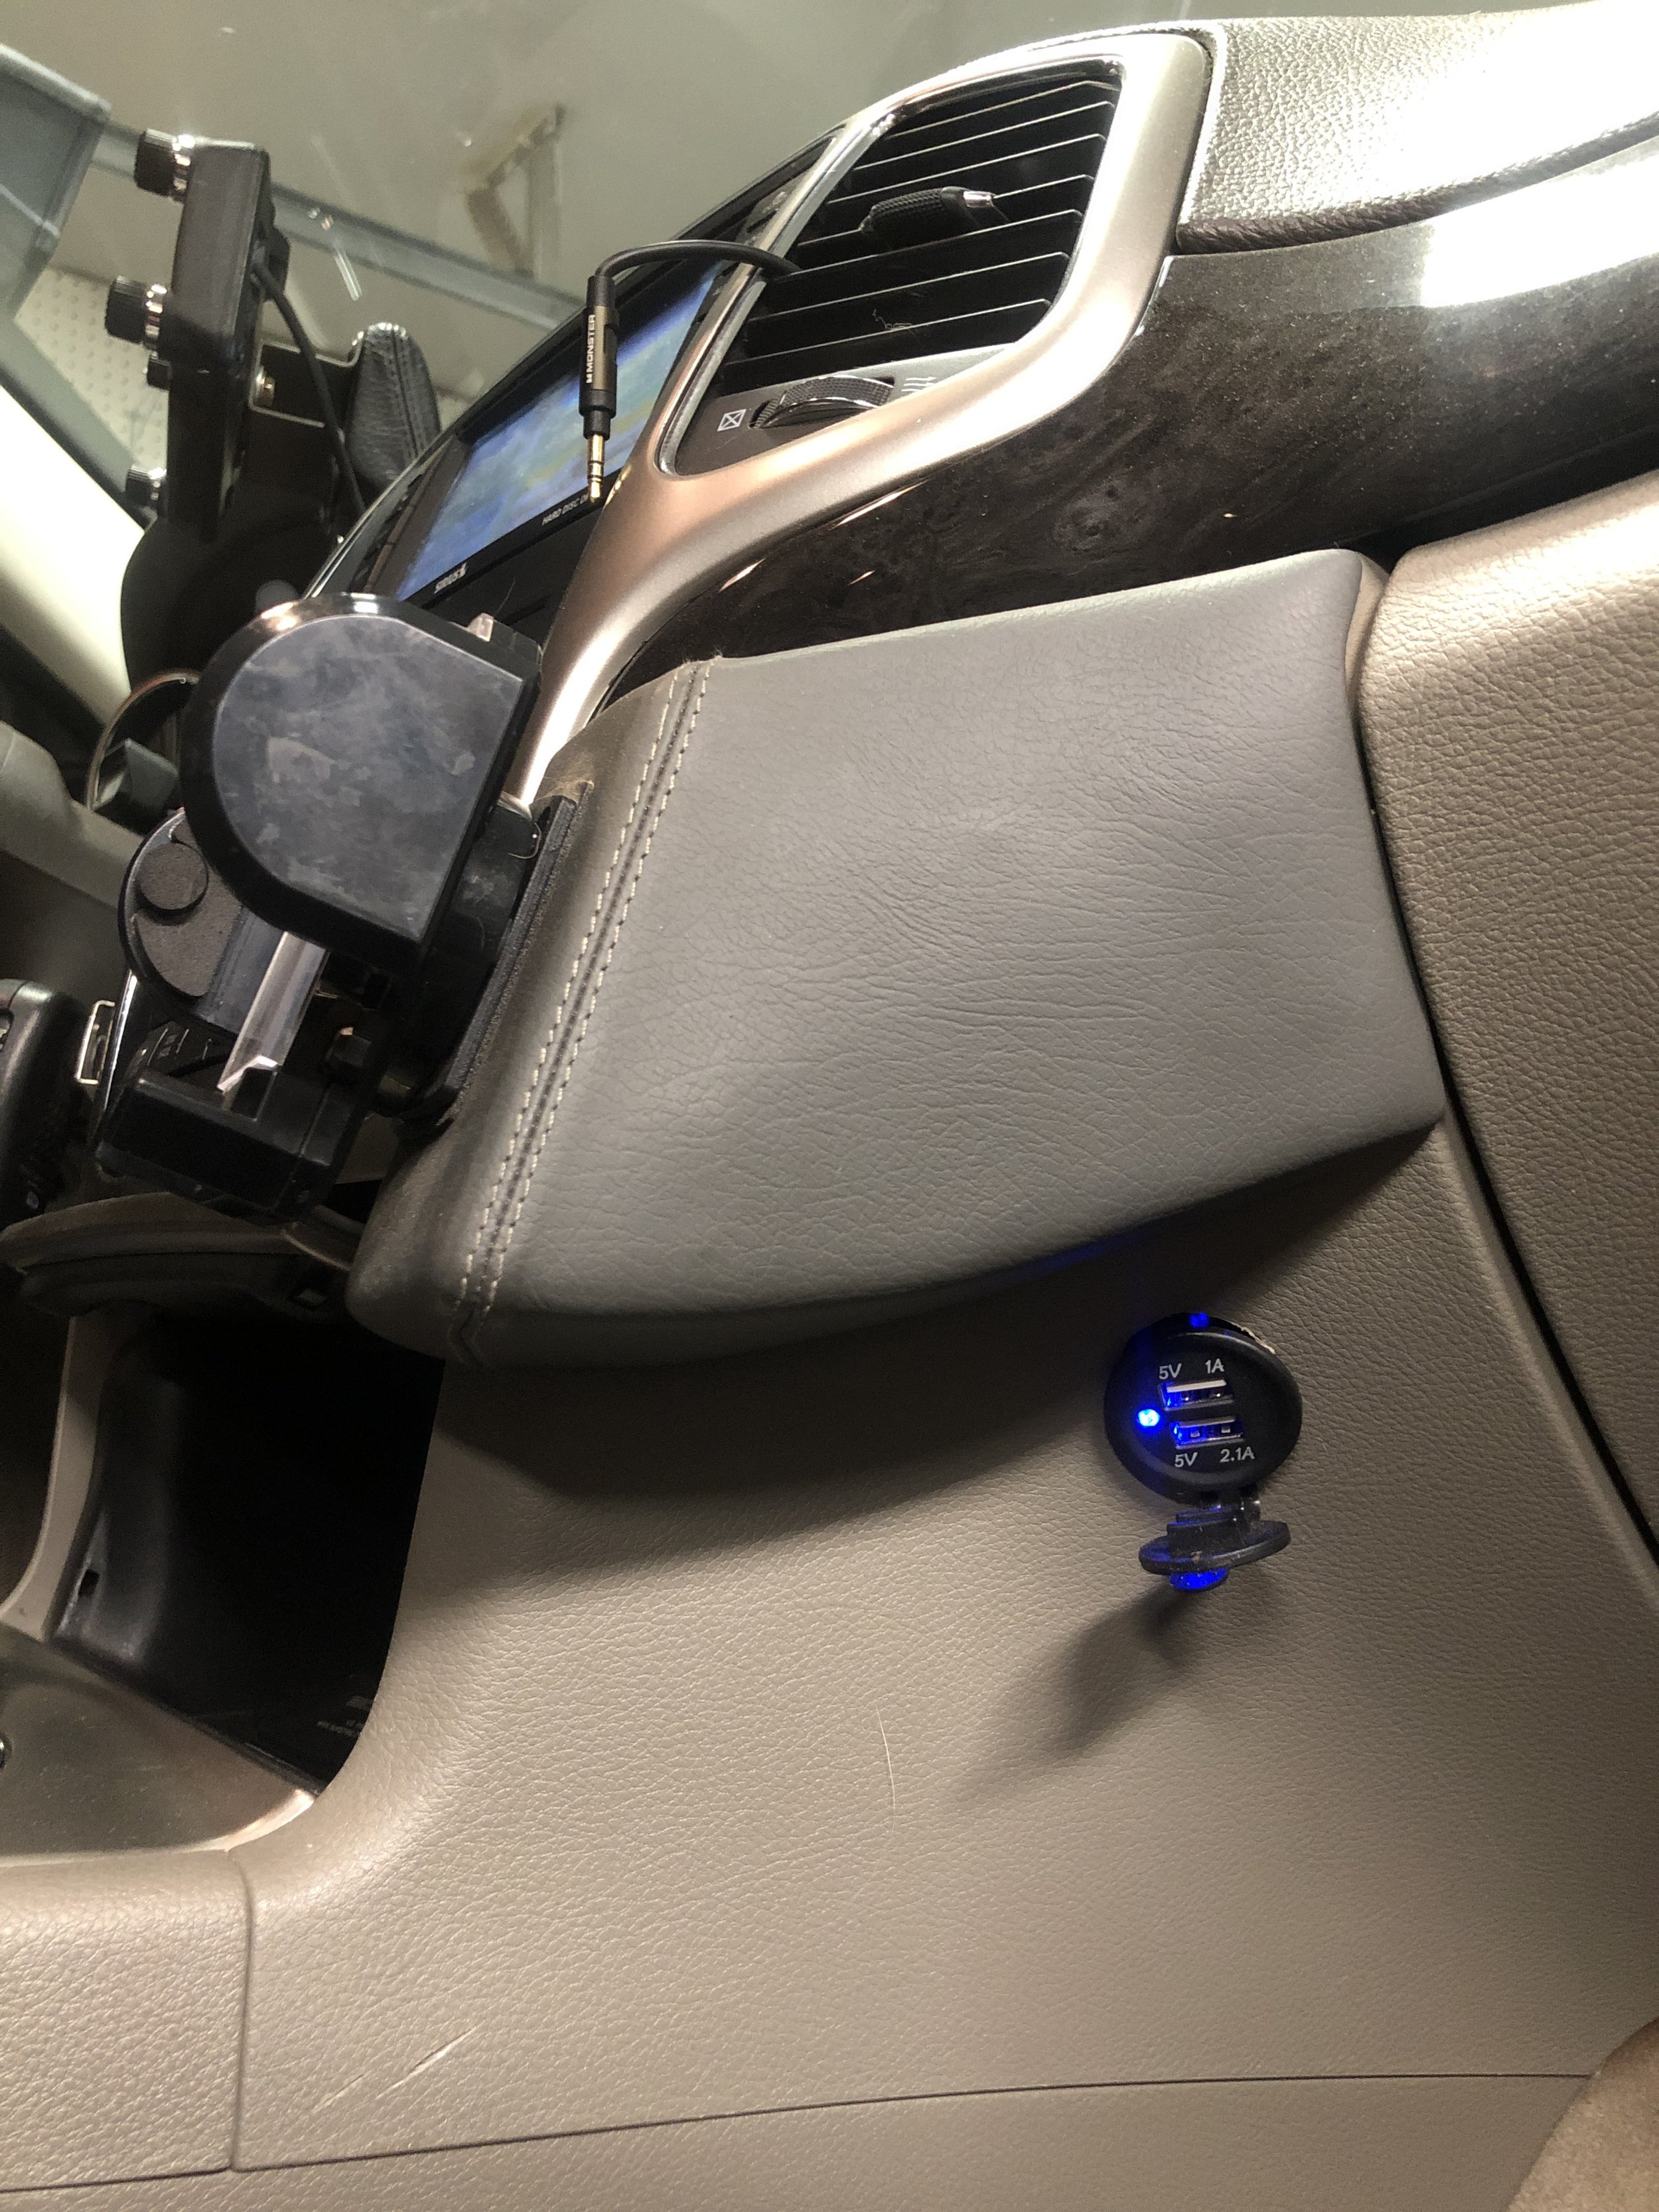
The major addition was an auxiliary fuse and relay block. Some relays had to be mounted in the engine compartment, but most of the fuses and control relays were ran through a recycled 2000 F-150 auxiliary block mounted in the bin below the driver’s seat. If you have a WK2 with the Quadra-Lift system or other luxury components, it is likely this bin will already be filled with computers or relays. A supplemental dual USB power port was installed on the right hand of the dash/console area below the Kuda cell phone mount.
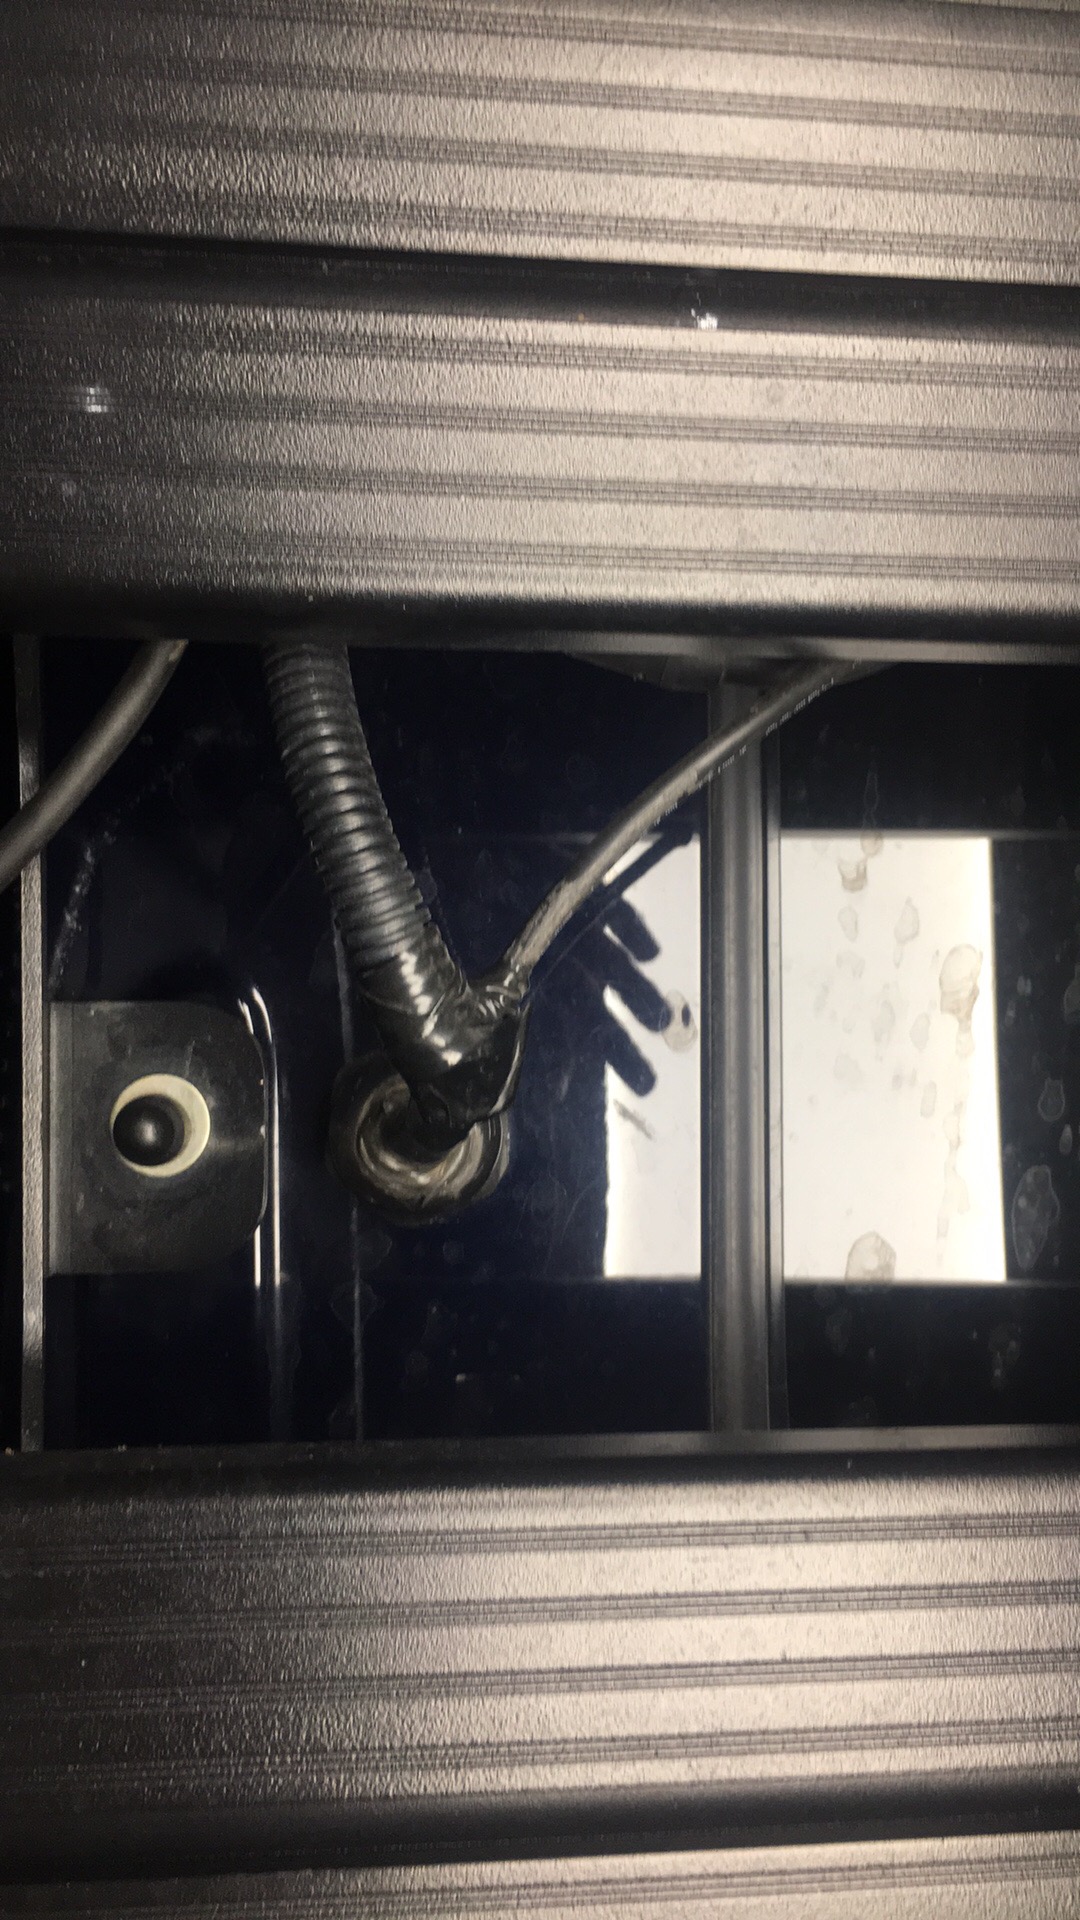
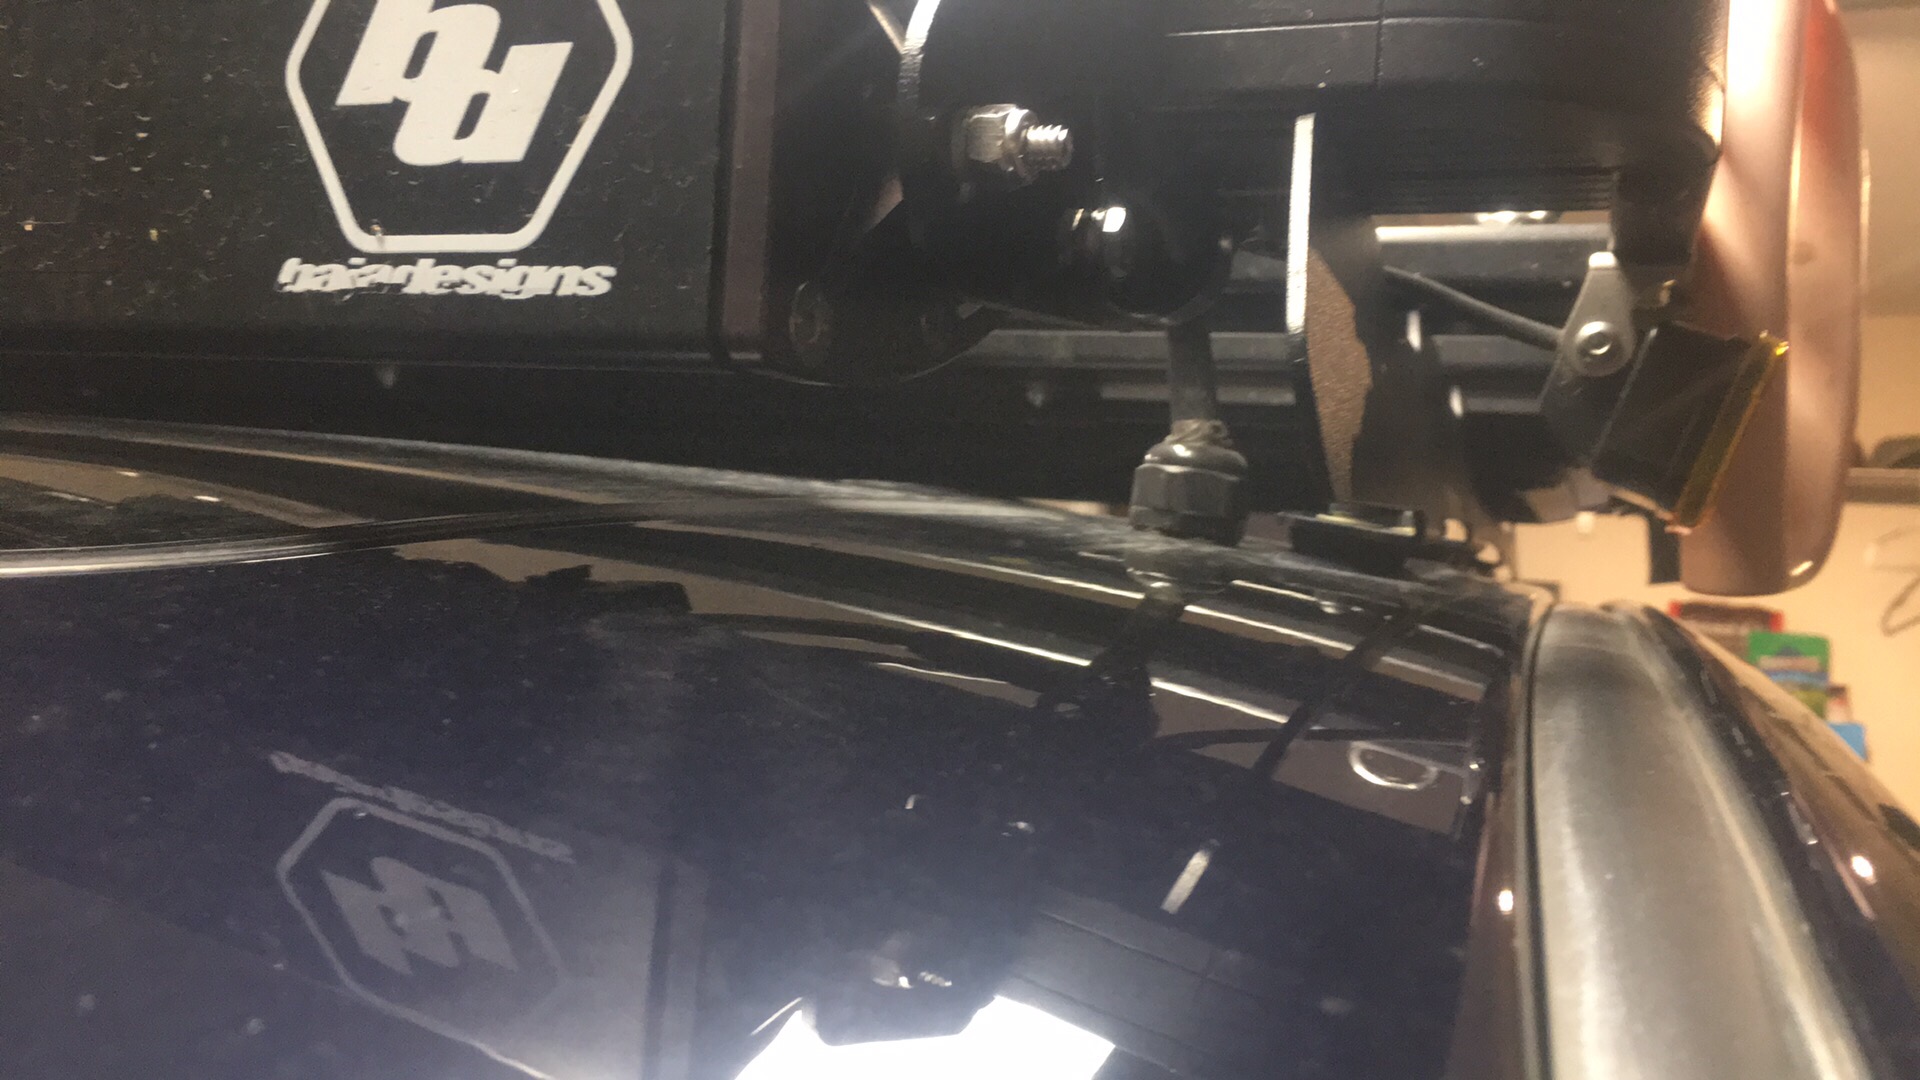
Installing all of the roof rack mounted lights created an issue- how to run the harnesses through to the rack. Everything on this Jeep is a permanent mount, so I decided to use a weatherproof bulkhead connector and cut a hole in the roof. I had used a similar method on the white WK with an antenna bracket from a Honda to good success. The WK2 was going to have significantly more wires passing to the roof, so a watertight bulkhead fitting (also called a cable gland) was used as well as a liberal application of RTV sealant in the connector. This was difficult to install as the roof in the area to pass through is still in multiple layers of unibody which required removing many interior panels as well as partial removal of the one-piece headliner in order to drill out the connector mounting hole. All the panels were left loose until all wires for the custom roof harness were completely ran and the bulkhead connector finally sealed. After a couple years of overland use, no leaks have yet to appear.
The next major additions to the infrastructure will be a second battery in the spare tire well. The custom swing-away tire carrier build will open up that space for storage and the extra power system for connecting the Ute overland trailer and running accessories. This is a near-term project as the new overland/camp/adventure trailer is finally nearing completion. More to come on that project.
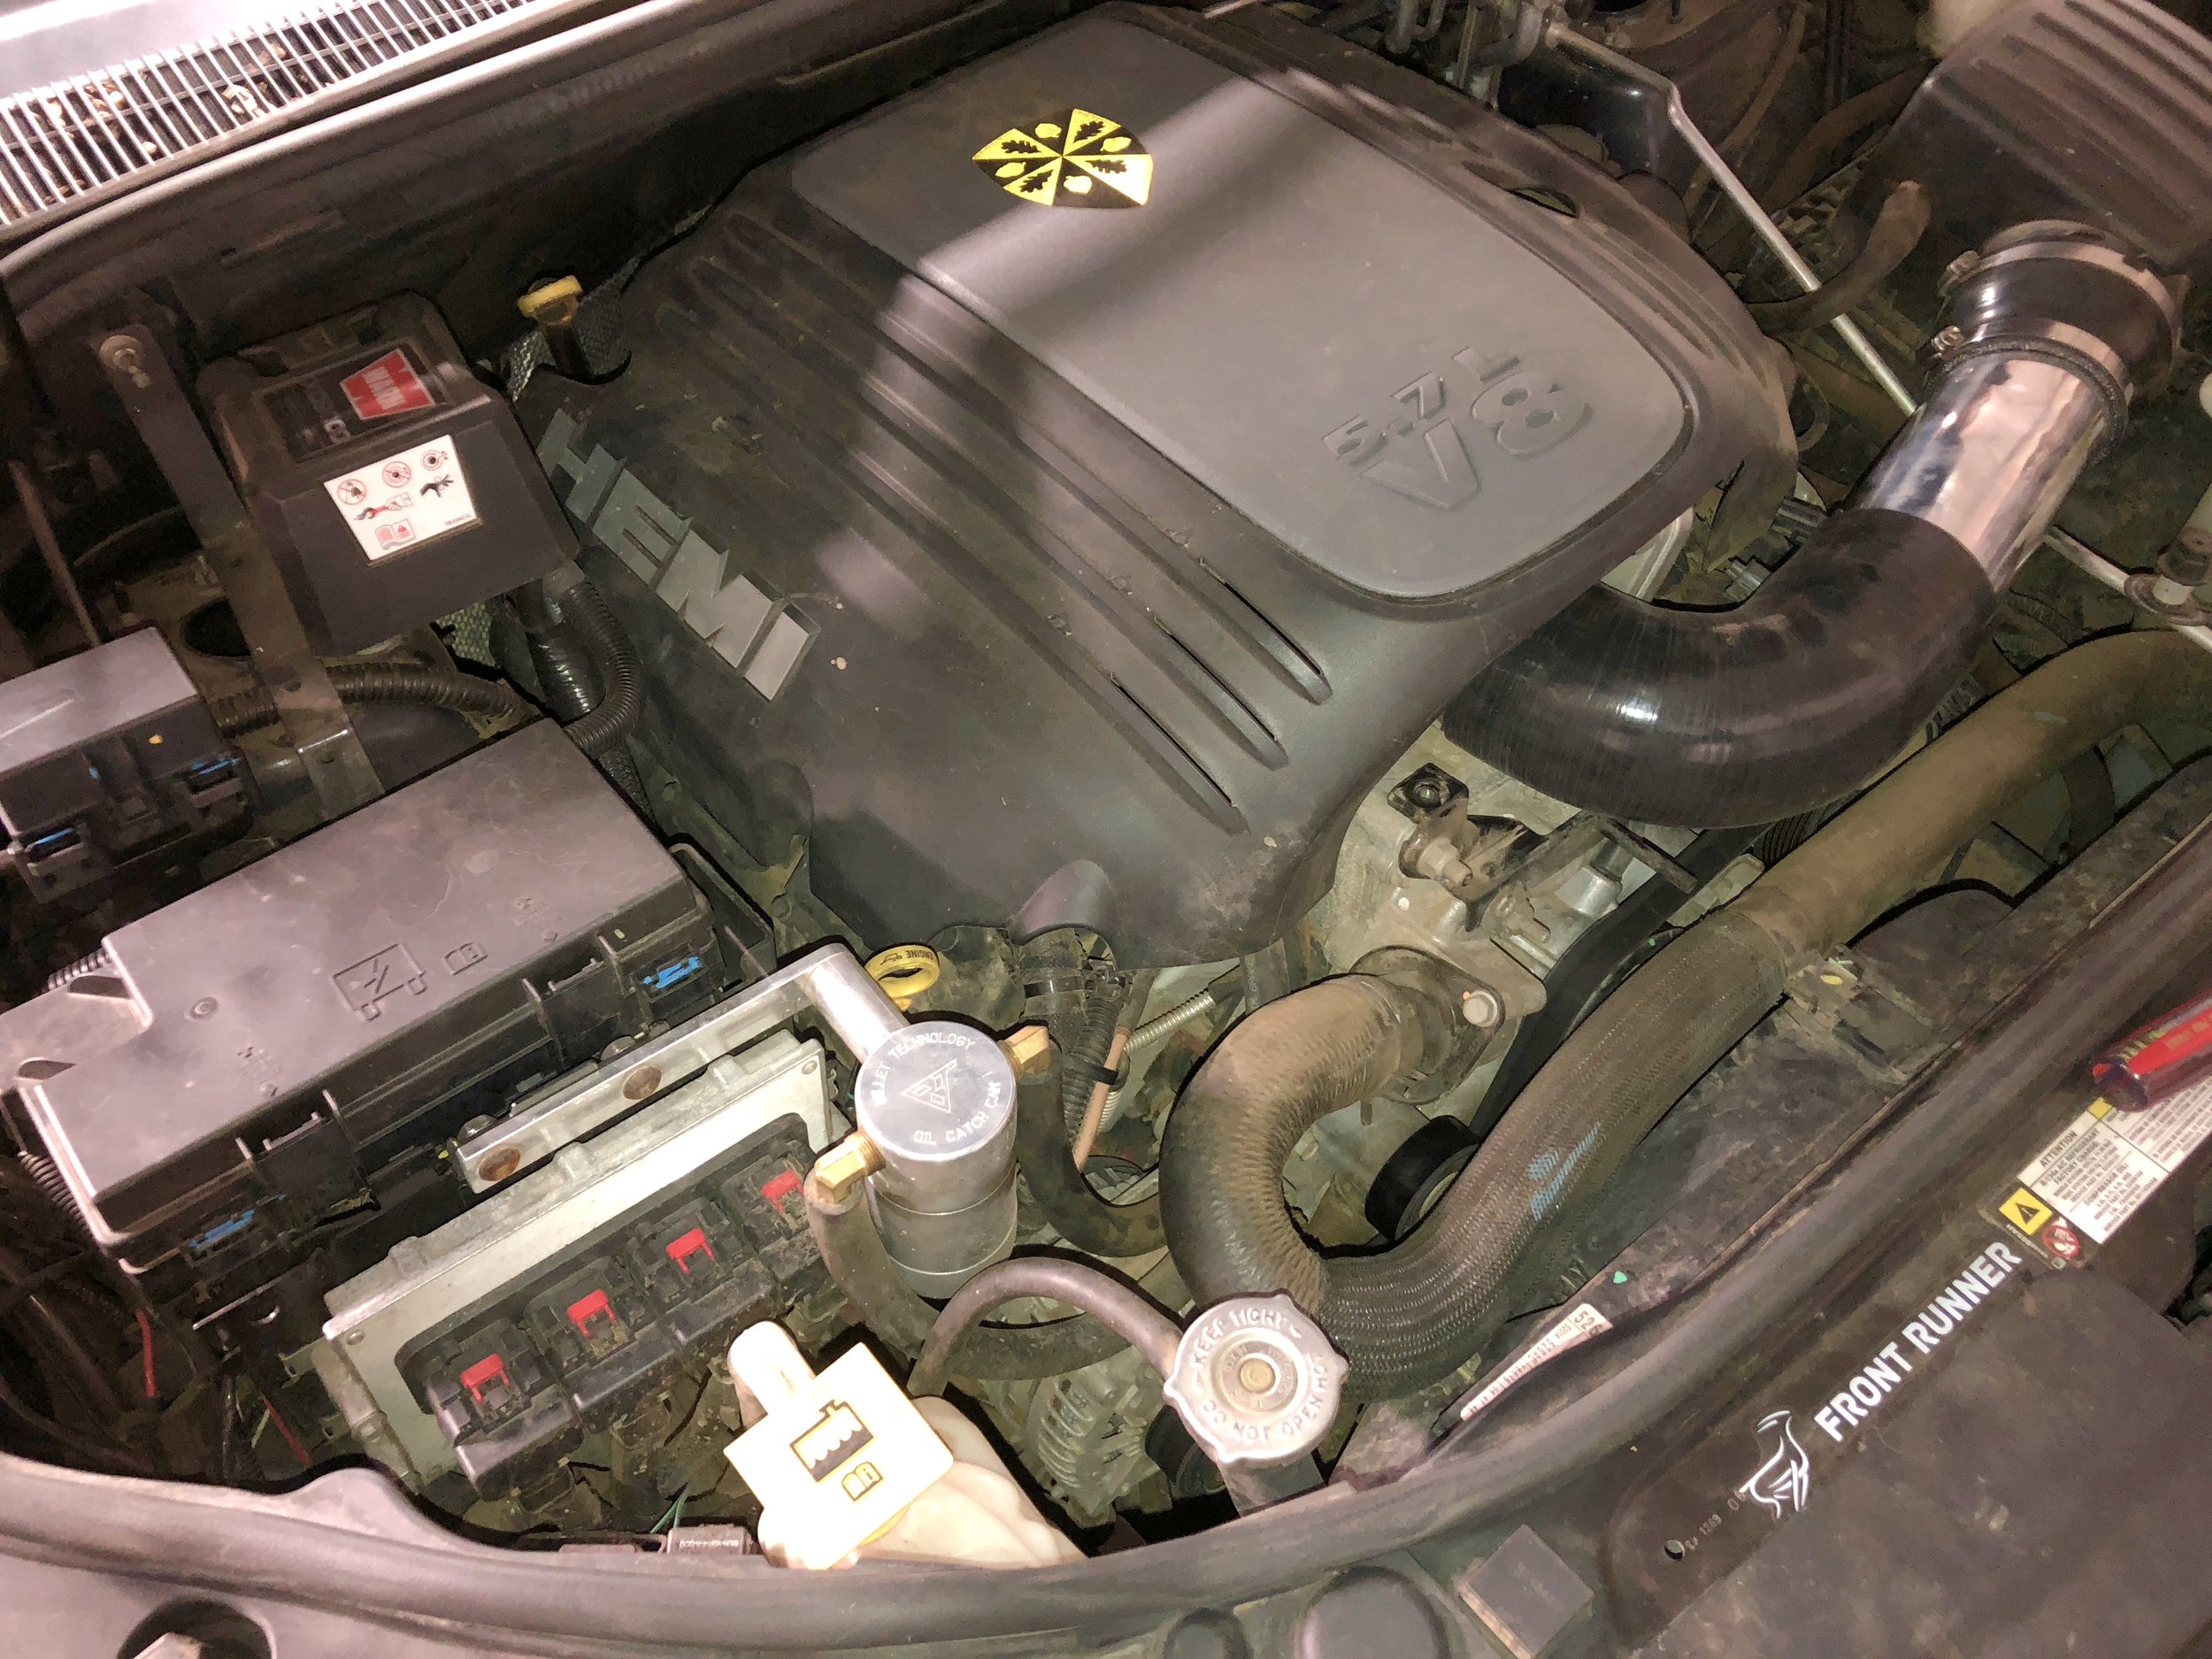



Modifications-armor
Modifications-armor
Up-Armored WK2
Protection is important…
Quite often, factory installed skid plates are less than sufficient for heavy off road use. Thankfully, Jeep outfitted the WK2 Grand Cherokee with a brace usable skid plates. With not a lot of lift options over a couple inches available for the fully-independent Grand, some good skid plates are a necessity. If your WK2 comes equipped with an Off Road Adventure package, you will get the very good skid package. Trailhawks also come with sill protection- a tubeless rock rail. There are additional skid plates that can be added if you plan on hard trail use, but start with the MOPAR package first, and add additional plates needed in your application.
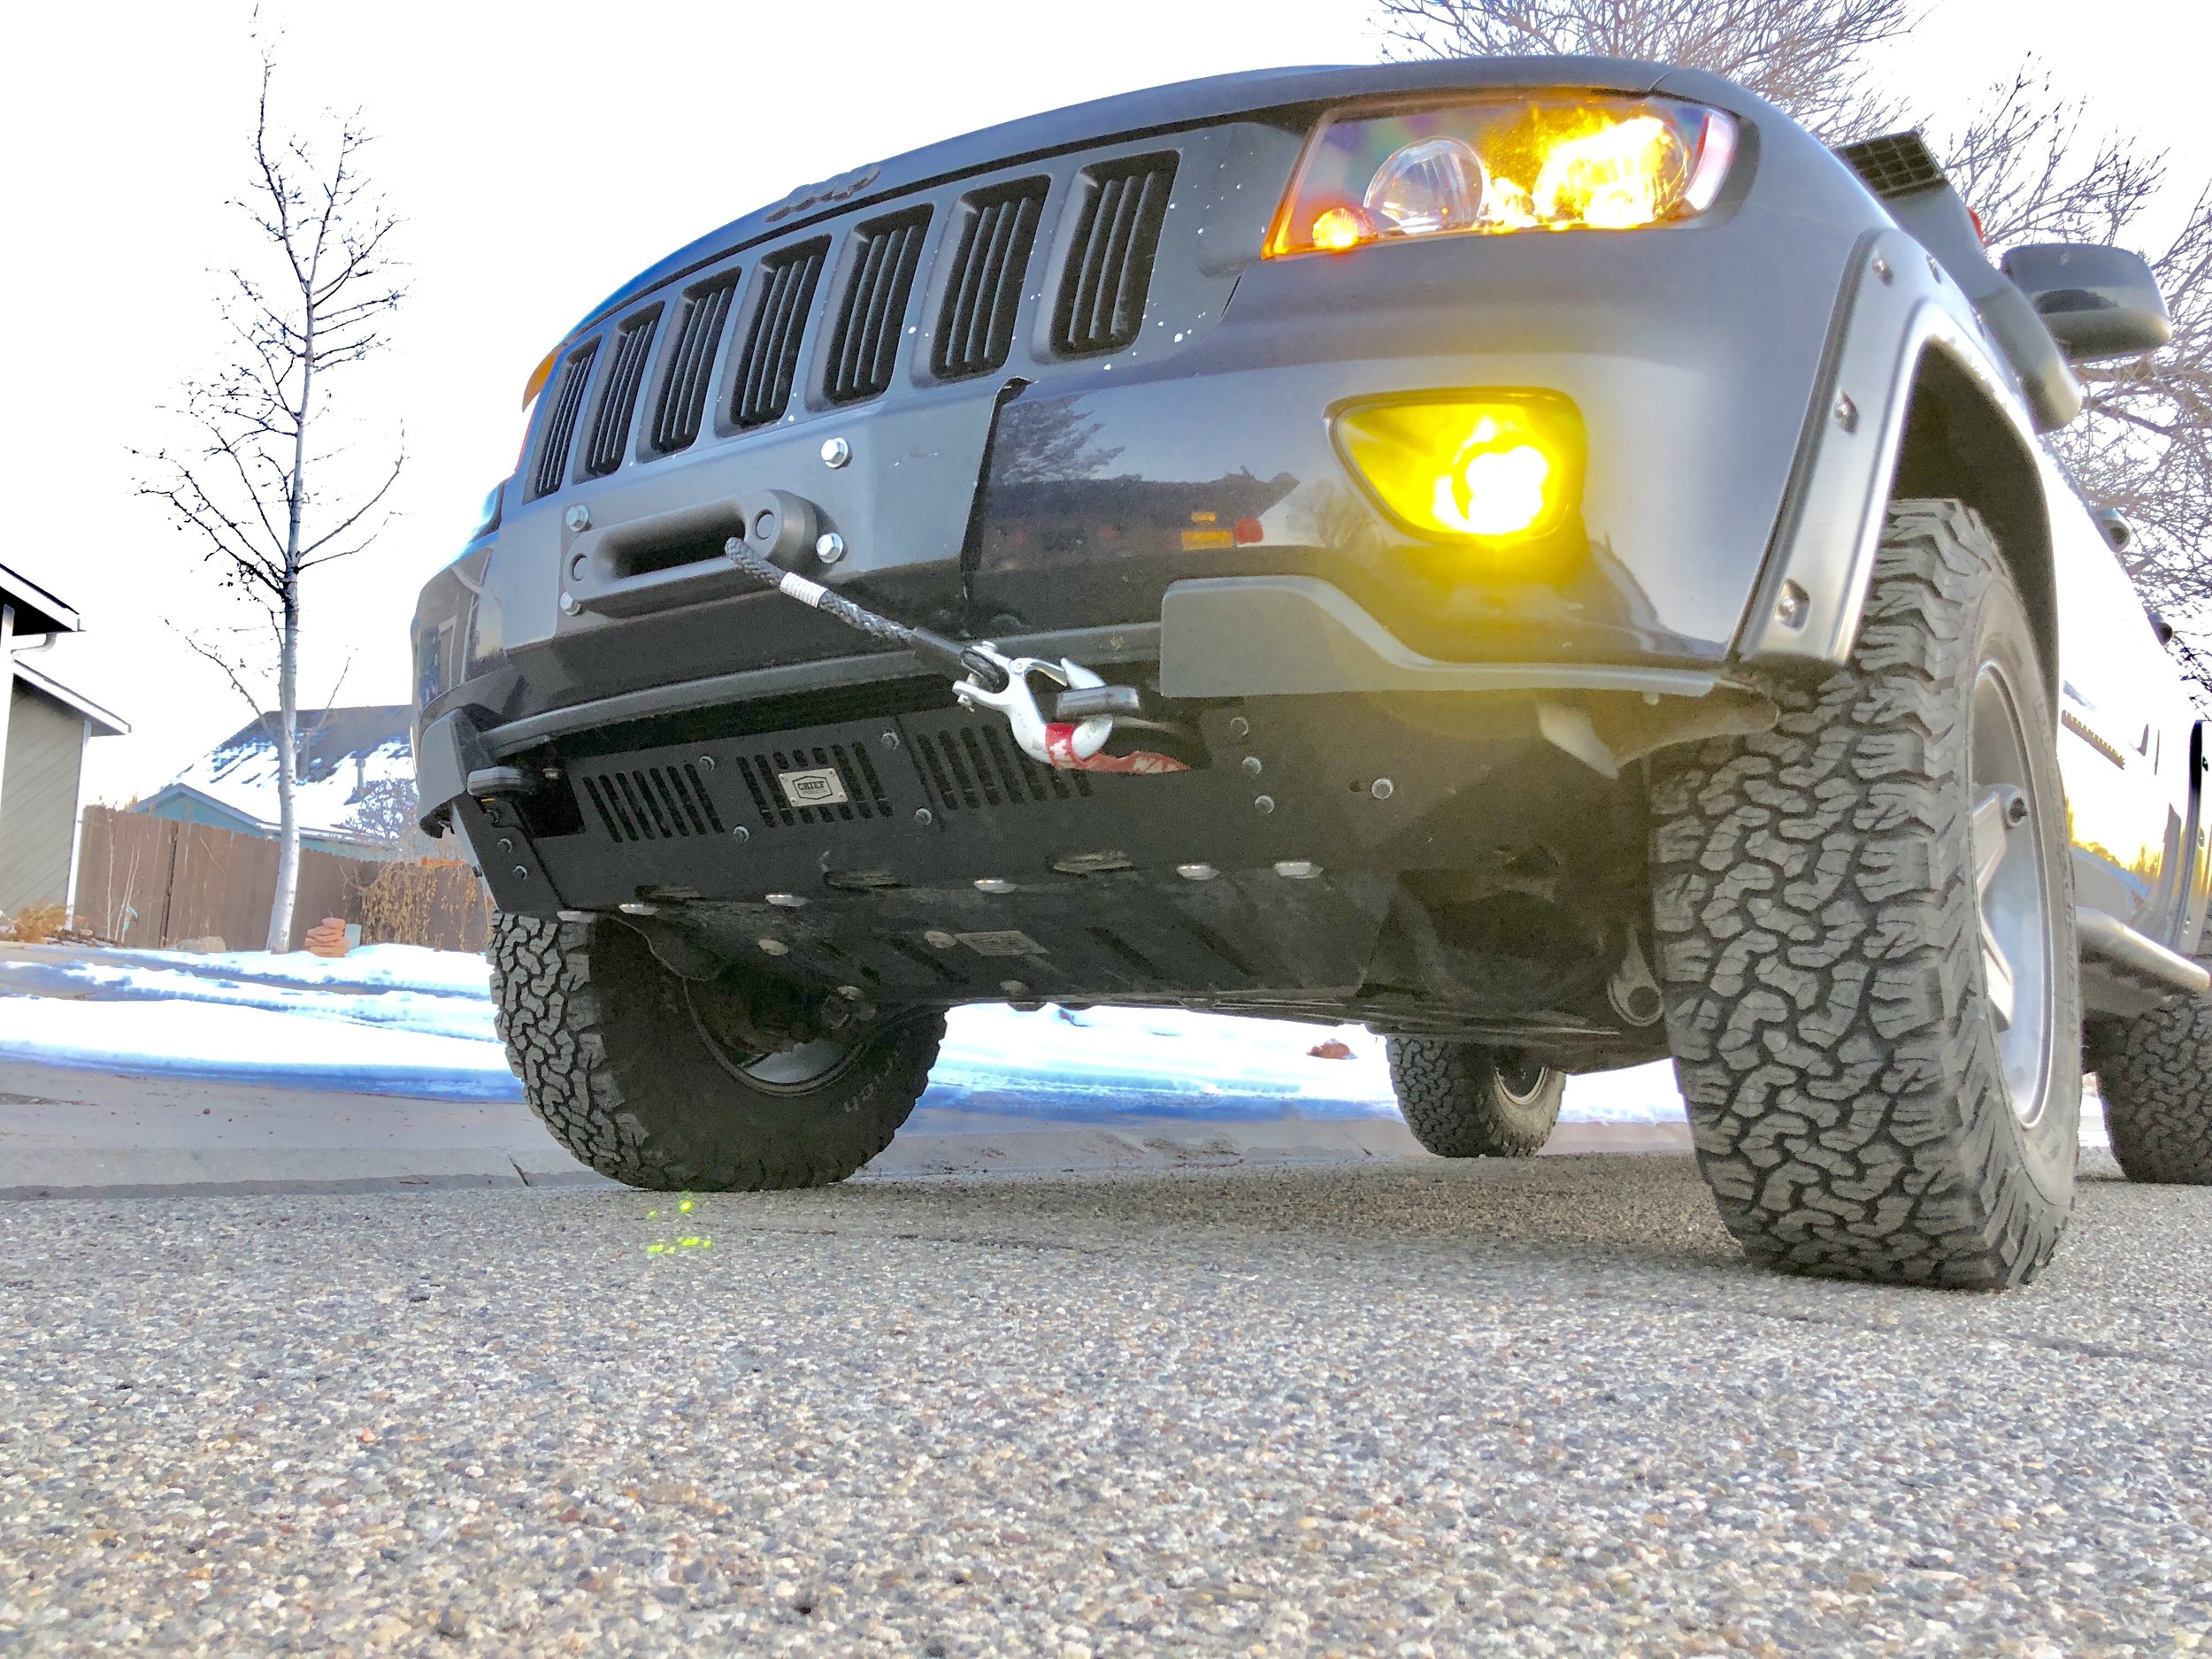
There are a few additional skids I would definitely recommend. 1. Sump protection plate which will help protect the engine oil pan and other low hanging items. 2. Lower front guard for radiator protection. 3. Rock rails. Sadly, the MOPAR rock rails with tubes are no longer available. A couple aftermarket manufacturers provide additional skid plates, but I always recommend Chief Products out of Australia for their superior quality. Thankfully, Chief does have inventory to ship here in the US, but there is a high demand for their WK2 accessories, and they sell out fast. It’s a good idea to pre-order if the option is available.
Currently, the Trail Wolf is equipped with the full MOPAR plate package as well as the MOPAR tubular rock rails. This Grand did not originally come equipped with any of the plates being a Laredo X. All of the MOPAR skids were installed by PRO CDJR prior to delivery. The Chief lower front guard and sump protection plate have since been added and proven to be necessary. The only piece of armor still on the list is a Chief rear guard with extensions to protect the mufflers the rear fascia. The 2017 trip to a couple black rated BLM trails did some damage to my unprotected mufflers. It was mostly cosmetic damage, but was a reality check none the less.
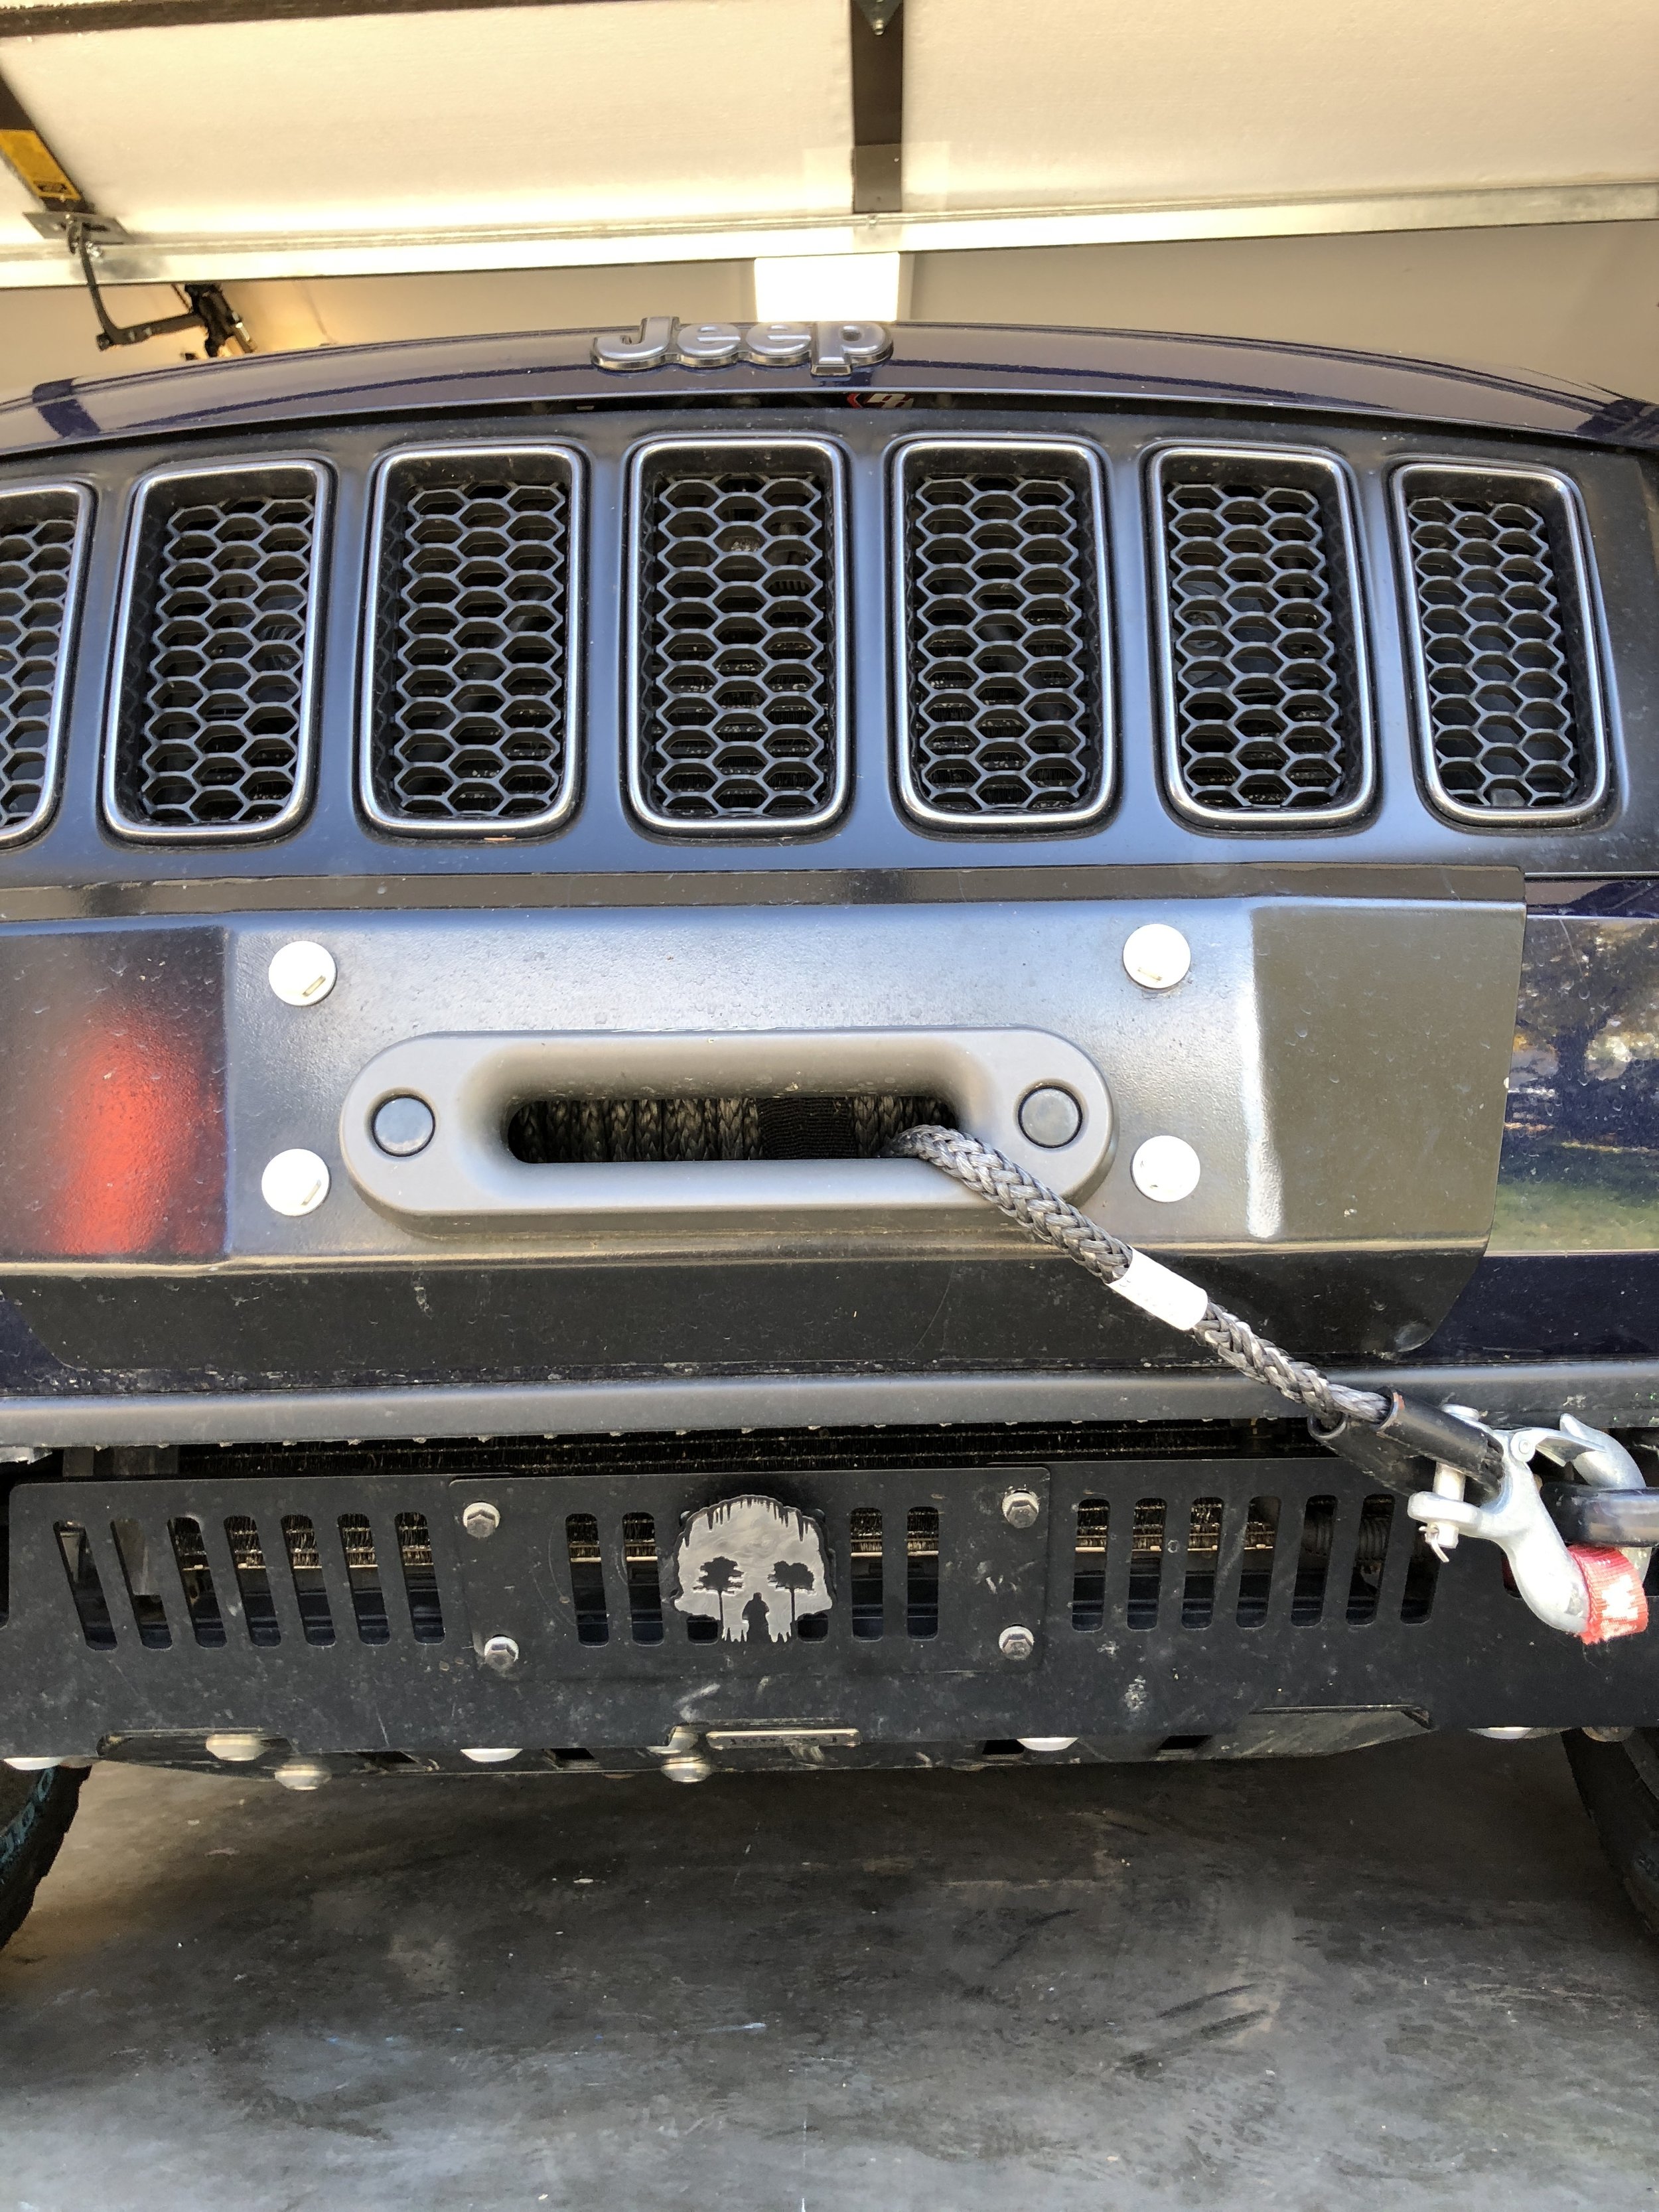
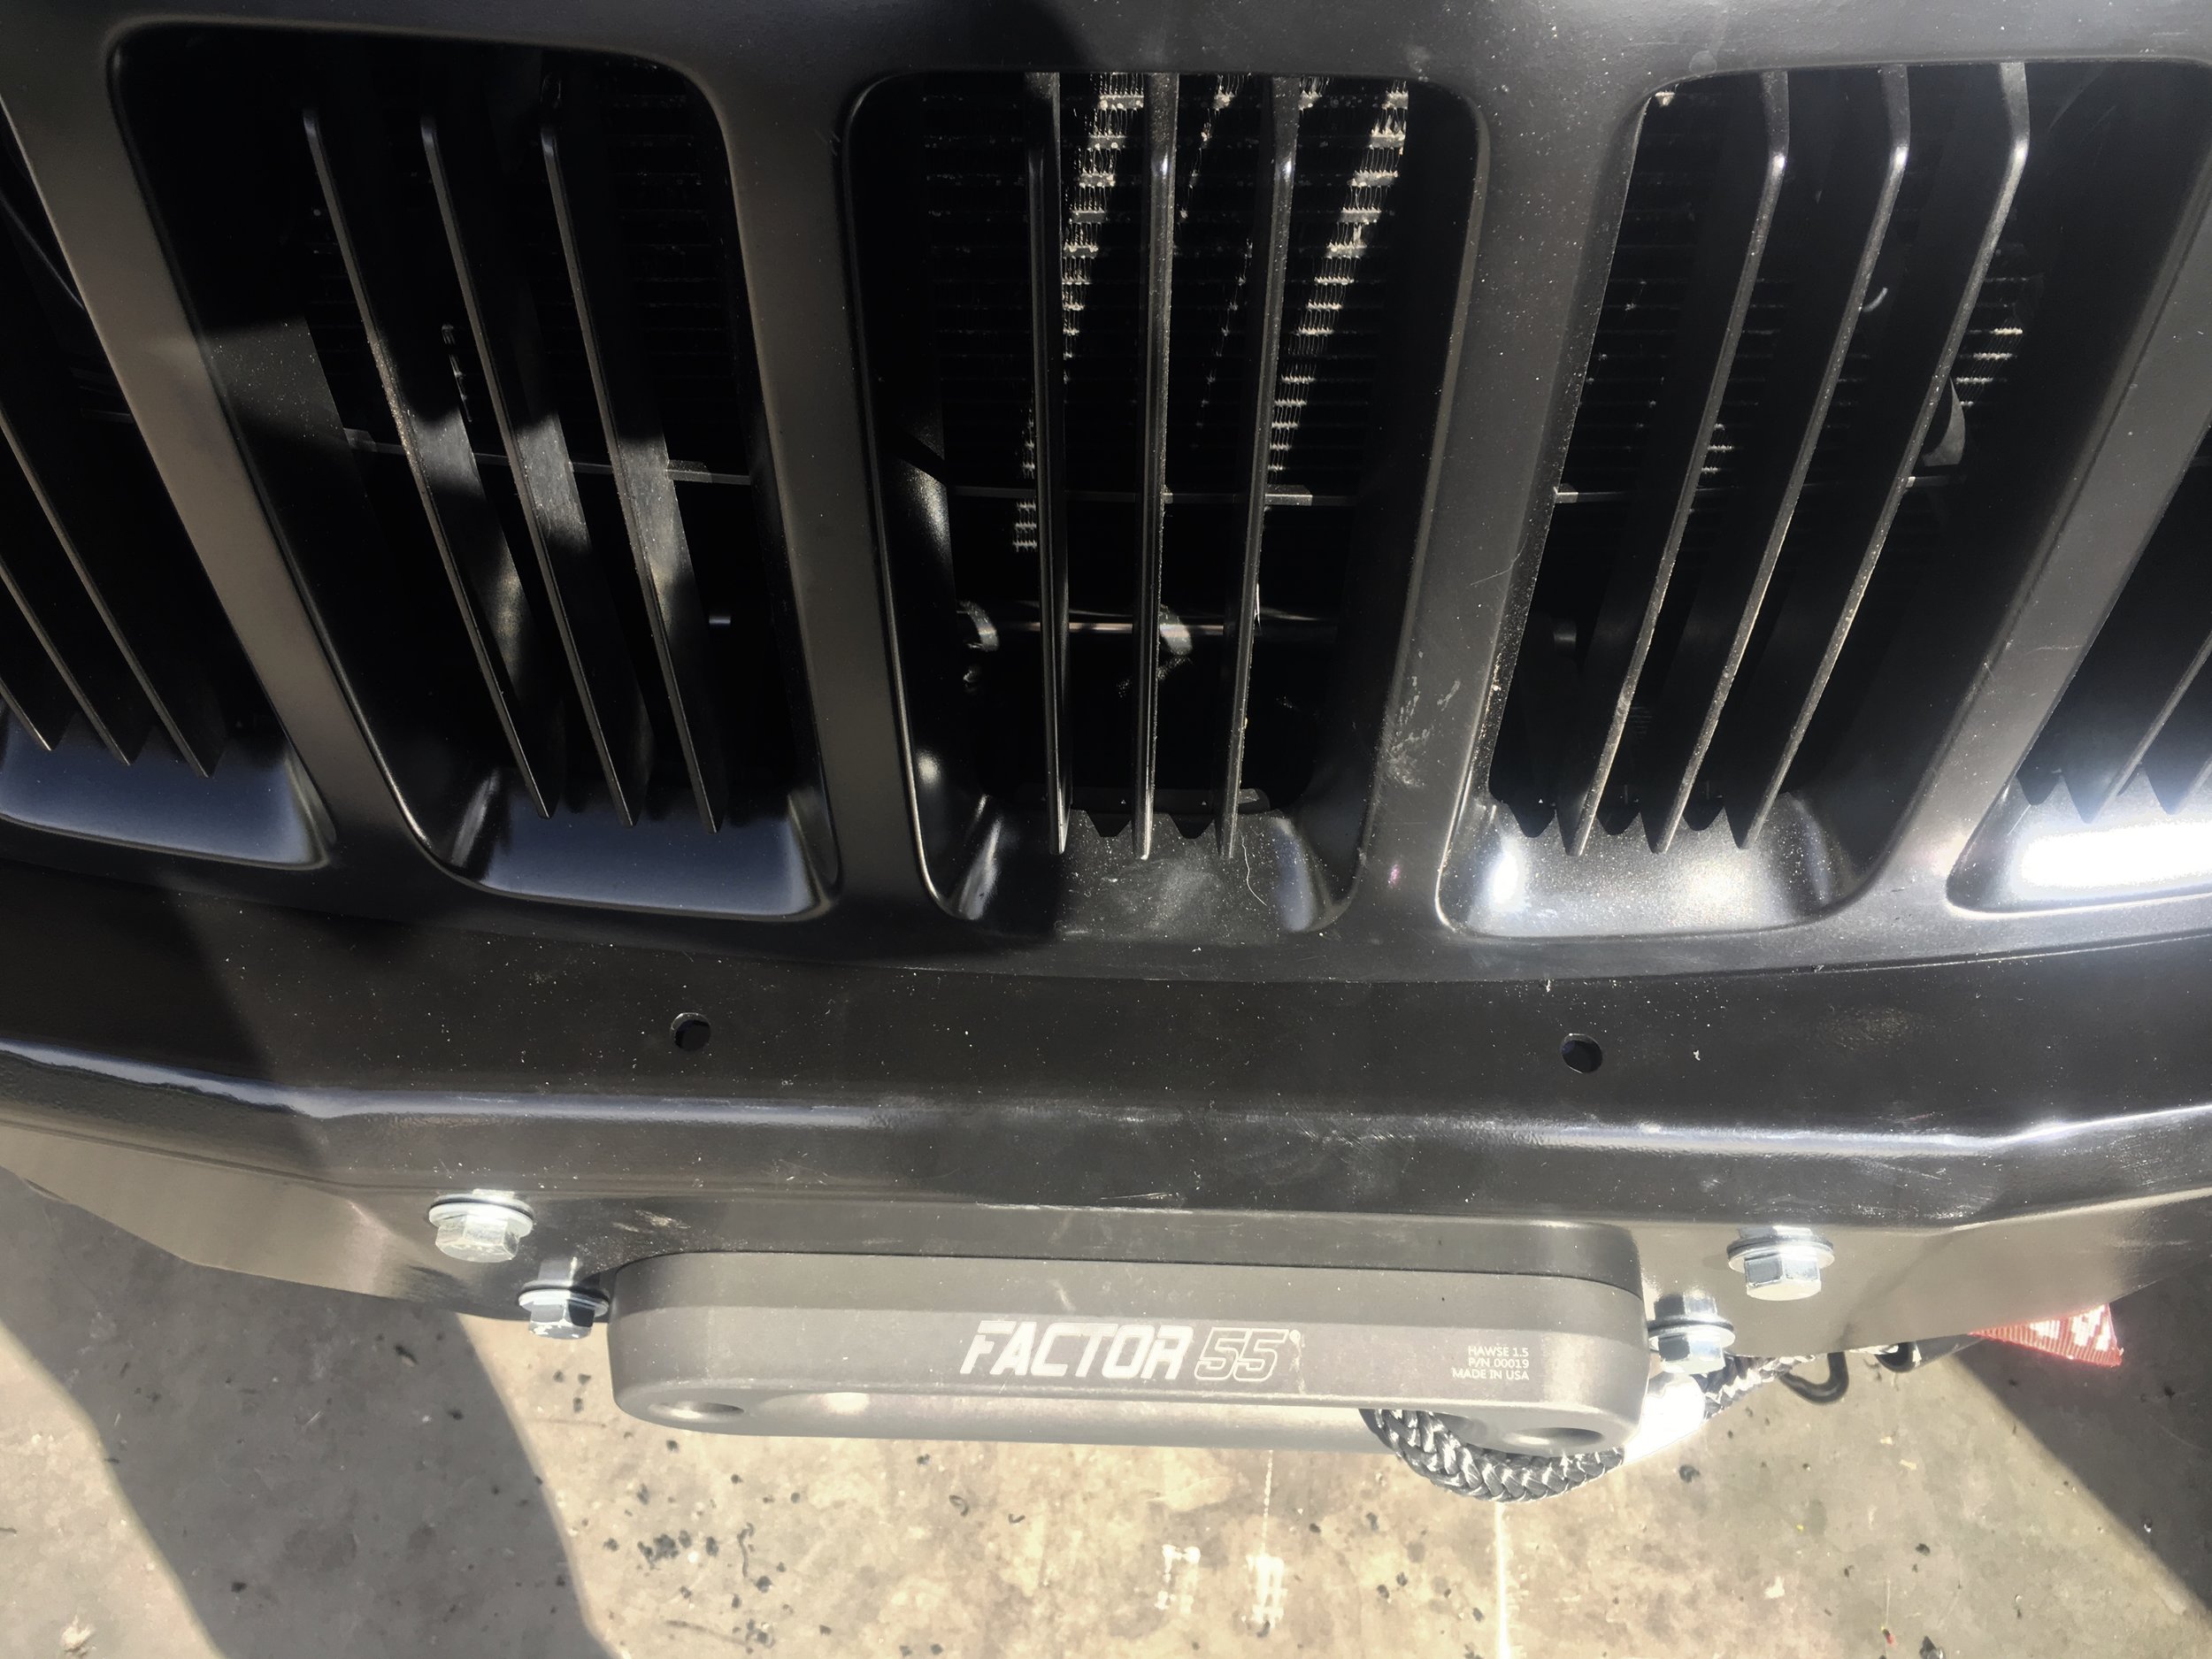
The Chief Products Lower Front Guard with a Triple Aught Design grille badge. Alsoi shown is the Rocky Road Outfitters hidden winch mount with bumper plate and a Factor 55 fairlead.

Modifications-storage
Modifications-storage
Storage Solutions and Interior
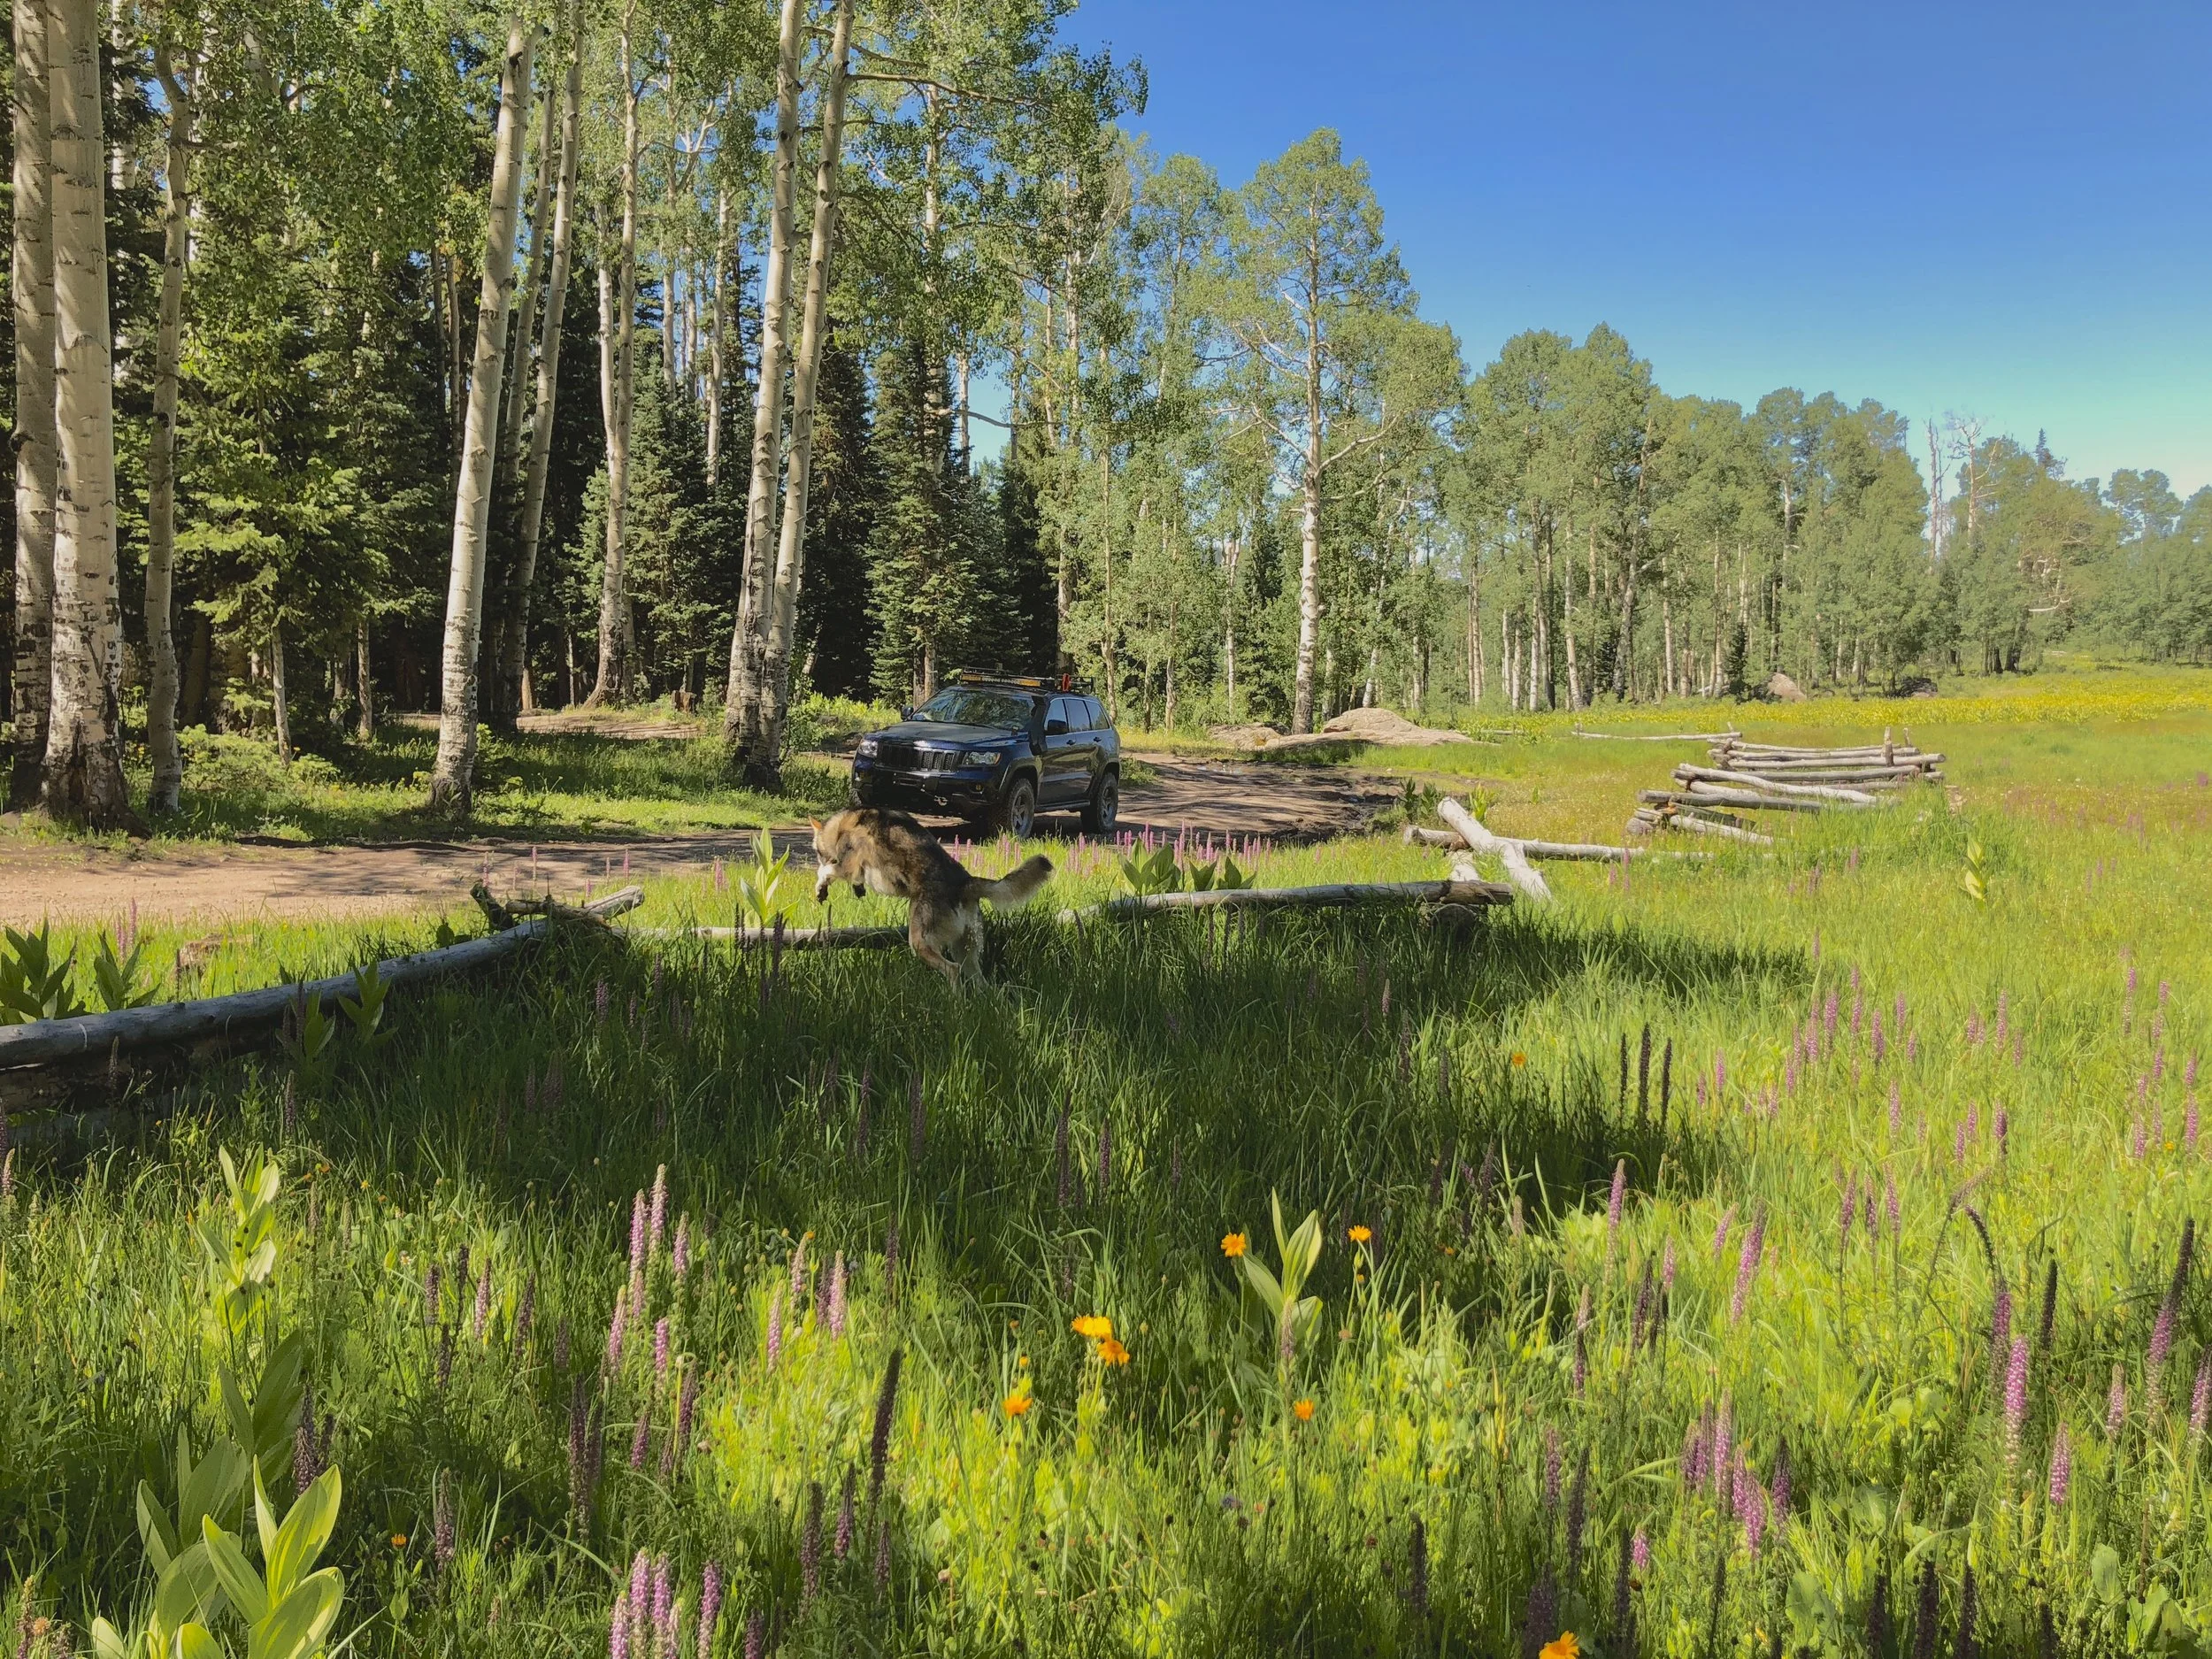
Fenrir the trail wolf loves adventure, too!
Lots of gear means creative storage…
Coming from a short wheelbase 4x4, storage is always an issue that requires creative attention. Since using the WK2 for off road adventures is its primary mission, there is a lot of necessary gear needed for backcountry travel to store on the Jeep.
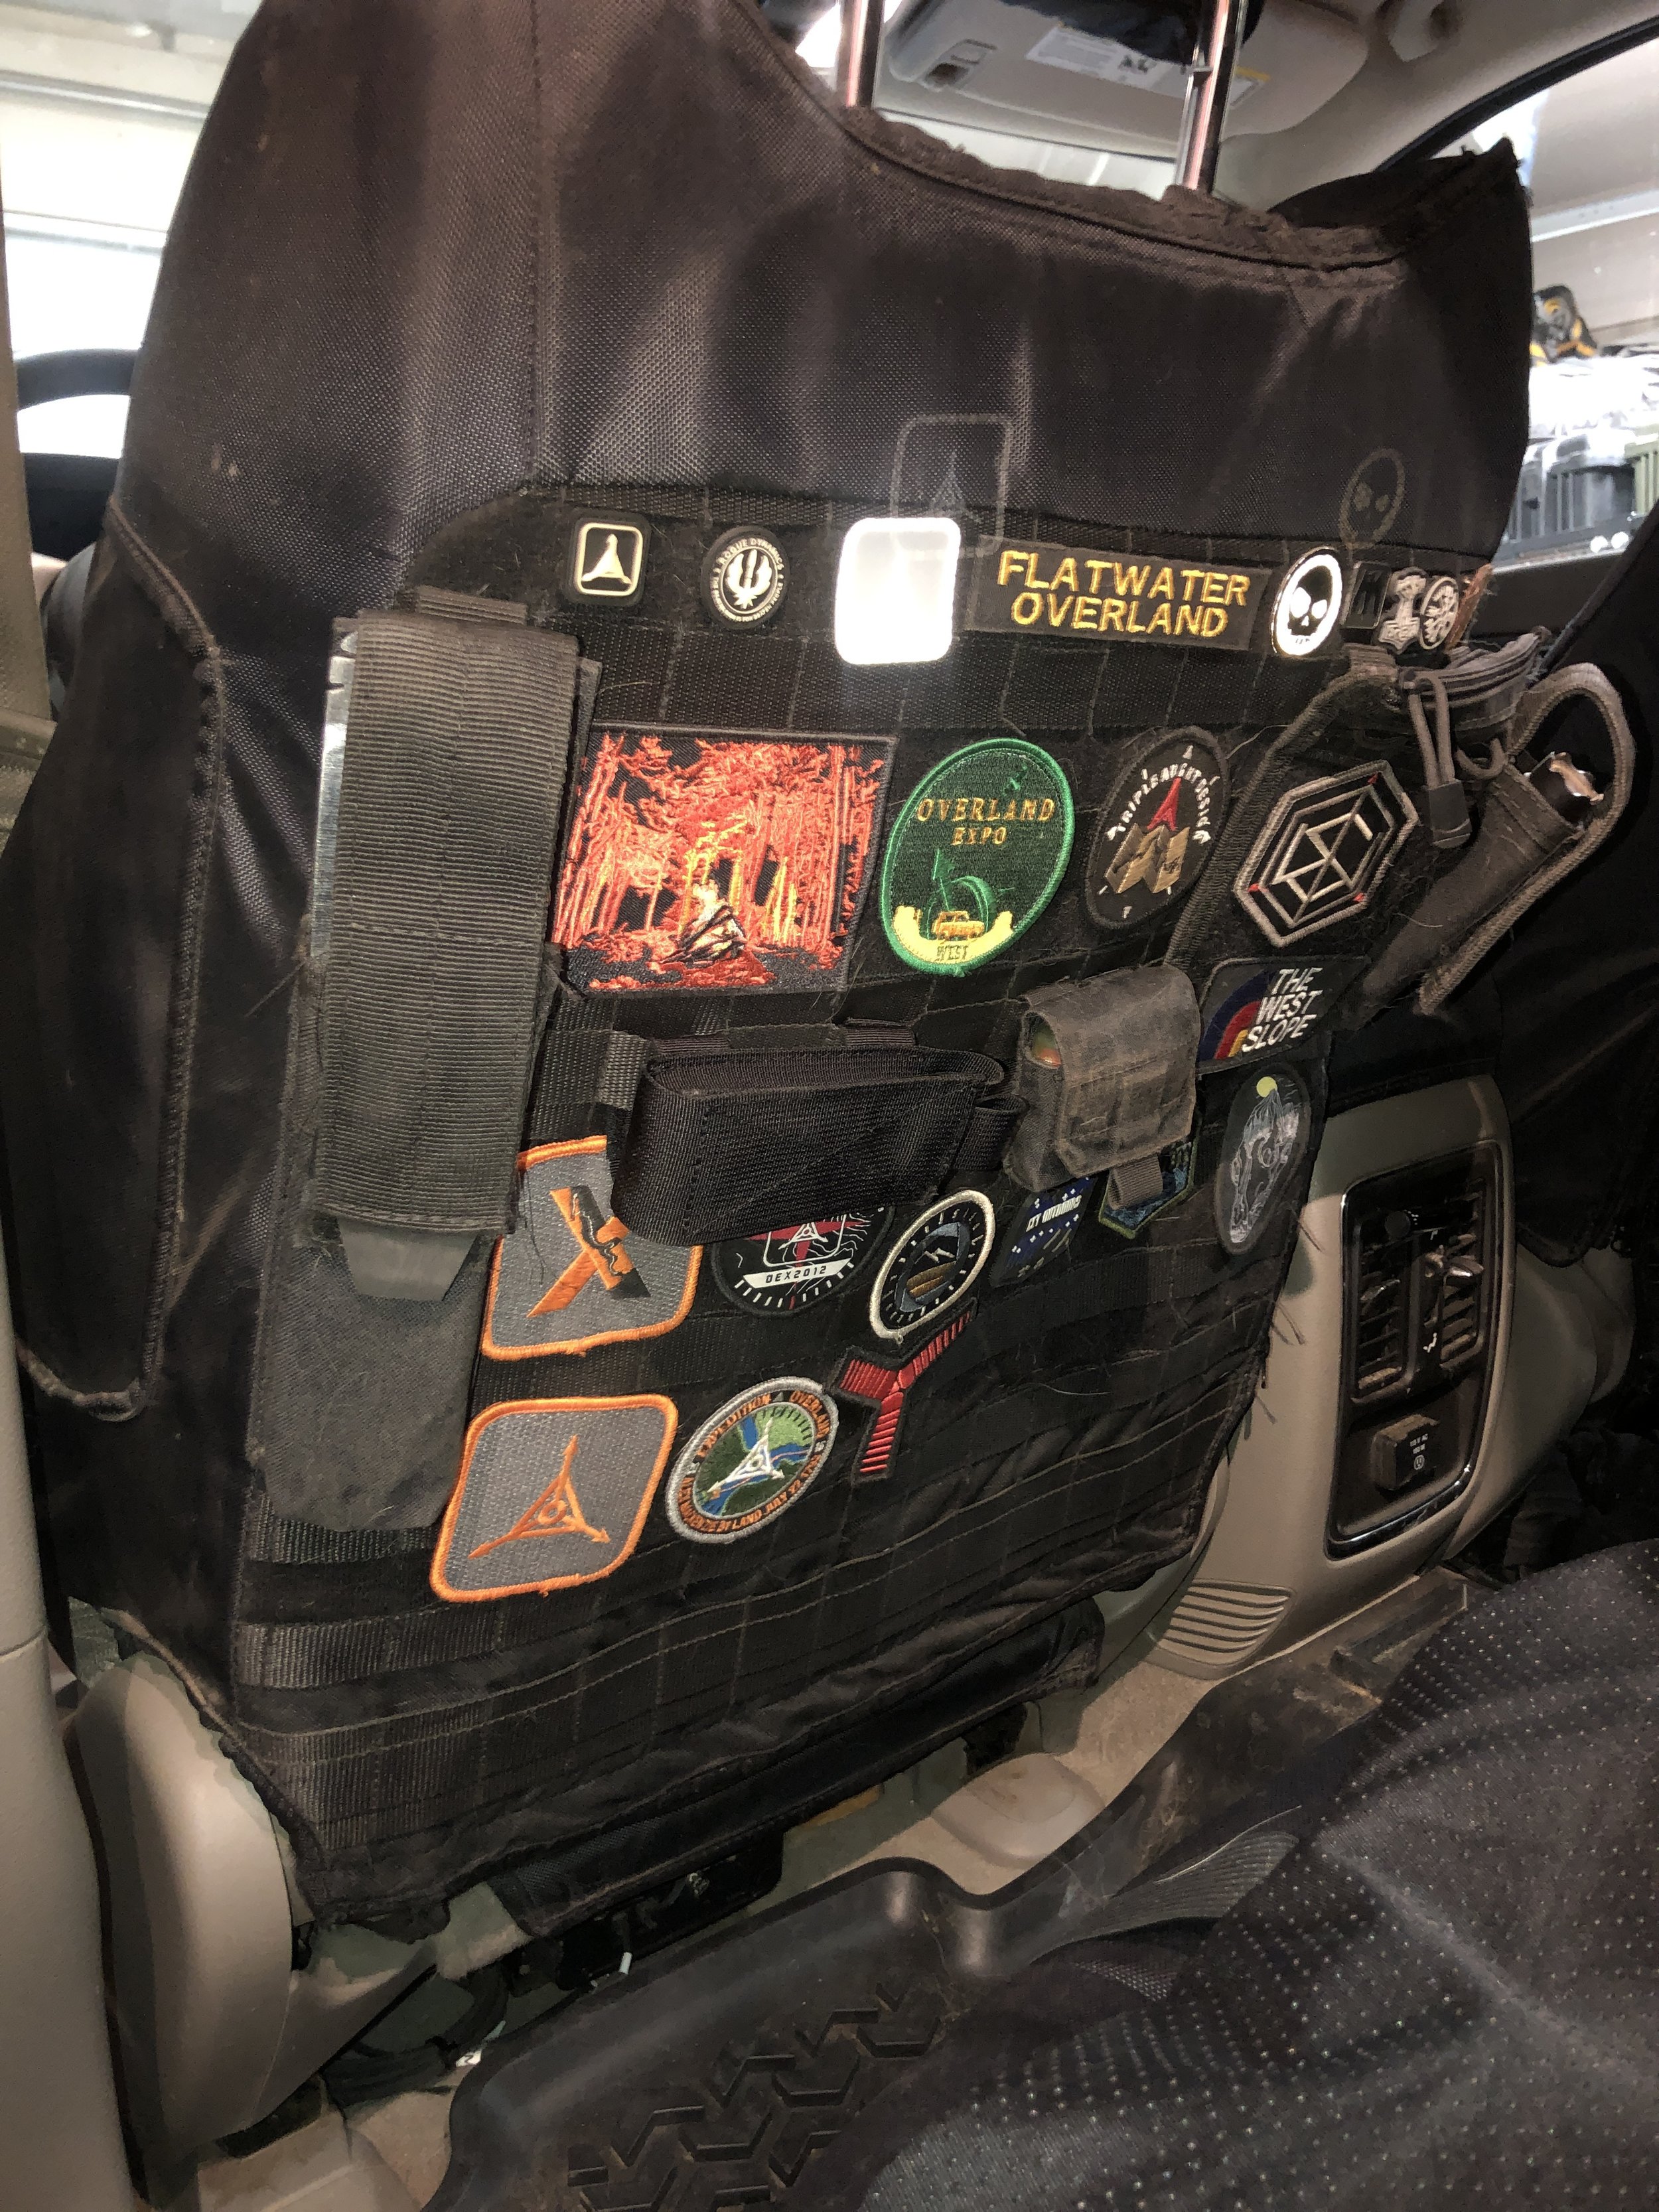
INTERIOR PROTECTION: This Grand Cherokee, like most, was equipped with leather seats. Since Fenrir the wolfdog will be accompanying nearly every overland adventure, some seat protection was a priority. The floormats also needed attention. I had excellent experience with Coverking ballistic nylon seat covers in previous vehicles and work trucks. The fit and quality of Coverking is unrivaled. They are also quite capable of being removed, washed, and reinstalled on a regular basis. In the Trail Wolf, the “tactical” ballistic nylon seat covers with MOLLE backs were chosen. The MOLLE webbing will allow for attachment of convenience and safety items in easily accessible locations with the ability to change the configuration as needed. Only the front bucket seats have MOLLE webbing attached to them. The covers for the rear seats are smooth on the back. This can be an issue for some, but I still fold the seats down for different cargo and trip setups. MOLLE capability on the rear seats was not a requirement. Coverking has an entire range of fabrics and leather if the nylon is not your thing. I also purchased a pet seat cover from Amazon for the back seat. This will take the brunt of the wolfdog wear and tear and dirt. Rugged Ridge floormats were added as I had good experience with them in my Wrangler, and they provide great protection at a modest price point.
THE ROOF RACK: Anyone who travels with large dogs knows how much space they can take up. Often, more space than a human passenger. In order to carry more than just basic backcountry gear, some cargo solutions were necessary. Primarily, lightweight cargo overflow on overland adventures would be handled by the Frontrunner Outfitters Slimline II roof rack. My camping philosophy continues to be based on utilizing a small off road capable trailer to haul camping gear. You can read more about that HERE. There are many high quality roof rack manufacturers out there, and many have a solution for the WK2. A warning up front- a roof rack system that is actually usable for off-pavement, long term use is going to be expensive. Also be careful about overloading a roof rack. It can cause damage to the roof of your vehicle as well as make it unsafe. It is worth noting that the rated total roof load for the WK2 Grand Cherokee (and most contemporary SUVs) is 150 lbs. EVENLY DISTRIBUTED. So, if you install a roof rack that mounts to only the threaded roof bosses on the WK2, then commonly load it to capacity or over (like with a Rooftop Tent), you are asking for trouble. The Frontrunner (and most quality roof racks) can handle significantly more weight, but the Grand’s roof mounts cannot.
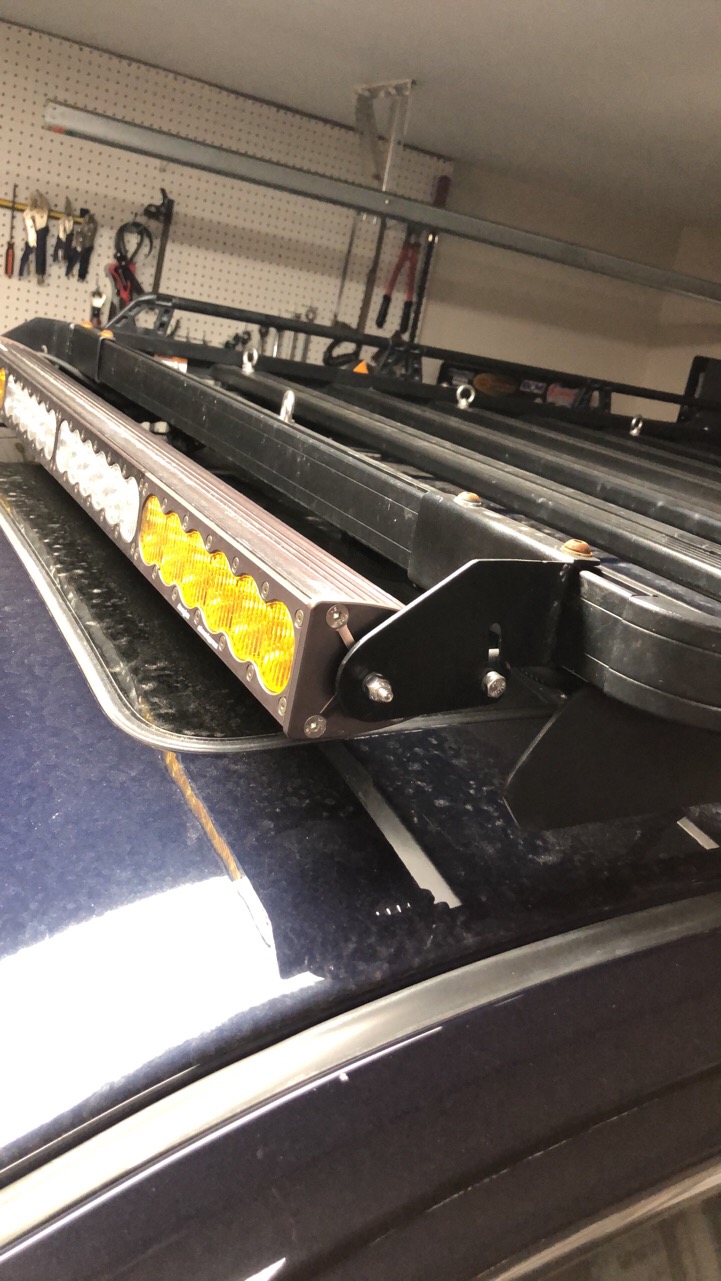
The Slimline II rack was intended to be a primary mount for bulky trail accessories and lighting with the ability to handle some lightweight gear overflow such as clothing, tent, and camping supplies. The fantastic modularity of the Slimline allows for easy addition of nearly any expedition gear. Frontrunner has a long and distinguished catalog of accessories and brackets for their racks, and if they don’t have something, the slotted rails allow for easy fabrication of custom mounts. I fabricated some mounting brackets for the Baja Designs 40” light bar and the rear antenna/camp light bracket. Frontrunner now has brackets available that fulfill these needs. I really like their breakaway antenna mount, and will probably upgrade. Otherwise, Frontrunner accessories are used to mount an axe, a shovel, and a camp table. I also fitted my rack with side expedition rails- mostly for aesthetics, I must admit.
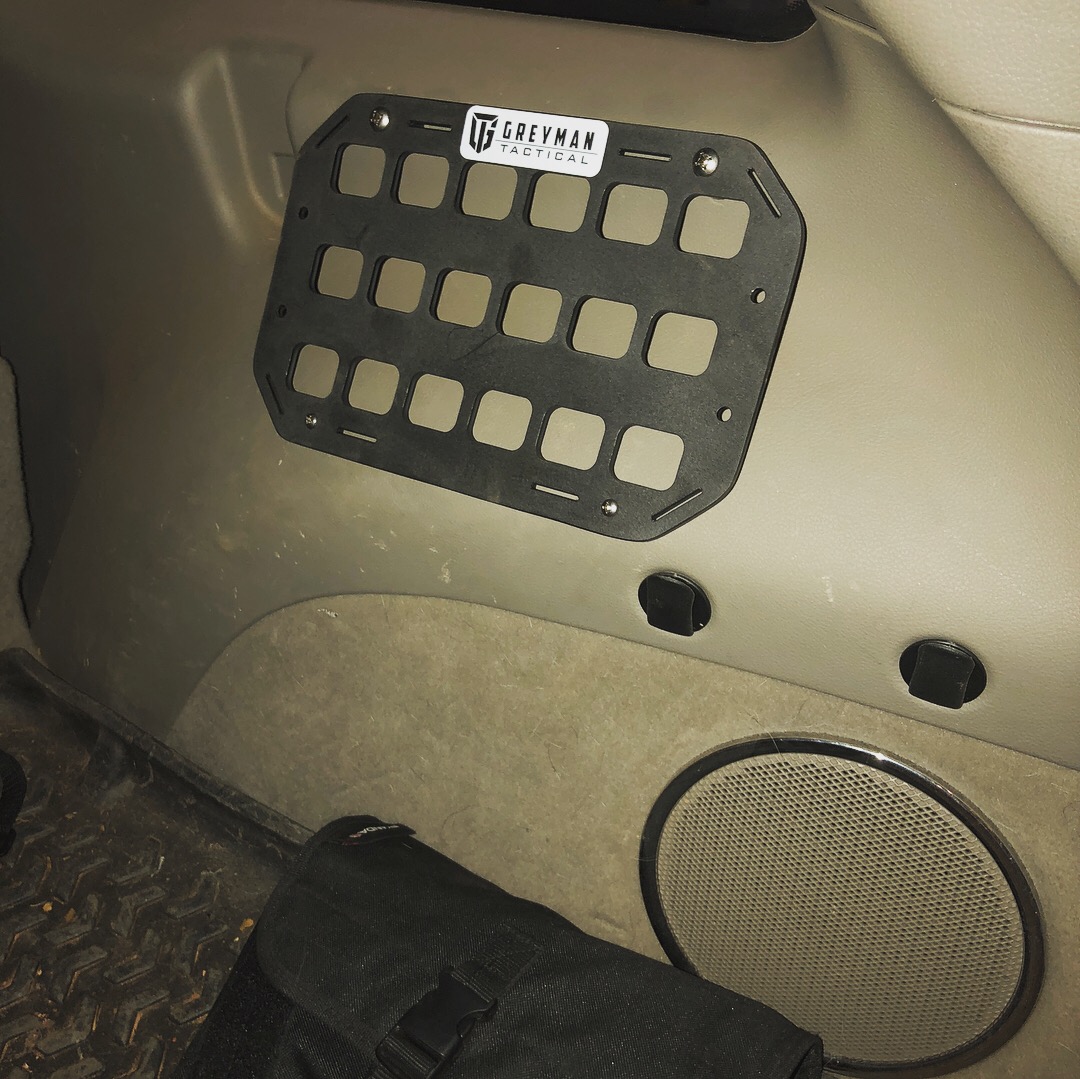
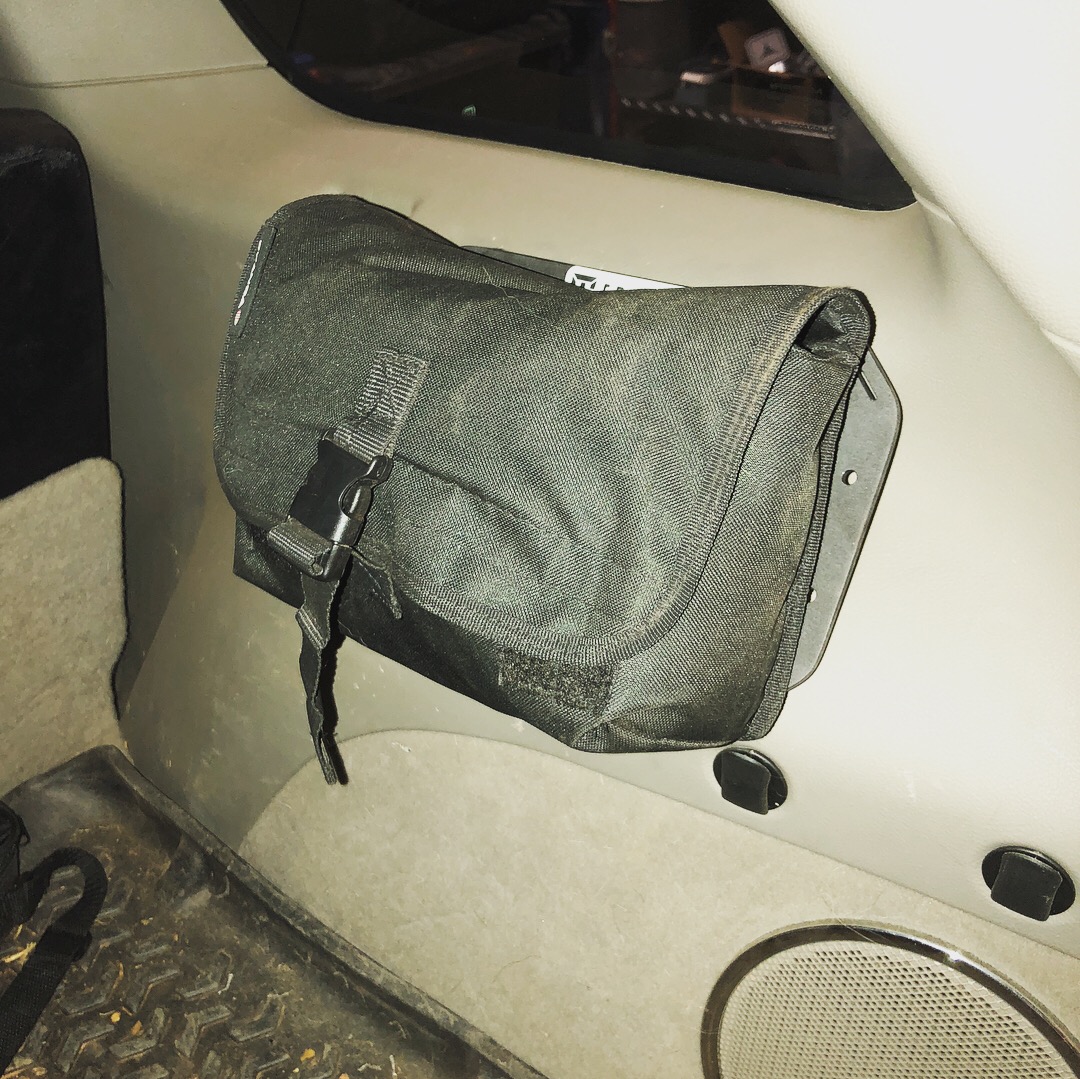
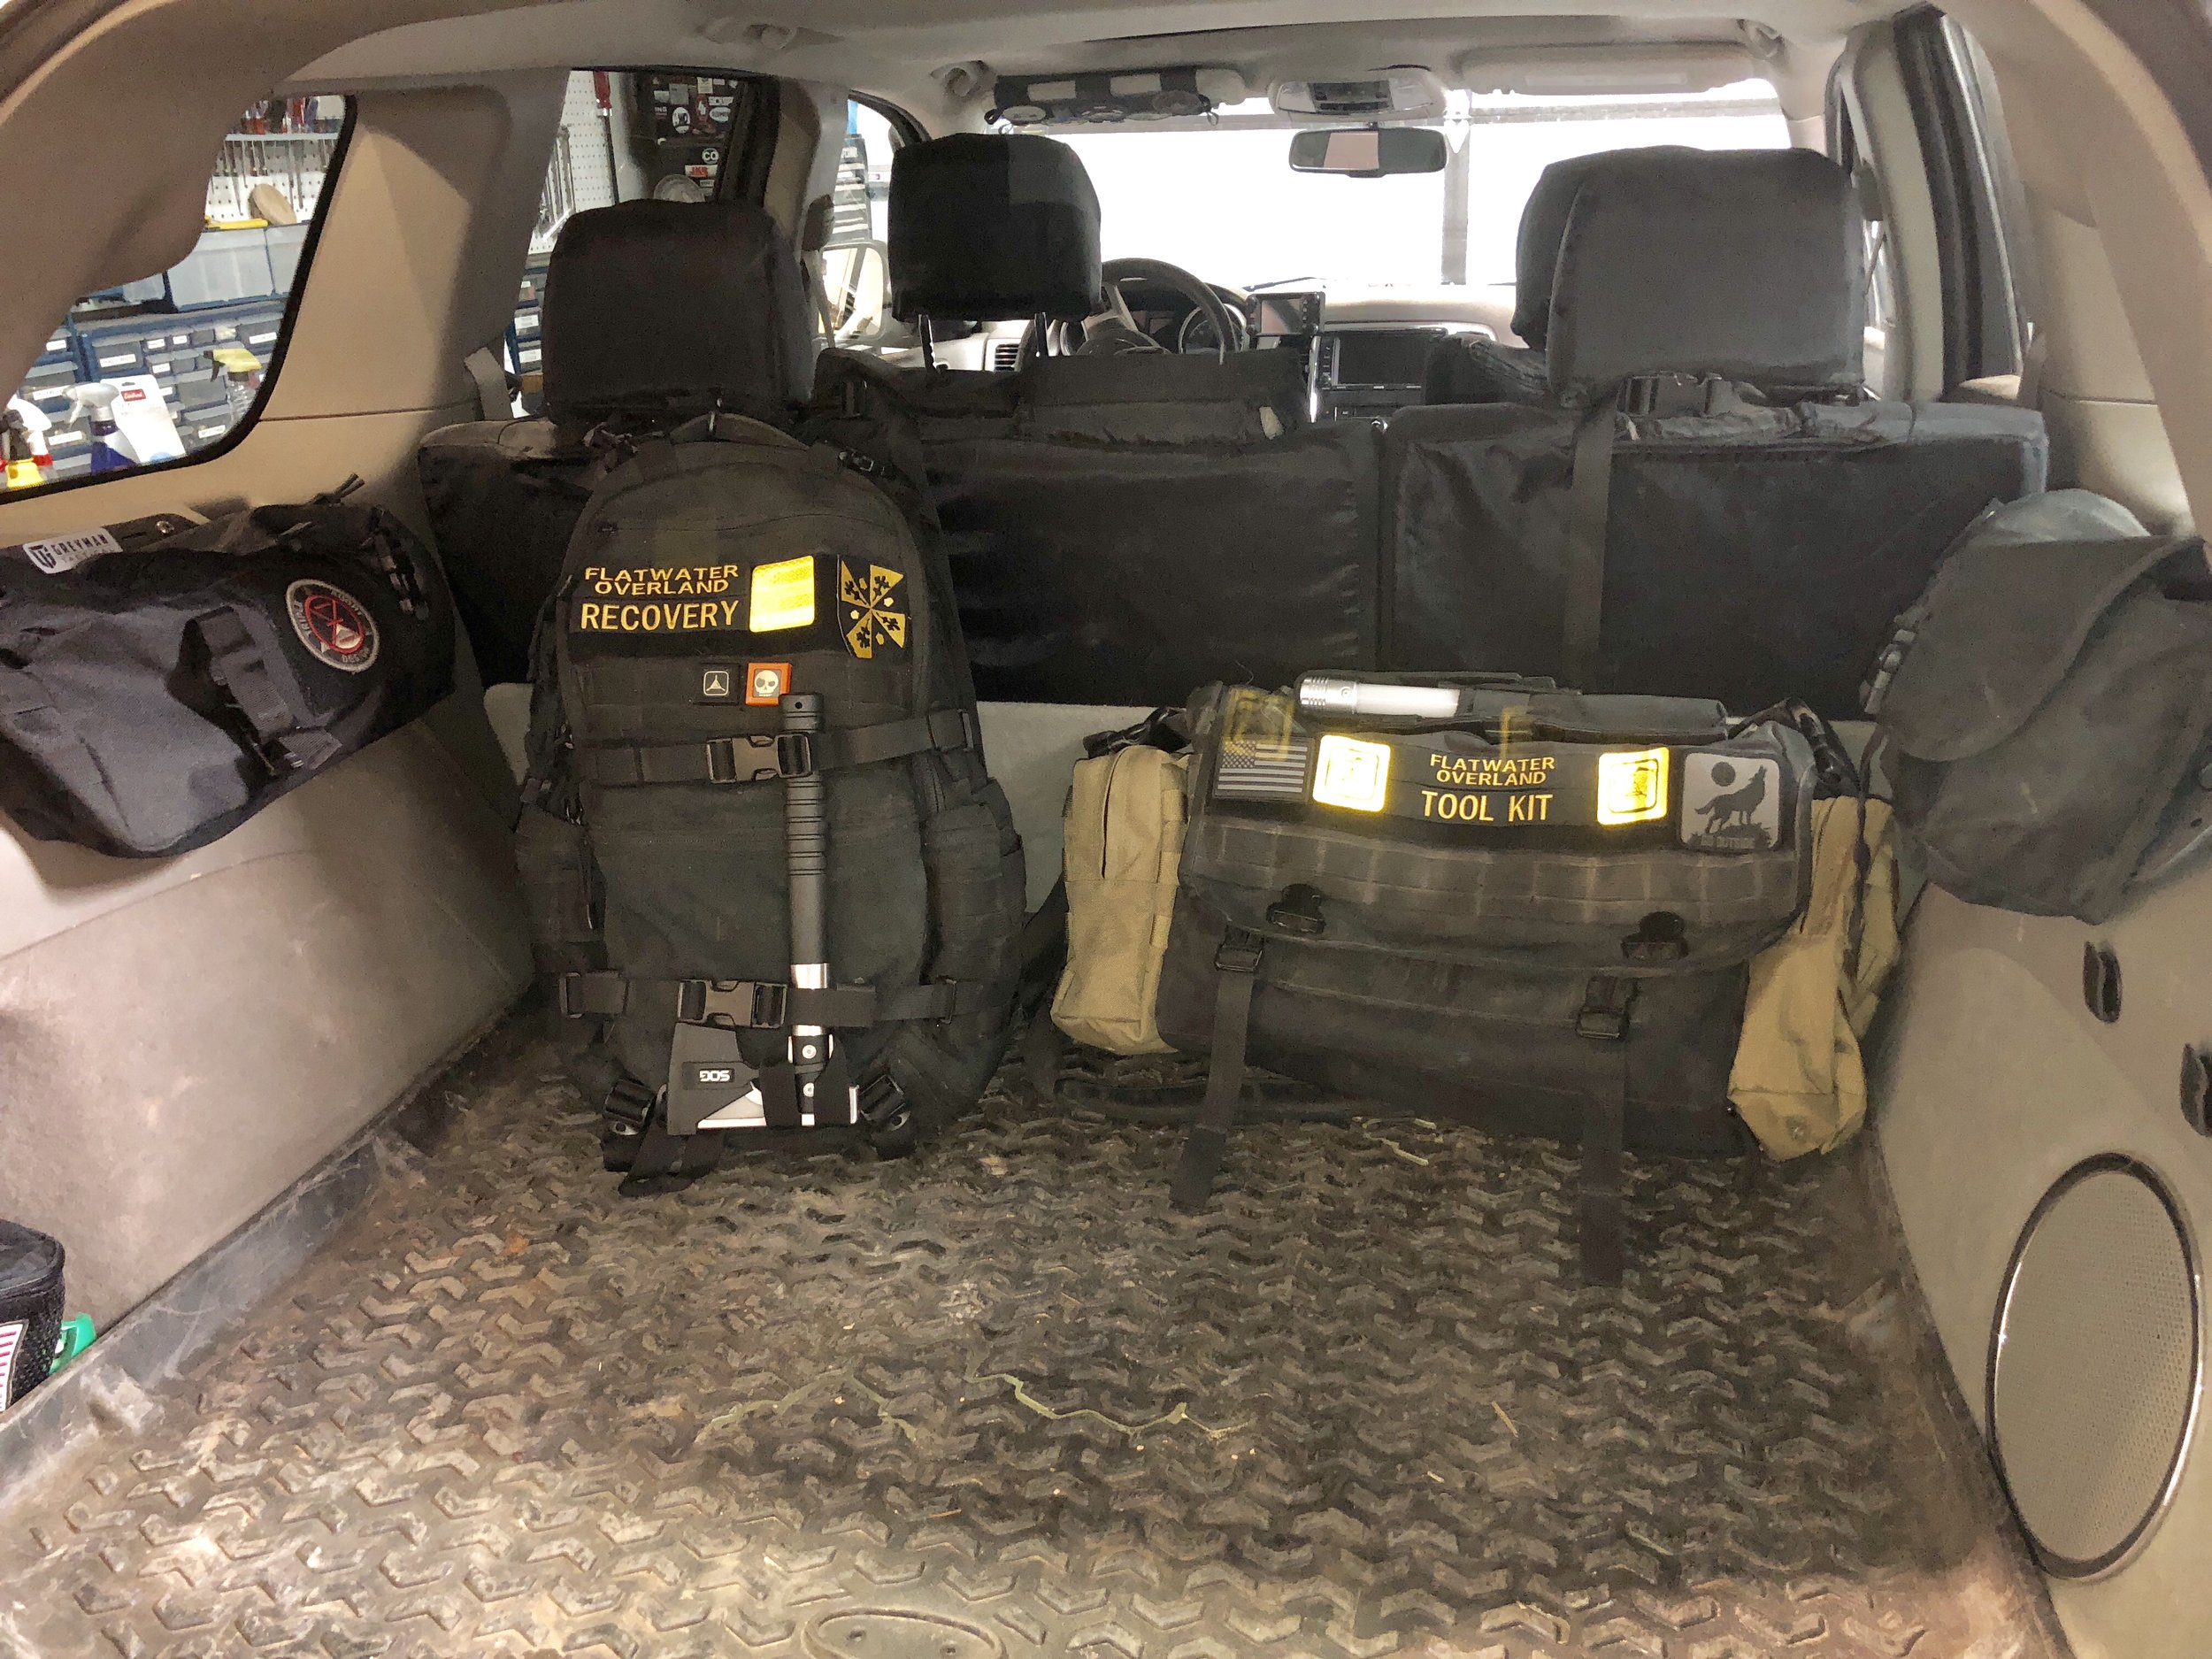
INTERIOR STORAGE: I prefer to have my gear organized and accessible as much as is possible in fully kitted out overland vehicle. Not always an easy task. The first order of business is to determine what you need to have quick access to when the vehicle is loaded, and what the driver needs to have in arm’s reach for regular use. Most of the access items were placed in MOLLE pouches and bags to be easily accessible, even if the vehicle was loaded with gear. Recovery equipment was placed in a backpack and clipped to rear seatback for easy access. Some rigid MOLLE panels from Greyman Tactical were installed in the rear hatch for some extra convenience storage along with a couple large MOLLE pouches. Other items like the tire repair kit and air compressor accessories are stored in some MOLLE pouches under the back seat next to the compressor. Navigation and communication equipment was a challenge.
An older cellular iPad running GaiaGPS is used for navigation duties and is mounted on a removable RAM mounts post bracket. When not operating off road, the mount can be pulled out to open up some leg space for passengers, but does not badly interfere when in use. Personal electronics were mounted on some very attractive Kuda mounting bases in reach of the driver. The Kuda bases allow for future mounting of different holders and brackets as electronics change.
The iPad in its RAM mount. The Kuda cell phone base is visible on the left.

Trail Gear
Trail Gear
Trail Gear
Backcountry travel means being prepared for changing conditions
Winches, compressors, and snorkels, oh my…
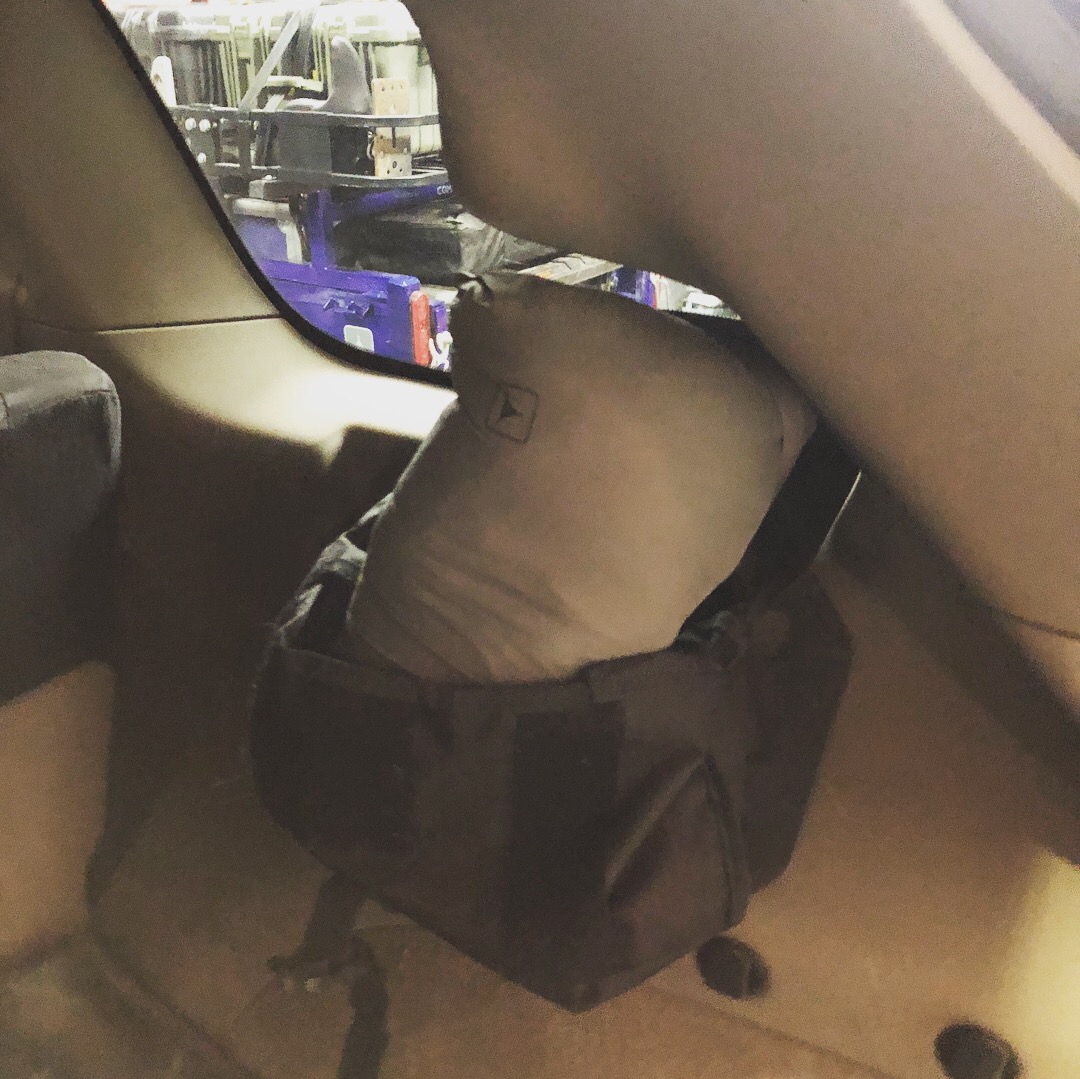
AIR COMPRESSOR: An onboard air compressor is one thing I wish every vehicle was equipped with. I even installed one on a junky 1990 Toyota Celica I once owned as a daily driver. For off pavement travel, the ability to “air down” and also repair punctured tires is a necessity. For this, you need some kind of compressed air capability. I personally prefer a vehicle mounted air compressor of some kind over a high pressure portable tank. For the WK2, an engine driven compressor wasn’t very realistic, so a compact ARB 12 volt compressor was installed under the rear seat. It is also possible to do an underhood mount of a small electric compressor, but I wanted a configuration that was out of the elements. Options are also available for a portable case mounted compressor system that can be completely removed from the vehicle and has no associated permanent wiring. The ARB CKMA12 is about the smallest compressor I would be comfortable installing in a backcountry vehicle for tire repairs and airing up. It does the job, but has to work hard to completely bring a tire larger than 31” up to highway pressure. A tire inflation kit and tire repair kit (broken down into a MOLLE pouches) is installed and accessories kept under the back seat next to the compressor for easy access.
ARB mounted under rear seat.
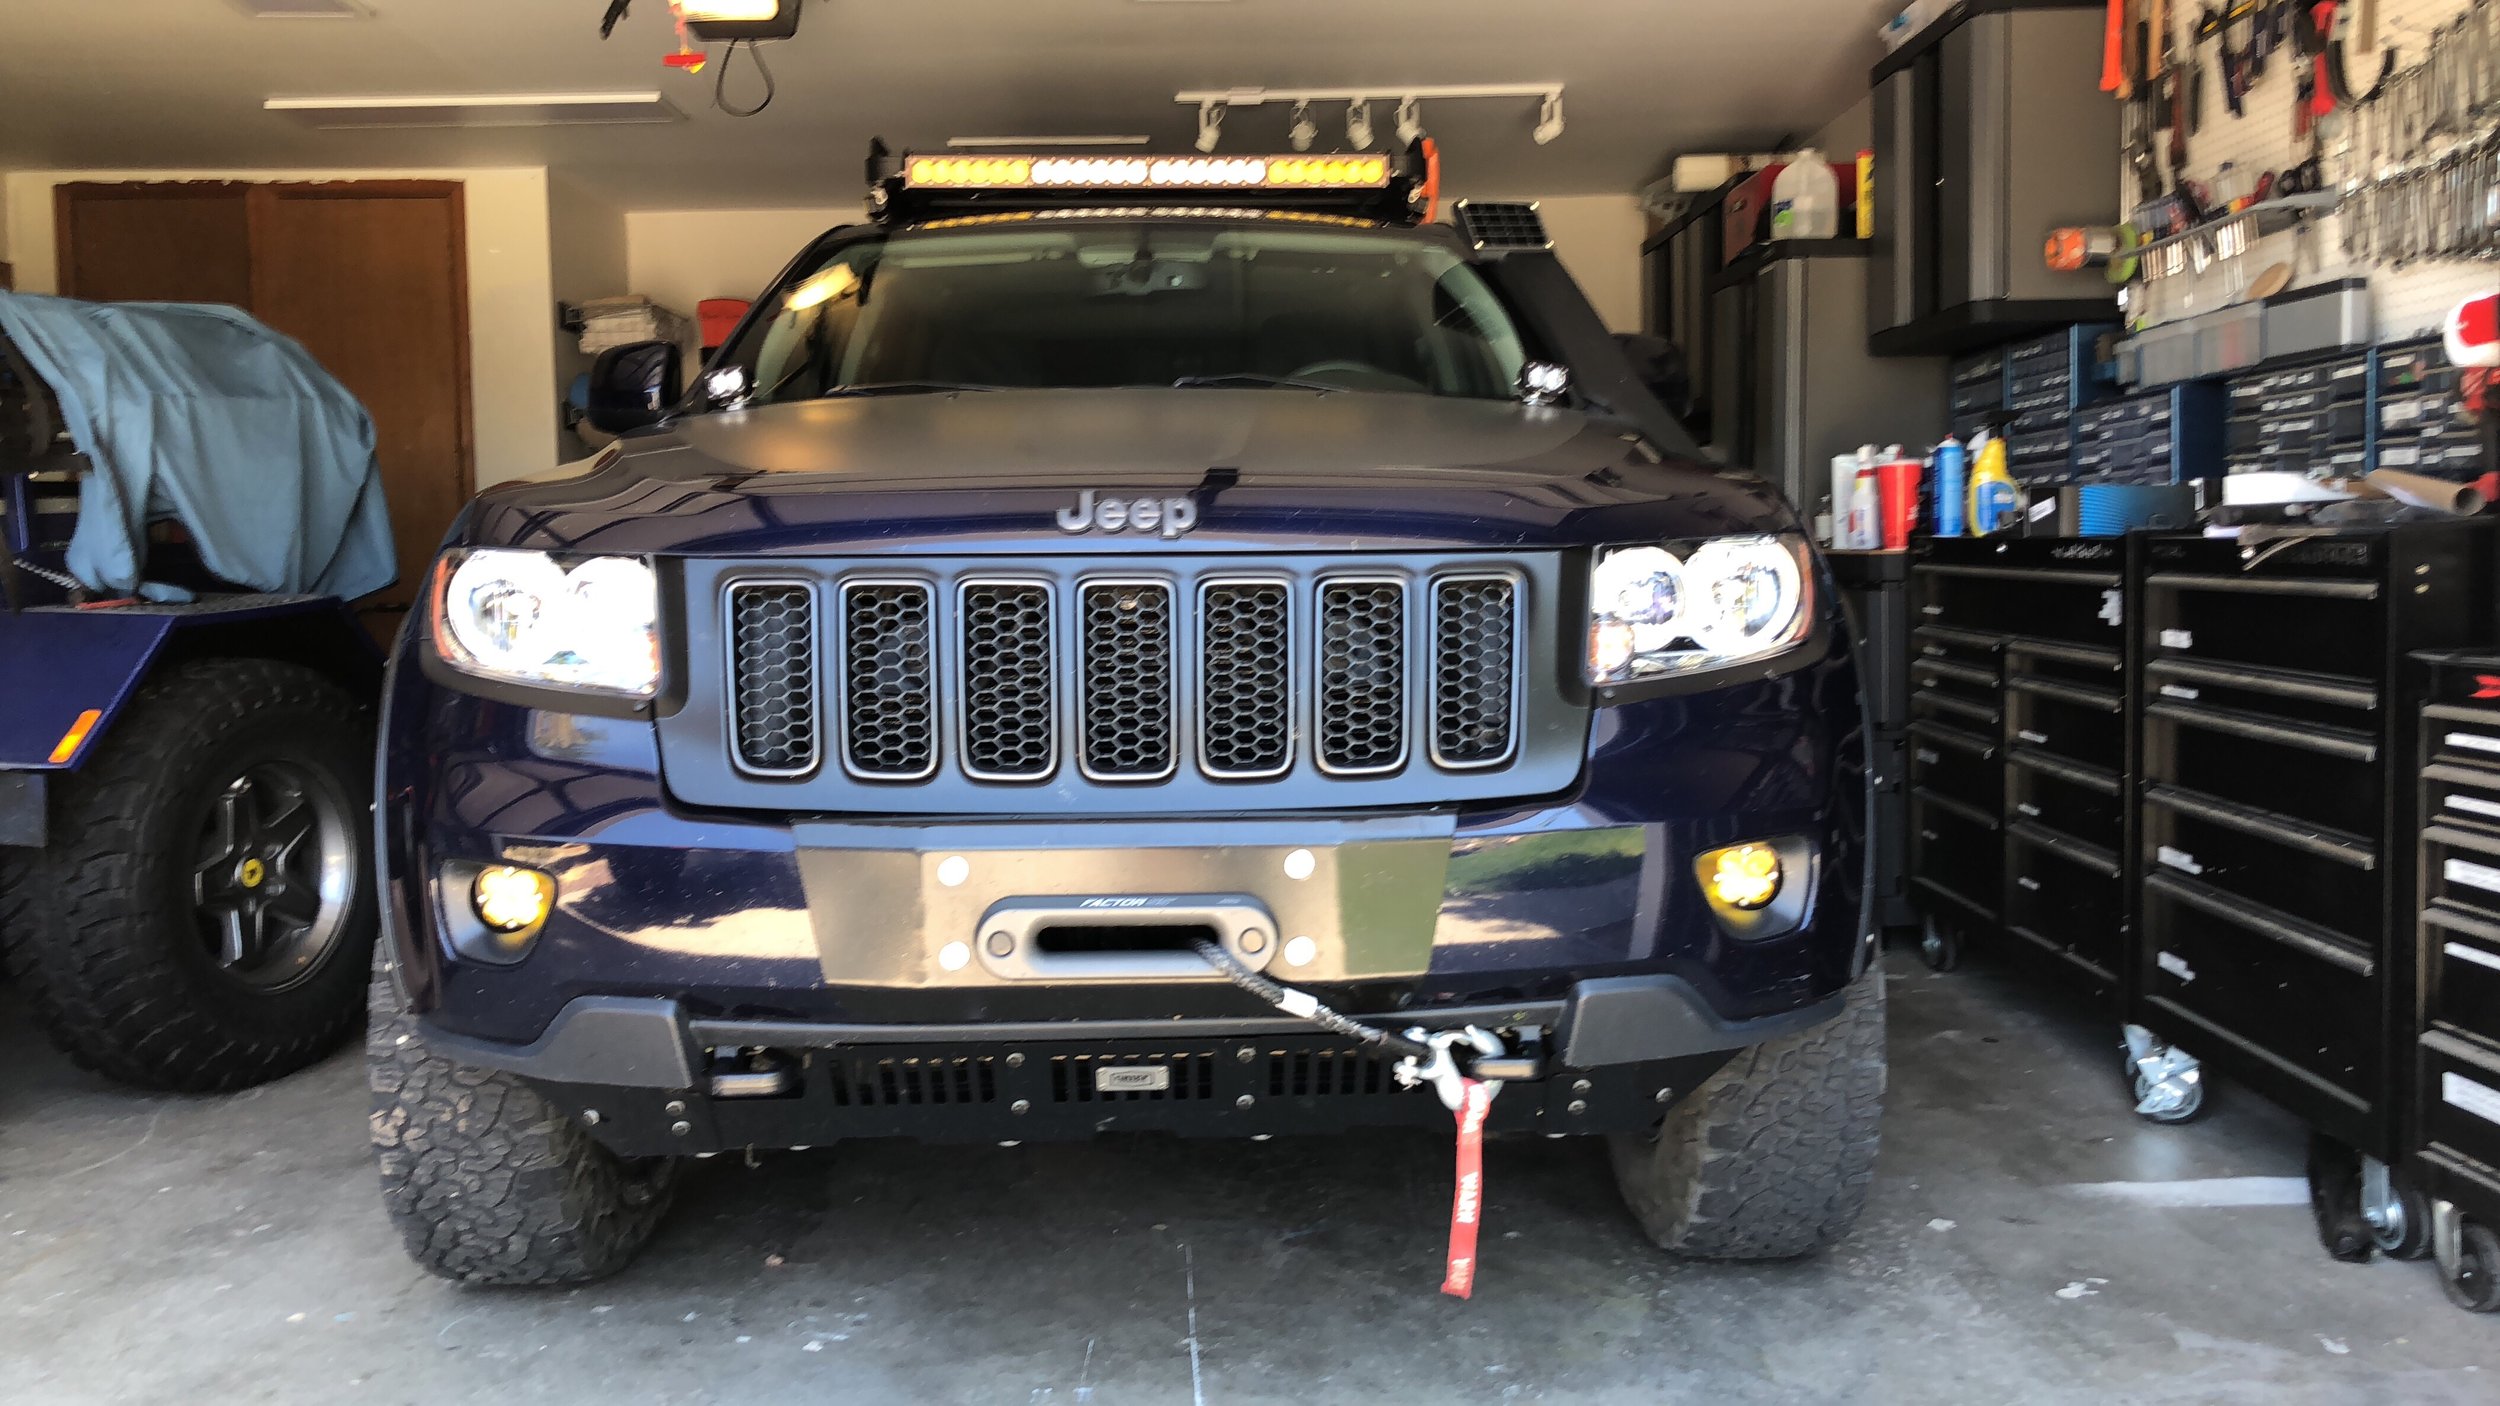
HIDDEN WINCH MOUNT: A winch for self and assisted recovery is a highly desirable tool for those who venture deep into the backcountry. They are also useful for moving heavy objects and clearing trails with the proper rigging. The downside is that a quality winch is expensive, heavy, and can be difficult to mount on a modern SUV. There are currently a couple hidden winch mounting solutions for the WK2 as well as replacement plate bumpers with integrated winch mounts. For this build, I wanted to save weight where I could, and I just couldn’t justify the cost and weight of plate bumper. Also not a fan of how they radically change the looks of the WK2. The only hidden mount available when I began this build was the Rocky Road Outfitters Hidden Winch Mount. Chief Products has since released their own version. The RRO mount I am utilizing is quite good, and mostly fits as advertised. I also ordered a bumper plate, but no brush guard. The mount can be ordered with or without various external bumper additions.
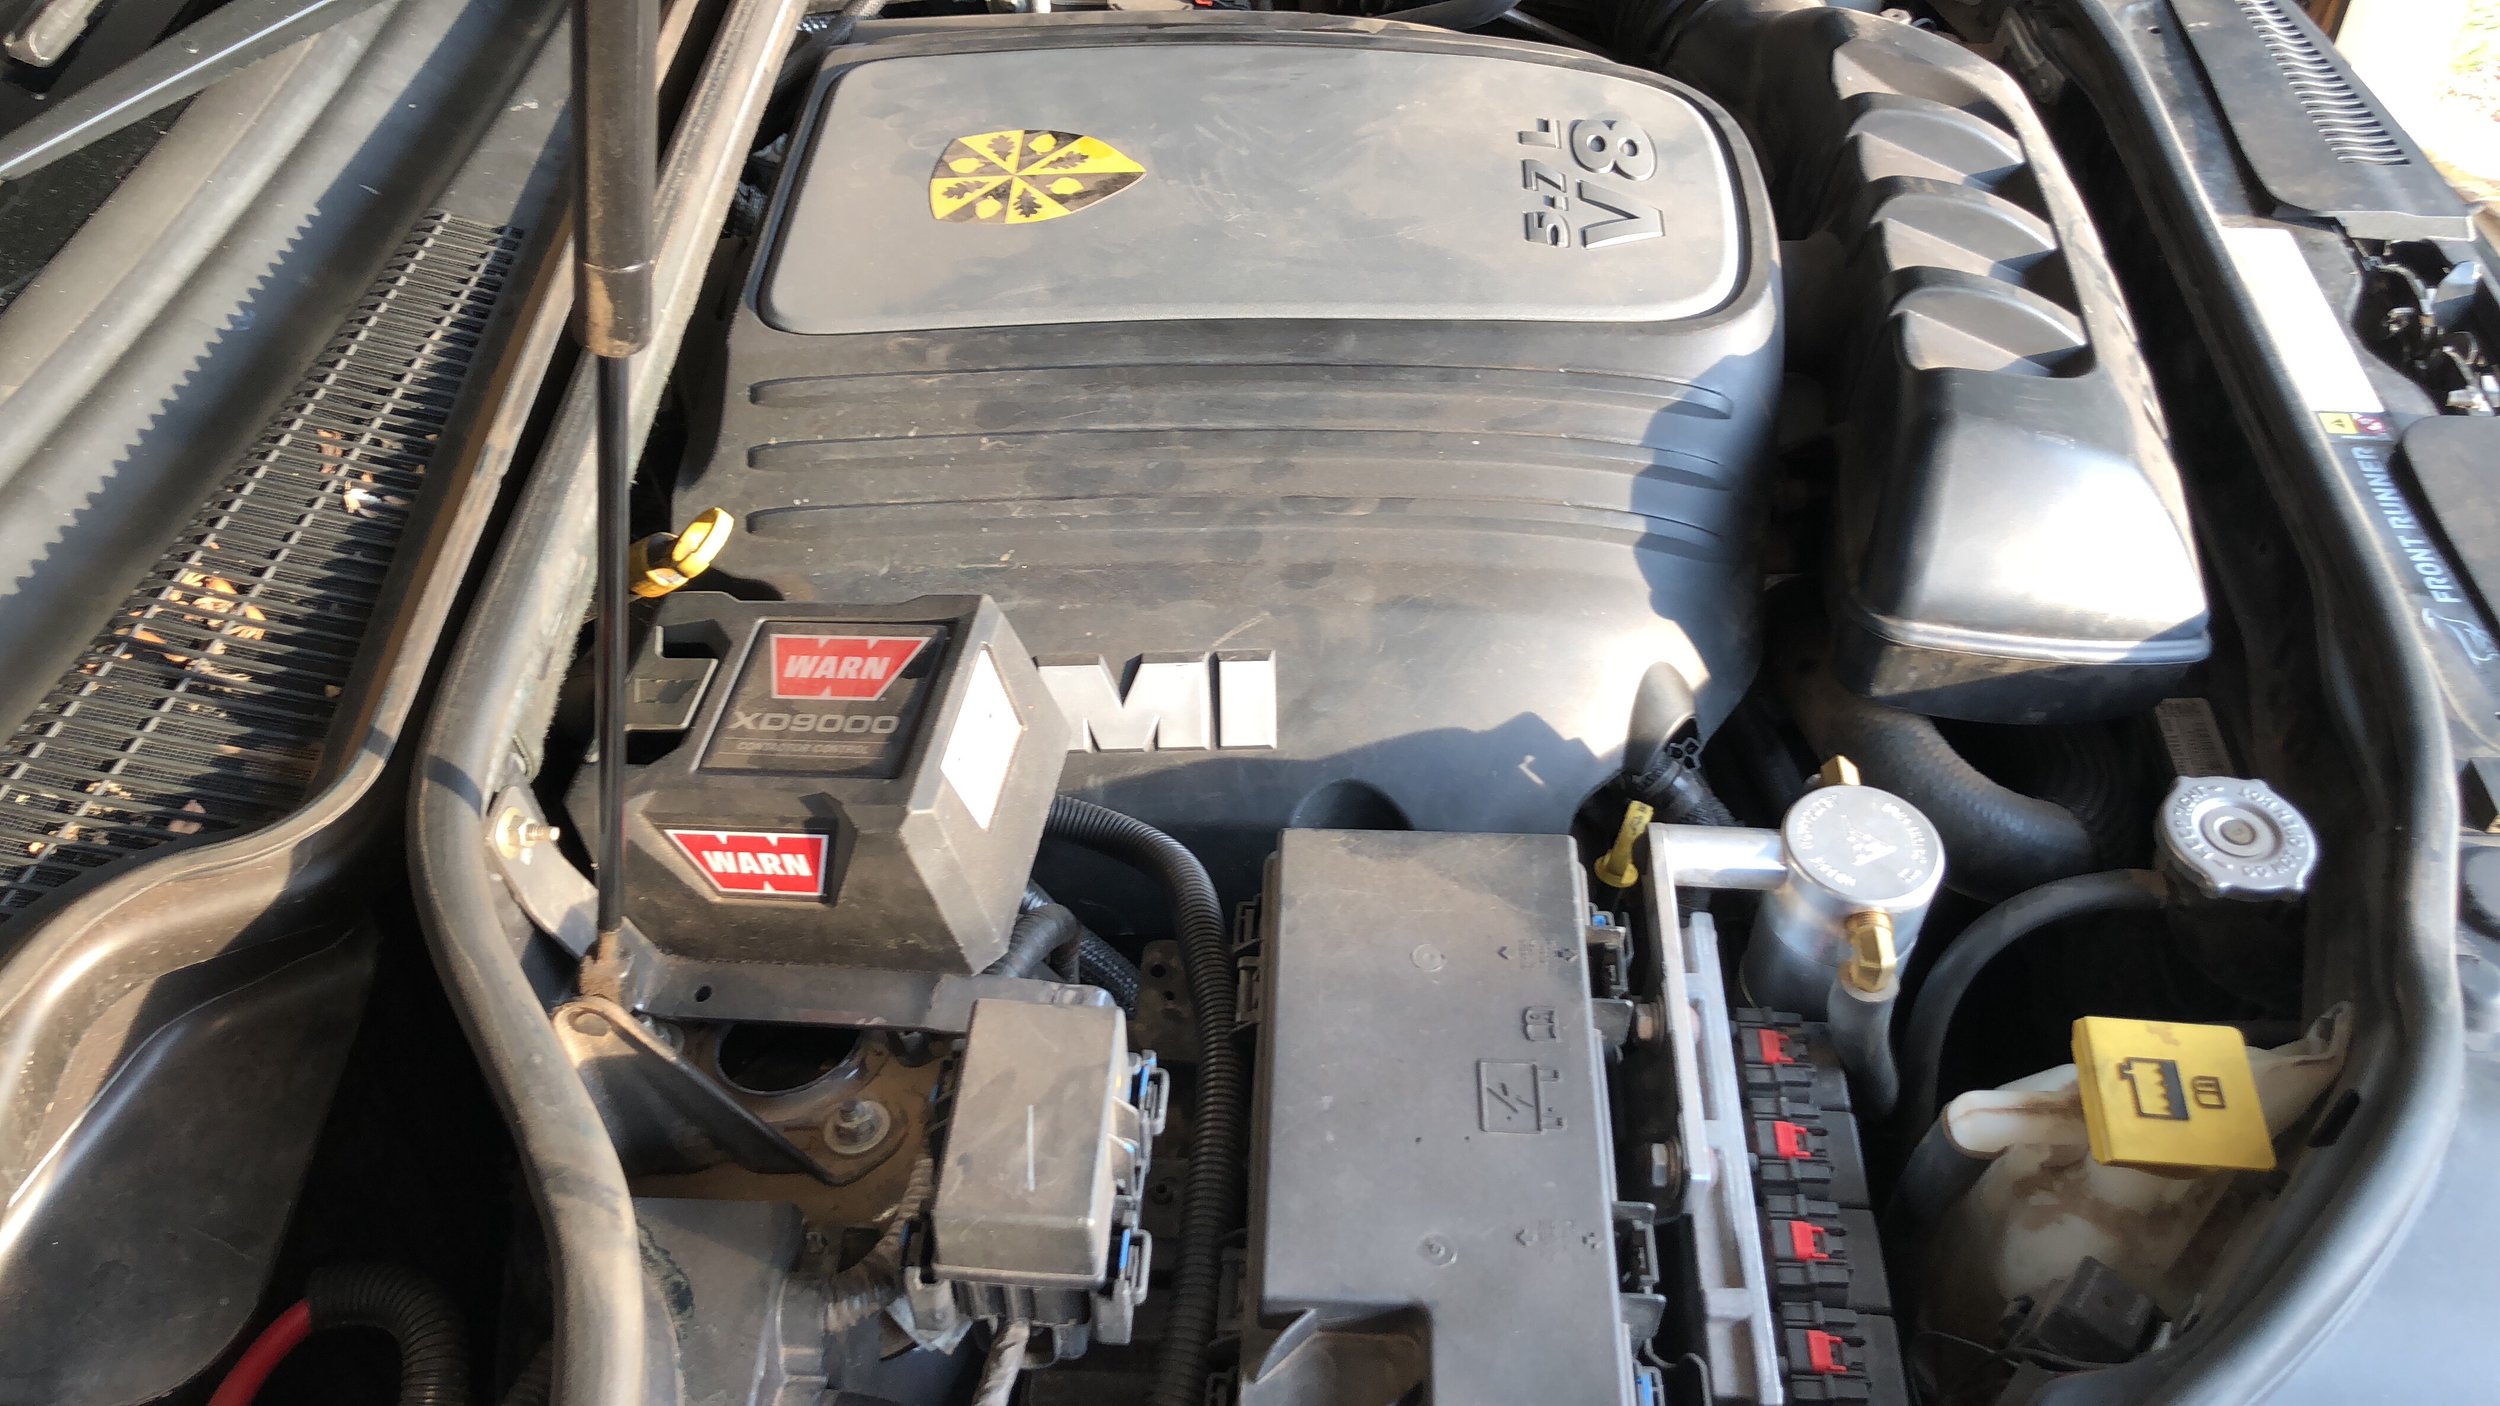
These hidden winch mounts are great, but they are also limited on the winches that can be installed. I went with a legacy Warn XD9000 winch (non-integrated solenoids) with synthetic rope. The synthetic rope is safer to use and saves almost 50lbs. This winch has a non-integrated control pack that can be remotely mounted with some custom power leads. I chose to mount the control pack under the hood on the passenger side near the firewall. This placed the control pack near the power hookups, but required some custom power cables to be run to the winch. A Warn wireless controller is also typically used with this setup and the underhood mount of the control pack gives easy access for plugging in the wireless or wired handheld controller. A small access hole needed to be cut in the plastic grille top so the winch clutch handle could be reached with a tool. This is not terribly convenient, but a small price to pay for a hidden winch setup. Winch rigging and accessories are stored in a Triple Aught Design EDC backpack in the rear of the Jeep.

SNORKEL: Engine intake snorkels can be a contentious topic, I am personally a fan. I have one on my Wrangler with both a ram and a centrifugal pre-cleaner attachments. A common misconception is that they are only for deep water fording up to the top of the snorkel- which should be obviously untrue. Jeeps generally have intakes that are mounted as high as possible under the hood and above the rated water fording depth. The problem becomes when the Jeep drives down into a ravine or hole where the front of the engine compartment is now no longer above the fording depth. A properly installed snorkel mitigates this situation and others such as when a wheel or two drops into a hole during a water crossing. Snorkels also are a true “cold air intake”, bringing in air to the engine from outside the engine compartment. Another benefit of snorkels is that they can marginally reduce particle intake when driving in dusty conditions. The Murchison snorkel installed on the Trail Wolf has a fixed ram (my only gripe), and is a perfect fit on the WK2. I don’t recommend attempting the install if you can’t cut large holes in your sheet metal or modify underhood components. It is also possibly the most attractive fully functional snorkel I have seen on a 4x4. The Murchison snorkel had to be imported from Australia, and as of this writing remains the only snorkel available for the WK2 Grand Cherokee.
SWING-AWAY TIRE CARRIER: Currently in the early stages of building a custom swing-away tire carrier for the off-road WK2 Trail Wolf. The carrier will be a single swing to the passenger side with a center tire mount. Most components have been sourced, and fabrication will likely start around the first of the year. Some hinge and latch components were sourced through 4xInnovations. Tube steel was sourced and roll bent to match the rear bumper arc locally. A tire mount plate has also been sourced for the carrier. At this time, there are no plans to add fuel cans or like to the carrier design. This is primarily to keep the tire as close to the tailgate as reasonable.


